Setting up an AWS IoT Greengrass v2 Learning environment


This guide is the first of many that will get you started with working with AWS IoT Greengrass in a practical and structured way targeted at beginners through to semi-pro. You are in the right place if you are any of the following:
- I am a developer who wants to build more than just Hello World apps
- I am working with a customer and want to learn patterns I can use in my job
- I am a hobbyist building something fun and want to see Greengrass v2 features used practically
This first tutorial is designed to set you up with an AWS IoT Greengrass v2 learning environment that can be used whenever you want to pick up a new feature in the AWS IoT space and want to prototype something fast.
Prerequisites
The following is a list of things that would be preferred you have for working through the tutorials in this series.
- An AWS Account with AWS CLI Setup. It would be ideal if you have unrestricted permissions in your AWS account (if you are using your account this should be fine). The services we will primarily be using are:
- AWS IoT Core / Greengrass, S3, and AWS IAM
- Edge Device, in the case of this post I'm using a Raspberry Pi, however, nothing is stopping you from deploying Greengrass to your computer!
- Some experience with Git, and a clone of the repository containing all the code: t04glovern/aws-greengrass-bricks
The Scenario
You have always wanted to own a cat, but know that you couldn't be trusted to look after another living thing (especially after what happened to Mr. bubbles the goldfish). So you decided to build Robocat!
Robocat is an Internet of Things connected computer with legs that looks and acts like a cat!

You decided that you'd like to learn a new skill while you work on Robocat, and AWS IoT Greengrass kept coming up when you were searching for IoT platforms. You don't have much of an idea of what it is however it seems suitable given you haven't worked on any IoT projects in the past.
You have worked with AWS a bit though, and have some Raspberry Pi devices laying around that could be perfect for this project
Greengrass Device Provisioning
The following steps go through the setup process of our Robocat Greengrass device. before diving in here's a summary of what each step is for:
- Create Greengrass Provisioning IAM User - An IAM user, along with secret credentials that can be used to bootstrap your Greengrass device with minimum permissions.
- Provision a Greengrass Device - Installing Greengrass Core onto a device and running the provisioning steps to onboard it into AWS IoT Greengrass.
- Greengrass Role Policy Assignment - Assigning policies to the IAM Role that was created for Greengrass; providing our device with a set of permissions to AWS resources.
- Greengrass Environment Delete & Cleanup - Process you can follow to clear out your Greengrass & AWS IoT resources if you are done with them
Create Greengrass Provisioning IAM User
Provisioning a new device without copying sensitive credentials onto the device can pose an interesting problem in the IoT space. There's an argument to be said that copying overly permissive access credentials onto a new device could come back to bite you later if you forget to purge them after provisioning.
For this reason, I've come up with a CloudFormation template that can be deployed that spins up an IAM user called greengrass-provisioner whose credentials can be safely put onto our IoT device and is locked down to only allowing users from an allow listed IP address.
To deploy this provisioning user, grab a copy of the greengrass-provisioning-user.yml template in the t04glovern/aws-greengrass-bricks repository and upload it to the CloudFormation console
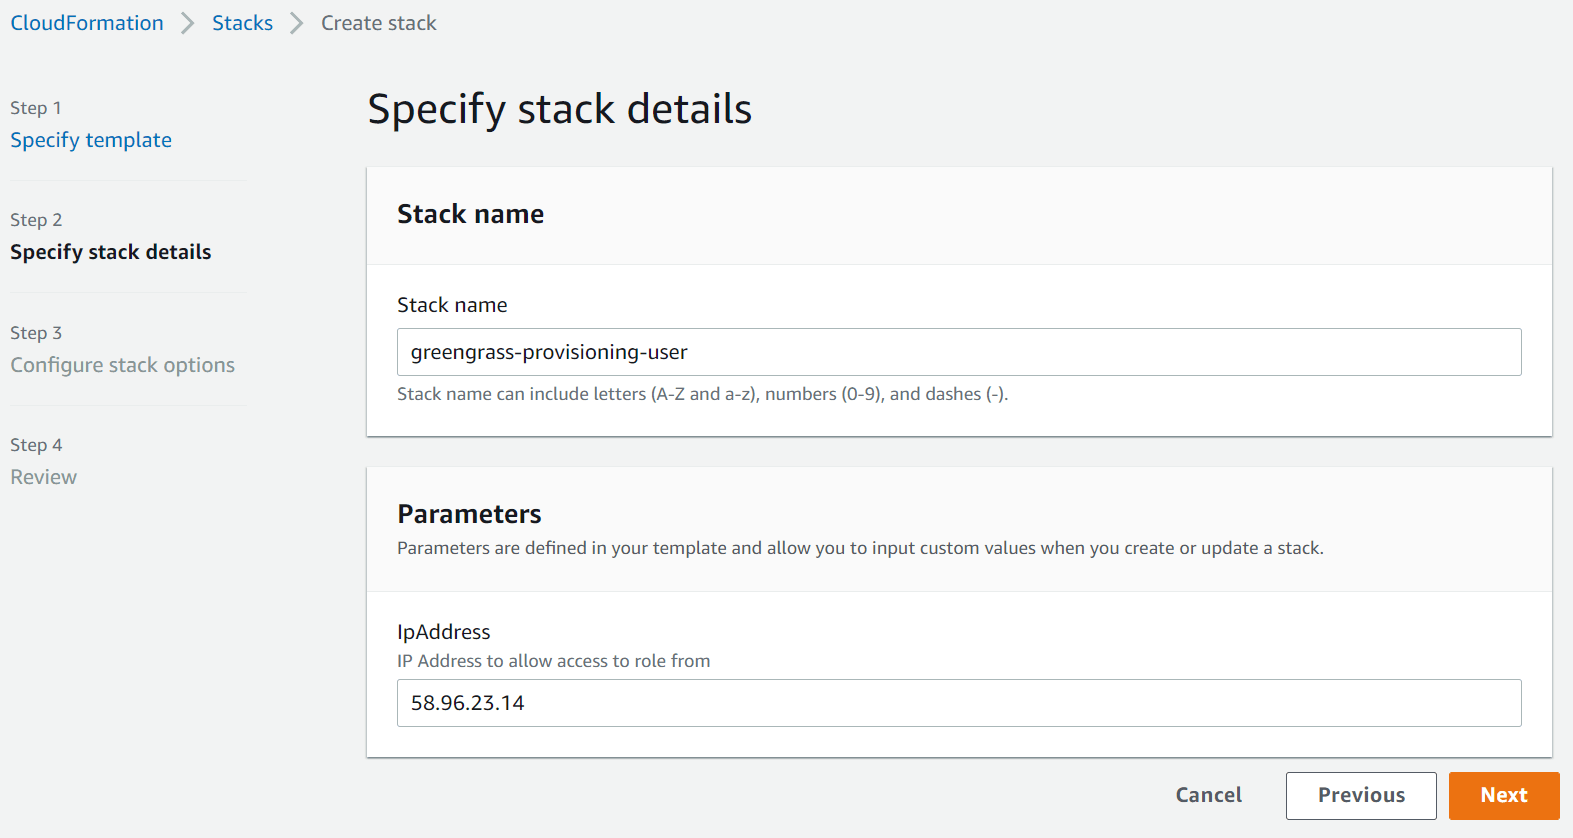
Note: If your IP address ever changes in the future, you can update the stack with the new IP
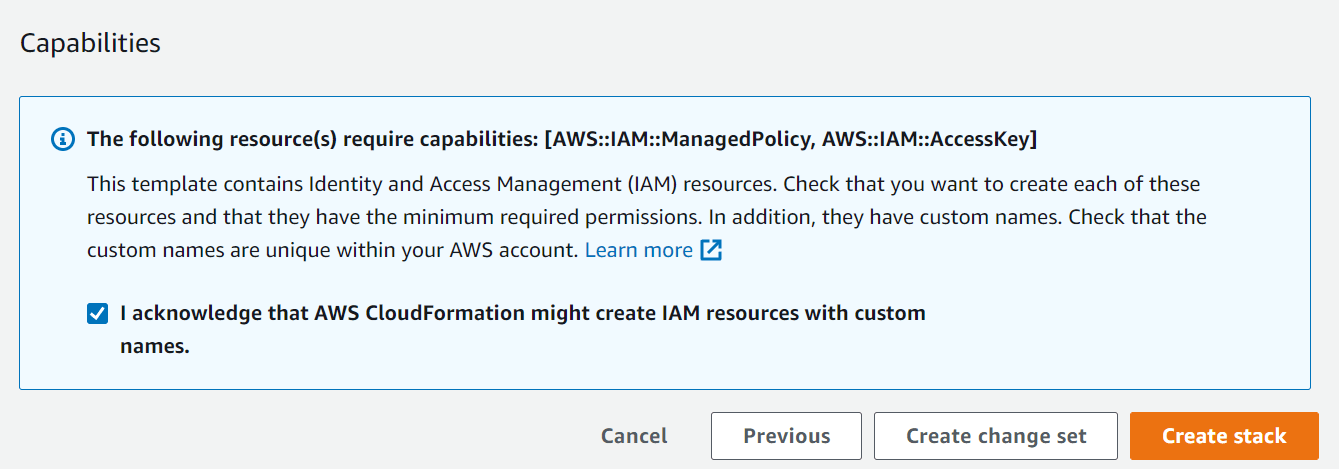
Click through the CloudFormation steps up to Review, and be sure to click Allow under the Capabilities section right before Creating the stack.
Once the stack has been created successfully, retrieve the access credentials from under the Outputs tab
Note: Although locked down to your IP address, these credentials should be treated as highly sensitive still. Don't just post them on the internet as I have done!
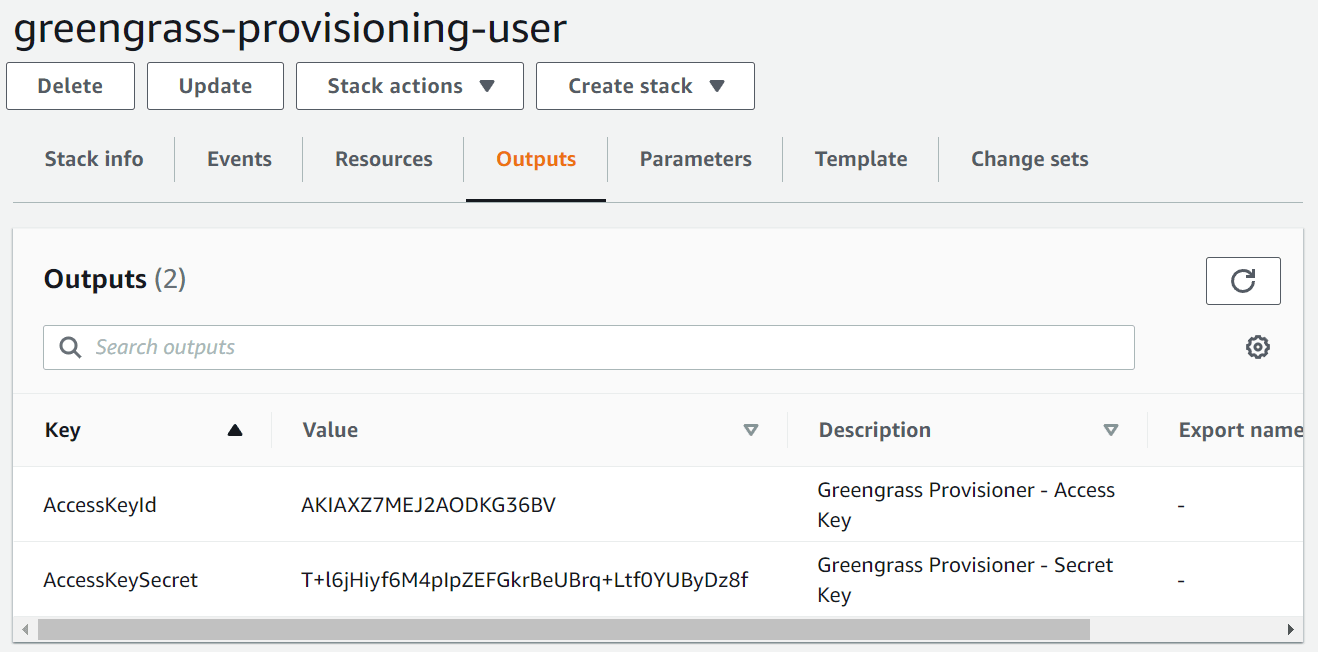
In the next steps of the guide, you will be prompted to populate the following environment variables with the access credentials from the CloudFormation outputs. So copy them somewhere safe for now.
export AWS_ACCESS_KEY_ID="AccessKeyId goes here"
export AWS_SECRET_ACCESS_KEY="AccessKeySecret goes here"
Provision a Greengrass Device
We are now ready to provision our Greengrass device with AWS IoT Greengrass Core. Depending on what device you are installing onto, this process might be slightly different (for example, on Windows it will use different slash formats \ ).
If you have issues, I recommend referring to the official AWS IoT developer guide (https://docs.aws.amazon.com/greengrass/v2/developerguide/quick-installation.html).
In the case of this tutorial, I assume you are working on a Linux-based system and have already installed the required dependencies listed here, which is mainly just Java JDK 11.
Login to the device you are deploying to and run the following to download and extract the most recent version of Greengrass Core v2 to a folder called GreengrassCore.
curl -s https://d2s8p88vqu9w66.cloudfront.net/releases/greengrass-nucleus-latest.zip > greengrass-nucleus-latest.zip && unzip greengrass-nucleus-latest.zip -d GreengrassCoreNext, populate the following environment variables with the secret credentials from the previous step, and some other values we will be using.
Note: if you plan on changing the Greengrass group/thing names, just be aware some other changes will have to be made yourself to other configuration files. If you are just learning, I would recommend keeping them the same as I have.
export AWS_ACCESS_KEY_ID="AccessKeyId goes here"
export AWS_SECRET_ACCESS_KEY="AccessKeySecret goes here"
export AWS_REGION="ap-southeast-2"
export GREENGRASS_THING_GROUP="robocat"
export GREENGRASS_THING_NAME="robocat-01"
Now run the following to provision our device. If you want to know more about each of the configuration flags below, you can check out the official documentation. I've used all the default configurations I could so that we don't stray too far from a normal setup you might see.
sudo -E java \
  -Droot="/greengrass/v2" \
  -Dlog.store=FILE -jar ./GreengrassCore/lib/Greengrass.jar \
  --aws-region ${AWS_REGION} \
  --thing-name ${GREENGRASS_THING_NAME} \
  --thing-group-name ${GREENGRASS_THING_GROUP} \
  --thing-policy-name GreengrassV2IoTThingPolicy \
  --tes-role-name GreengrassV2TokenExchangeRole \
  --tes-role-alias-name GreengrassCoreTokenExchangeRoleAlias \
  --component-default-user ggc_user:ggc_group \
  --provision true \
  --setup-system-service true \
--deploy-dev-tools trueNote: if for whatever reason, the deployment fails, you can just run the same command again and you should find the deploy auto-corrects itself.
Greengrass Role Policy Assignment
The final step in the provisioning process will be to create a standard set of policies with permission that we want to map to our Greengrass device. This is effectively a list of things we want the Robocat device to be able to do if it needs to interact with other AWS services.
You can see the default policy document we will be deploying in the t04glover/aws-greengrass-bricks repository under the device-policy.json.template file.
{
  "Version": "2012-10-17",
  "Statement": [
    {
      "Effect": "Allow",
      "Action": [
        "s3:GetObject"
      ],
      "Resource": [
        "arn:aws:s3:::greengrass-component-artifacts-$AWS_REGION-$AWS_ACCOUNT_ID/*"
      ]
    },
    {
      "Effect": "Allow",
      "Action": [
        "ecr:GetAuthorizationToken"
      ],
      "Resource": "*"
    },
    {
      "Effect": "Allow",
      "Action": [
        "ecr:BatchGetImage",
        "ecr:GetDownloadUrlForLayer"
      ],
      "Resource": [
        "arn:aws:ecr:$AWS_REGION:$AWS_ACCOUNT_ID:repository/robocatcontainer"
      ]
    }
  ]
}
The effective permissions above allow our Greengrass device to pull files from an AWS S3 bucket with the name greengrass-component-artifacts-$AWS_REGION-$AWS_ACCOUNT_ID, and also pull a Docker container from AWS ECR with the name robocatcontainer.
The following commands should be run to create a new policy called GreengrassV2ComponentArtifactPolicy and then attach it to the Role GreengrassV2TokenExchangeRole that was created during the Greengrass provisioning step above.
export AWS_ACCOUNT_ID=$(aws sts get-caller-identity |  jq -r '.Account')
export AWS_REGION="ap-southeast-2"

# Creates IAM policy that can be attached to roles
envsubst < "device-policy.json.template" > "device-policy.json"

aws iam create-policy \
    --policy-name GreengrassV2ComponentArtifactPolicy \
    --policy-document file://device-policy.json \
    --region ${AWS_REGION}

aws iam attach-role-policy \
    --role-name GreengrassV2TokenExchangeRole \
    --policy-arn arn:aws:iam::${AWS_ACCOUNT_ID}:policy/GreengrassV2ComponentArtifactPolicy \
    --region ${AWS_REGION}
If you ever have to update the permissions allowed by your Greengrass device in the future, the following command can be run instead to create a new revision of the GreengrassV2ComponentArtifactPolicy policy.
export AWS_ACCOUNT_ID=$(aws sts get-caller-identity |  jq -r '.Account')
export AWS_REGION="ap-southeast-2"

envsubst < "device-policy.json.template" > "device-policy.json"
aws iam create-policy-version \
    --policy-arn arn:aws:iam::${AWS_ACCOUNT_ID}:policy/GreengrassV2ComponentArtifactPolicy \
    --policy-document file://device-policy.json \
    --set-as-default
Greengrass Environment Delete & Cleanup
The uninstall process for Greengrass Core is best documented on the AWS docs site, however, there are a couple of other parts not covered there that you'll need to do. On Linux, the following commands can be run on the Greengrass devices to remove the service/files
sudo systemctl stop greengrass.service
sudo systemctl disable greengrass.service
sudo rm /etc/systemd/system/greengrass.service
sudo rm -rf /greengrass/v2
From your computer (not on the Greengrass device), run the following AWS CLI command to delete your Greengrass Core
export GREENGRASS_THING_NAME="robocat-01"
aws greengrassv2 delete-core-device --core-device-thing-name $GREENGRASS_THING_NAME
Finally, you can also delete the greengrass-provisioning-user CloudFormation stack that we created at the start of this guide if you haven't already. This can be done from the [AWS CloudFormation console or the AWS CLI
aws cloudformation delete-stack --stack-name greengrass-provisioning-userSummary
In this guide, you've gone through the process of provisioning a simple Greengrass Core v2 device and getting it ready for use with projects and learning.
You can now move on to one of the other parts of this series and start putting your environment to the test! I recommend checking out one of the following:
- Using GitHub Actions for Greengrass v2 Continuous Deployment
- Deploying Containers to AWS Greengrass v2 - A Comprehensive Guide
If you have any questions or think parts of this guide could be improved on, please reach out to me on Twitter @nathangloverAUS or via the contact page.