Sort AWS Config and Security Hub emails with Power Automate

If you have ever enabled AWS Config or AWS Security Hub before you probably remember getting spammed with compliance emails the day after enabling the functionality. While this is good for audibility it can quickly become a burden to parse through the daily inbox of compliance events.
This isn’t helped by the format of the emails, as they come in as JSON blobs and can be difficult for humans to parse them anyway! Computers, however, are very good at reading JSON so it makes sense that there must be a way to parse these incoming compliance emails and highlight only the important compliance alerting.
That’s where Microsoft Power Automate comes in. This powerful tool can help you automate the process of sorting, categorizing and prioritizing alerts, freeing up your time to focus on more important tasks. In this blog post, we will take a deep dive into how to use Microsoft Power Automate to sort incoming emails from AWS Config and AWS Security Hub.
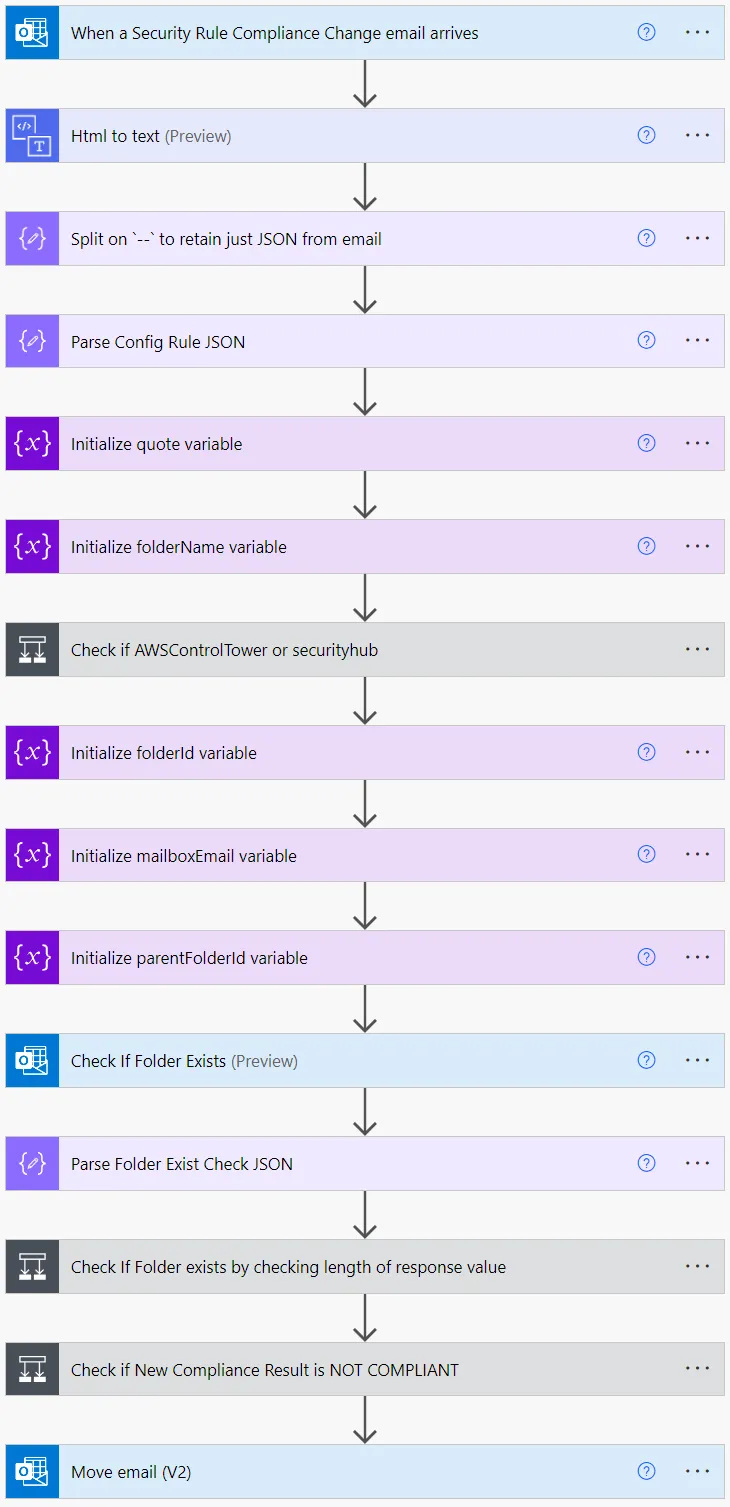
Seem below is the final flow that we will be creating!
Overview of the problem
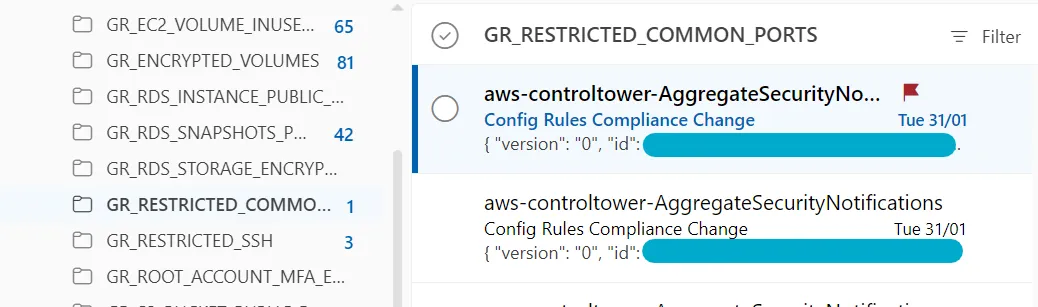
The goal is for us to be able to sort these emails into folders based on the configRuleName and then flag any emails that have a complianceType of NON_COMPLIANT as a high priority. This will make it easier for us to find the important alerts and prioritize them for remediation.
Below is an example of the email that comes in from AWS when a config rule is violated (if you are using AWS Control Tower). Things like the configRuleName and complianceType are the fields that are important to us, as they tell us what rule was violated and whether it was a violation or not.
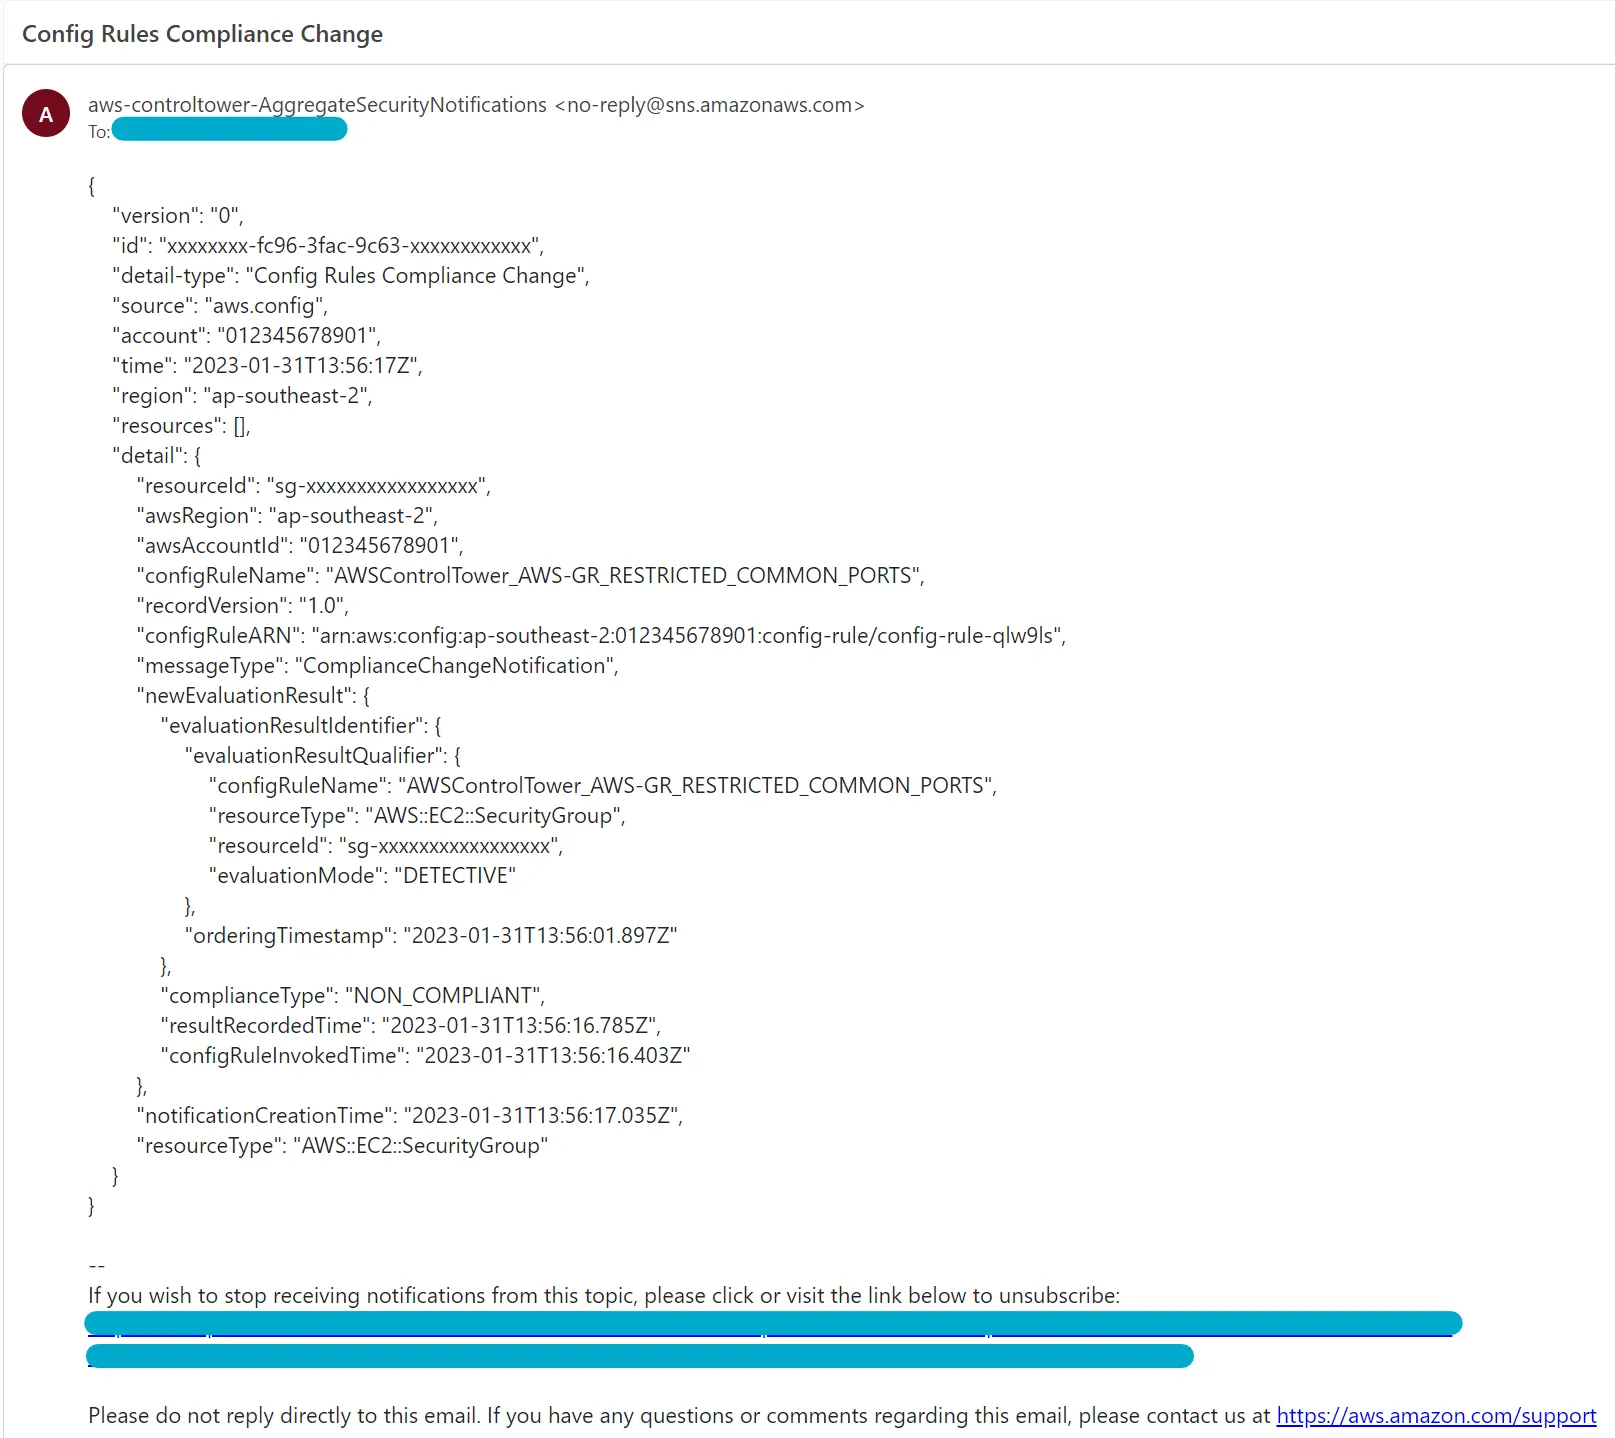
This example email contains the following JSON block, which we will use later on when constructing the Power Automate flow, so keep it handy.
{
  "version": "0",
  "id": "xxxxxxxx-fc96-3fac-9c63-xxxxxxxxxxxx",
  "detail-type": "Config Rules Compliance Change",
  "source": "aws.config",
  "account": "012345678901",
  "time": "2023-01-31T13:56:17Z",
  "region": "ap-southeast-2",
  "resources": [],
  "detail": {
    "resourceId": "sg-xxxxxxxxxxxxxxxxx",
    "awsRegion": "ap-southeast-2",
    "awsAccountId": "012345678901",
    "configRuleName": "AWSControlTower_AWS-GR_RESTRICTED_COMMON_PORTS",
    "recordVersion": "1.0",
    "configRuleARN": "arn:aws:config:ap-southeast-2:012345678901:config-rule/config-rule-qlw9ls",
    "messageType": "ComplianceChangeNotification",
    "newEvaluationResult": {
      "evaluationResultIdentifier": {
        "evaluationResultQualifier": {
          "configRuleName": "AWSControlTower_AWS-GR_RESTRICTED_COMMON_PORTS",
          "resourceType": "AWS::EC2::SecurityGroup",
          "resourceId": "sg-xxxxxxxxxxxxxxxxx",
          "evaluationMode": "DETECTIVE"
        },
        "orderingTimestamp": "2023-01-31T13:56:01.897Z"
      },
      "complianceType": "NON_COMPLIANT",
      "resultRecordedTime": "2023-01-31T13:56:16.785Z",
      "configRuleInvokedTime": "2023-01-31T13:56:16.403Z"
    },
    "notificationCreationTime": "2023-01-31T13:56:17.035Z",
    "resourceType": "AWS::EC2::SecurityGroup"
  }
}
We also want to be able to handle emails from AWS Security Hub, which are formatted the same however have a configRuleName that is prefixed with “securityhub” instead of “AWSControlTower”.
Creating the Flow
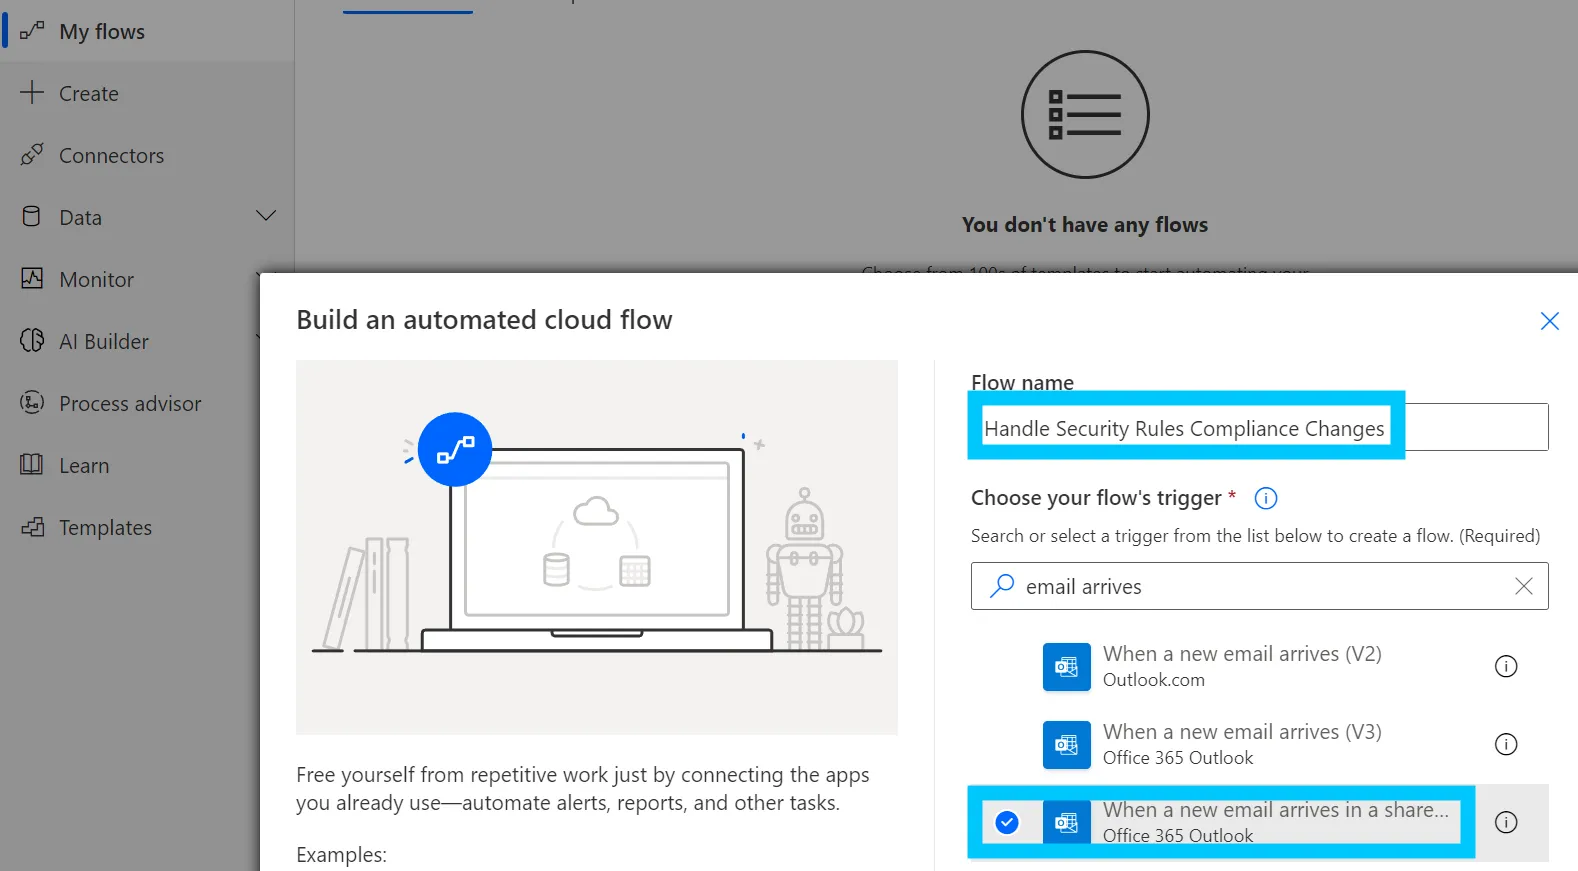
Start by heading over to https://make.powerautomate.com/ and sign in with your Microsoft account. Once you are logged in, click on “My flows” in the left-hand menu and then click the create button.
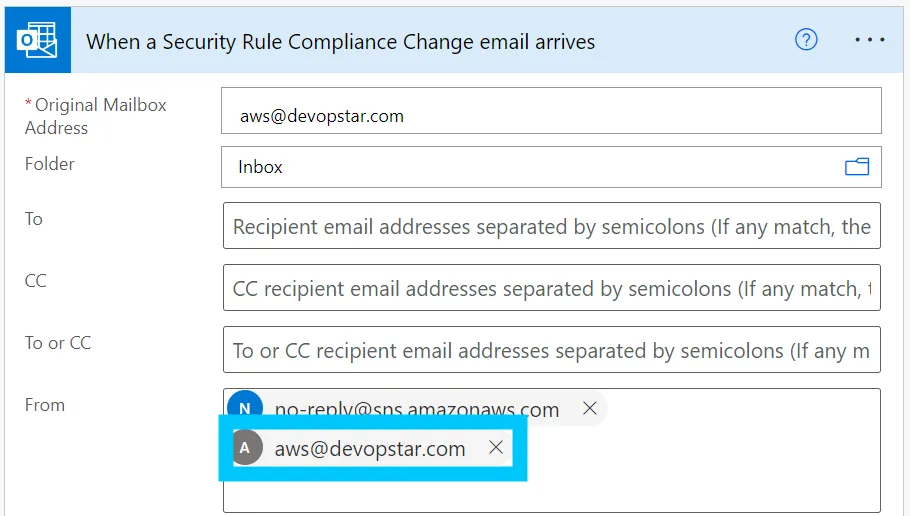
As the emails come into a shared outlook mailbox, we want to create a new flow that triggers when an email arrives in a shared mailbox.
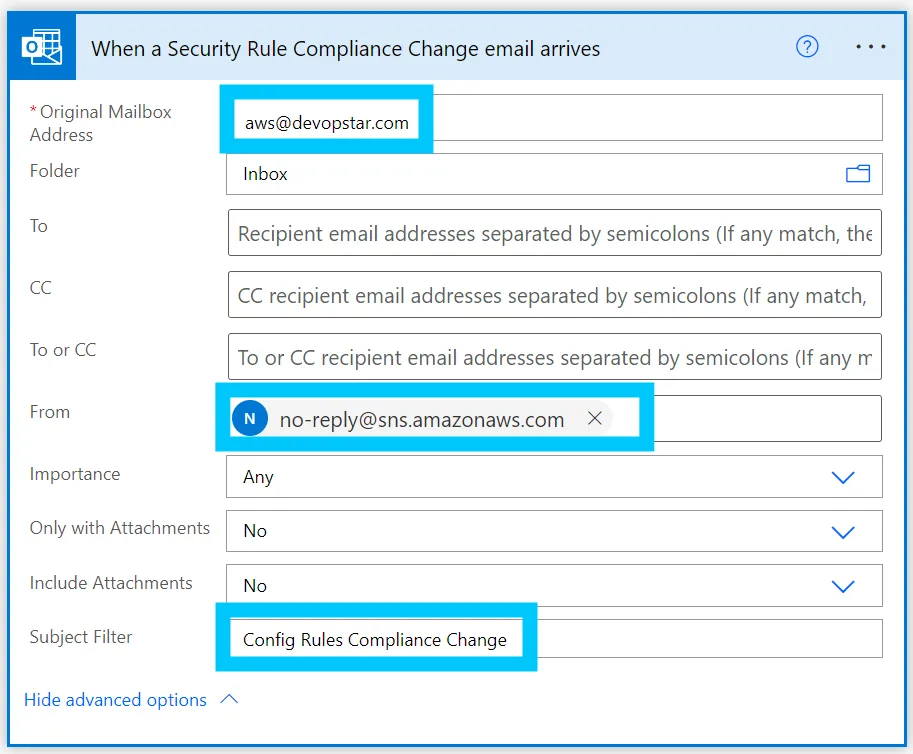
Rename the rule to something that makes more sense, such as “When a Security Rule Compliance Change email arrives”, then modify the advanced settings to specify the following:
- From: no-reply@sns.amazonaws.com
- Subject Filter: Config Rules Compliance Change
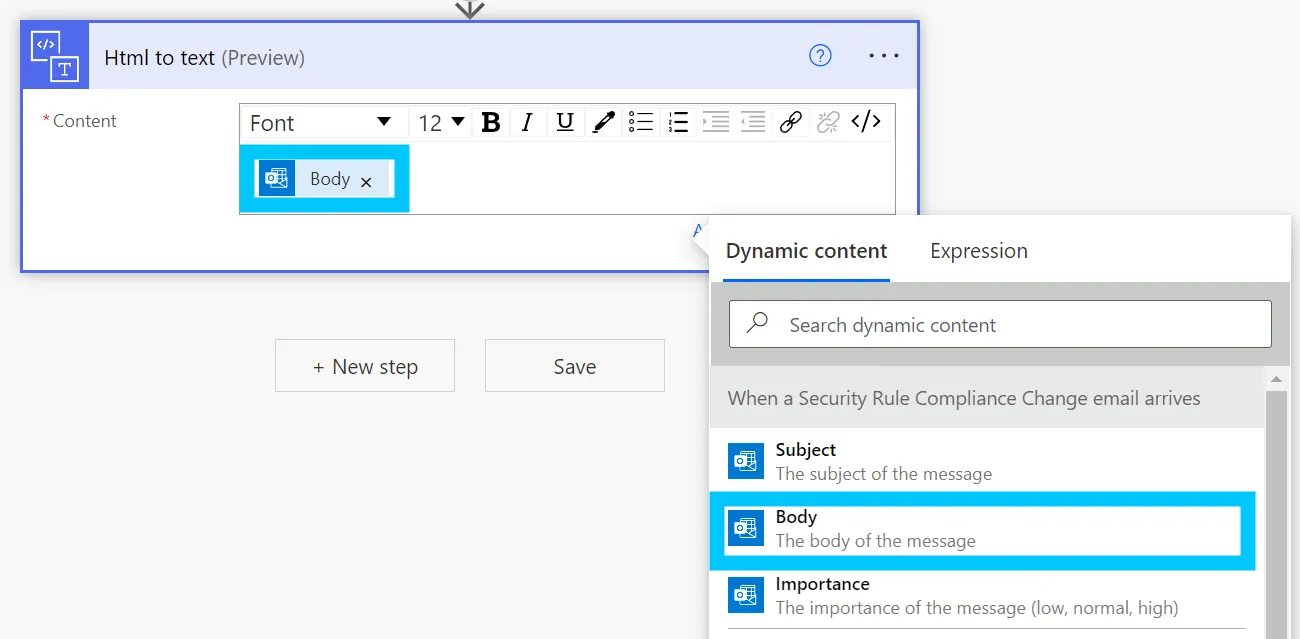
Now that we have the rule to capture the emails we’d like to sort, we need to somehow extract the JSON block that is included in the email - while ignoring all the extra text outside of the JSON block. To do this we must first convert the email HTML to text using the Html to text block.
In the block settings, select Body as the content to convert.
The next step is probably the most complicated part as we need to do a couple of operations on the text output to extract just the JSON body - and ensure it’s in a legal JSON format.
To do this we will use a Compose block with an expression that will perform the following steps:
- Split the text output from the email on the character
--, as these characters are directly after the JSON block in the email - Use the concat function to only operate on the content before the
--, by selecting just index0 - Replace any newline encoding strings (
\n) with an empty string, which just strips them out of the data. - Replace delimited double quotes with just a single quote, removing the delimiter from the string
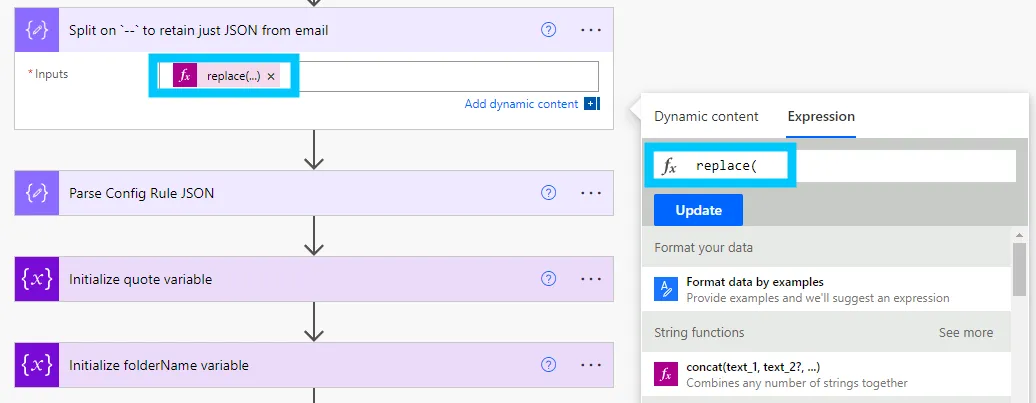
These four steps can be done by pasting the following into the Expression section of the compose block.
replace(
  replace(
    concat(
      split(
        outputs('Html_to_text')?['body'],'--'
      )[0]
    ),'\n',''
  ),'\"','"'
)
I would also recommend renaming the block to “Split on -- to retain just JSON from email” to make it clear what the step is doing.
Now create a Parse JSON block where the Content field is set to the output of the previous block. For the Schema field, select Generate from sample and paste in the JSON block from the email. This will generate a schema that we can use to parse the JSON.
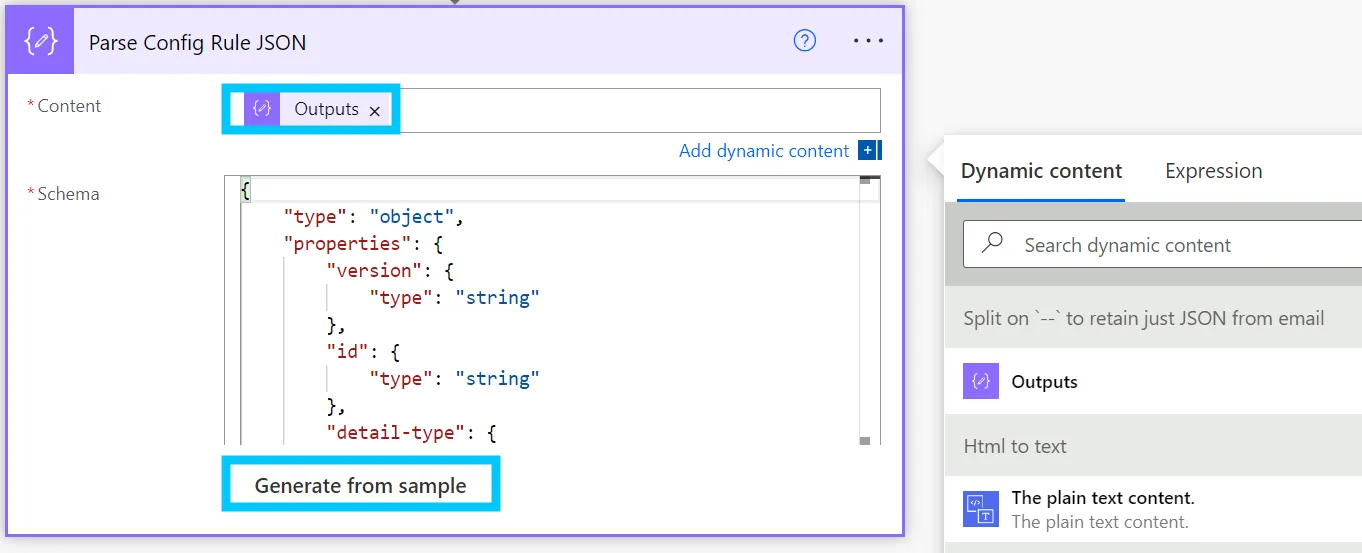
I also recommend renaming the block to “Parse Config Rule JSON” for clarity.
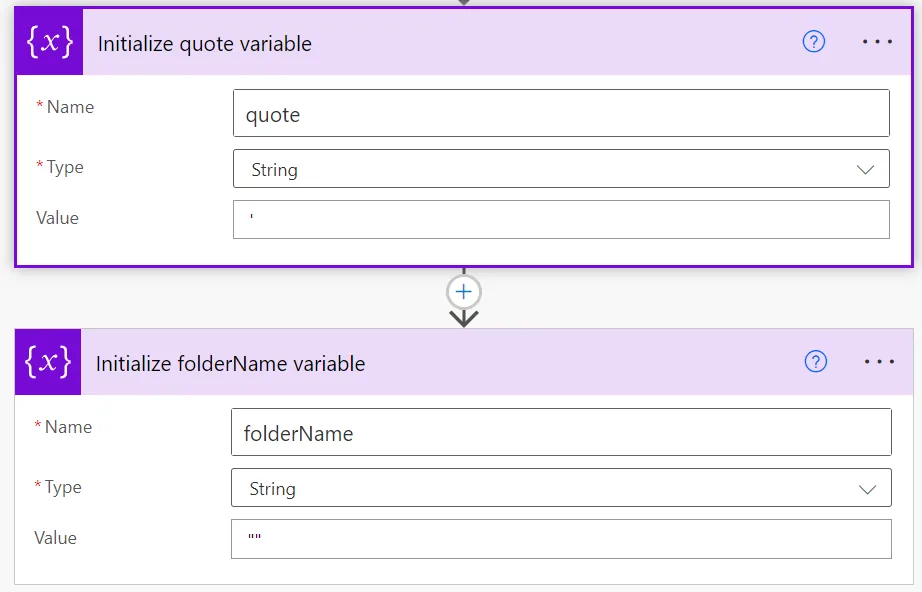
Now that we have the JSON block parsed, we can begin to set up the logic to sort the emails into folders based on the configRuleName. To do this however we need to set a couple of variables that we can use later on for dealing with some complicated formatting.
These two variables are:
- quote: A single quote character that can be referenced as a variable - this is to get around needing to escape single quote characters in expressions.
- folderName: This variable will store the folder name for the config email to go into. We will use this later on when creating the folder if it doesn’t exist.
Create two Initialize variable blocks like so - making sure to also rename the blocks to something more meaningful.
Now we can set the folderName variable based on the configRuleName. To do this we use an if statement to check if the configRuleName starts with “AWSControlTower_AWS-”, and if it does, we set the folderName variable to the suffix of the configRuleName after the “AWSControlTower_AWS-” prefix.
If it is not prefixed with “AWSControlTower_AWS-”, we know it is a Security Hub rule and we can set the folderName variable to the configRuleName after the “securityhub-” prefix.
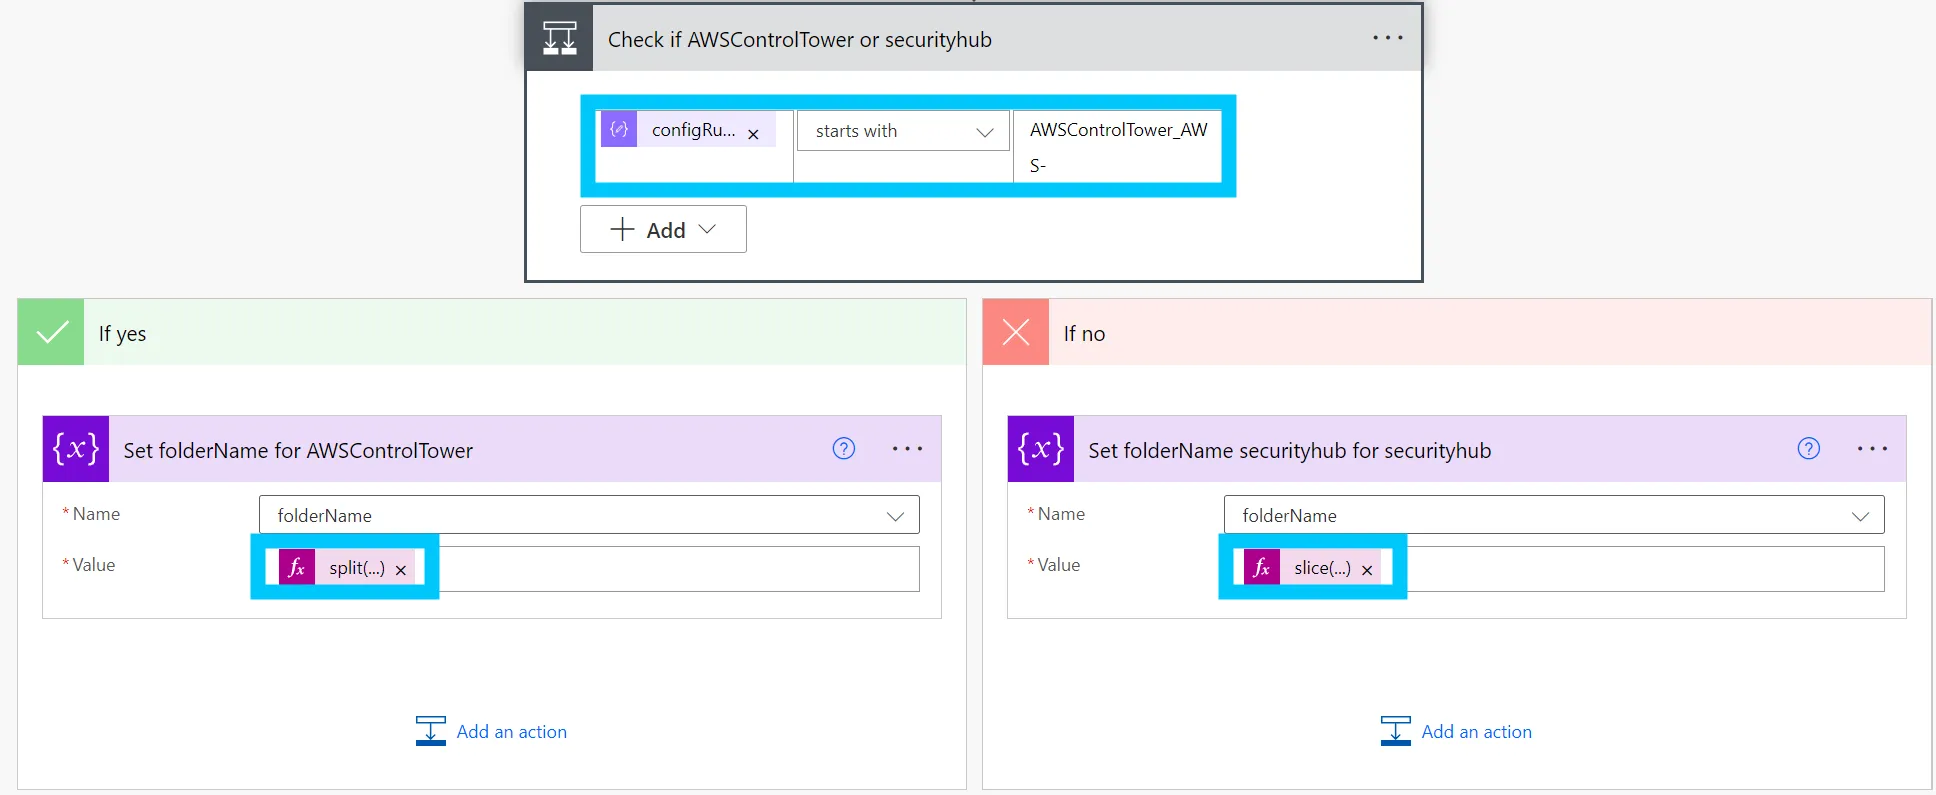
The expression used for the AWSControlTower rule is:
split(body('Parse_Config_Rule_JSON')?['detail']?['configRuleName'], '-')[sub(length(split(body('Parse_Config_Rule_JSON')?['detail']?['configRuleName'], '-')), 1)]
The expression used for the securityhub rule is:
slice(body('Parse_Config_Rule_JSON')?['detail']?['configRuleName'], 0, lastIndexOf(body('Parse_Config_Rule_JSON')?['detail']?['configRuleName'], '-'))
Now we need to prepare a variable to store the folder ID of the folder we are going to move the email to. We will also need to set a couple of static variables that are specific to our setup
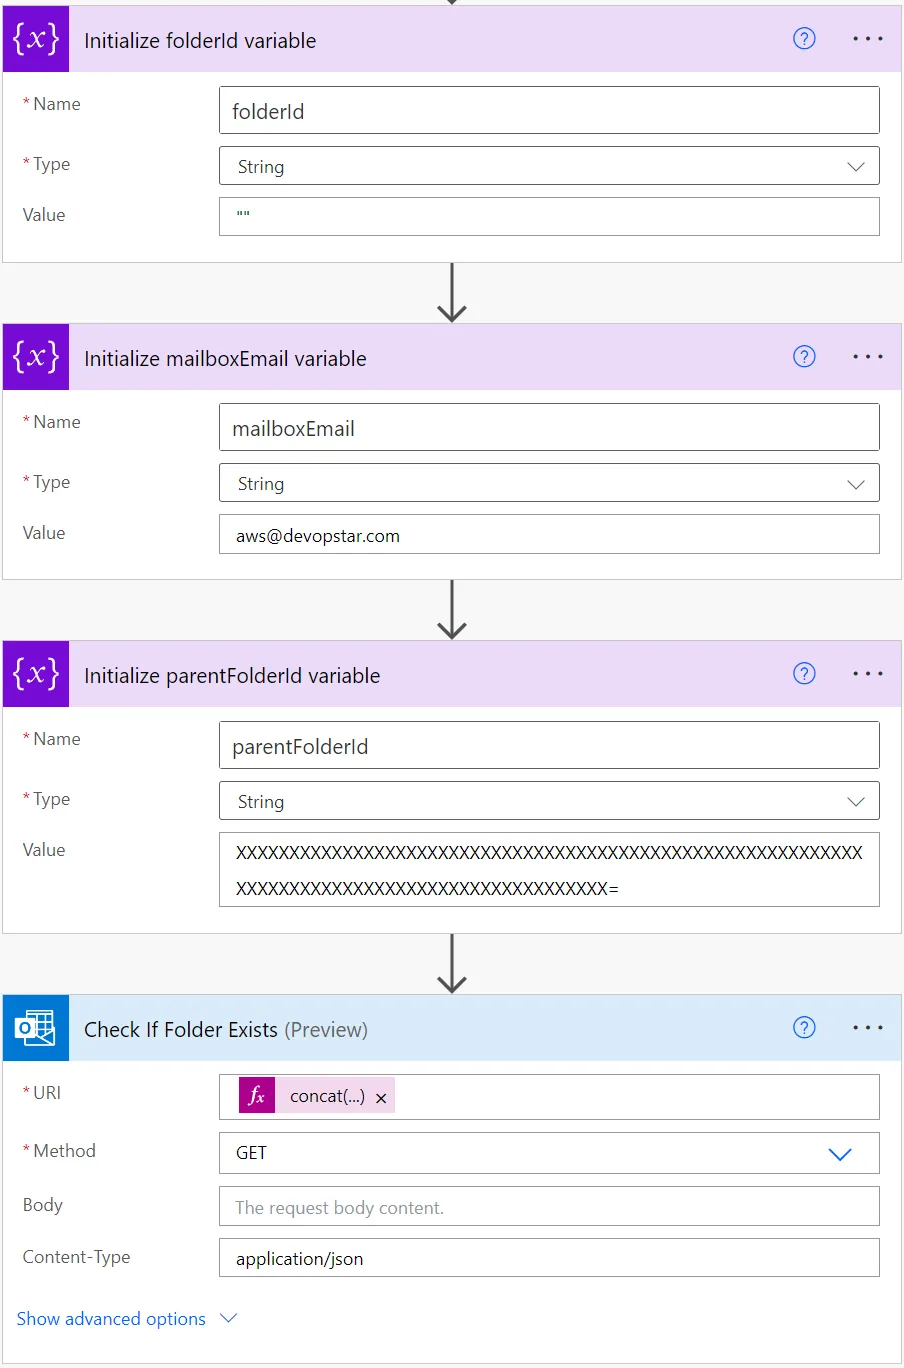
Create three new Initialize variable blocks and set the variable names to the following
- folderId: This will store the folder ID of the folder we are going to move the email into.
- mailboxEmail: This is the email address of the shared mailbox we are going to move the email into.
- parentFolderId: This is the folder ID of the parent folder in which we are going to create the new folders.
To get the parentFolderId - it is easiest to head over to https://developer.microsoft.com/en-us/graph/graph-explorer and run the following query to get the folder ID of the parent folder the given folder - replace aws@devopstar.com with your shared mailbox email address, and Inbox with the name of the parent folder.
https://graph.microsoft.com/v1.0/users/aws@devopstar.com/mailFolders?filter=displayName eq 'Inbox'
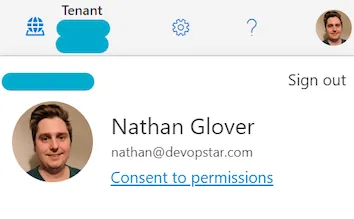
If you get an error, it is likely that you have not authenticated with the Microsoft Graph API - to do this click your profile in the top right corner and select Permission consent.
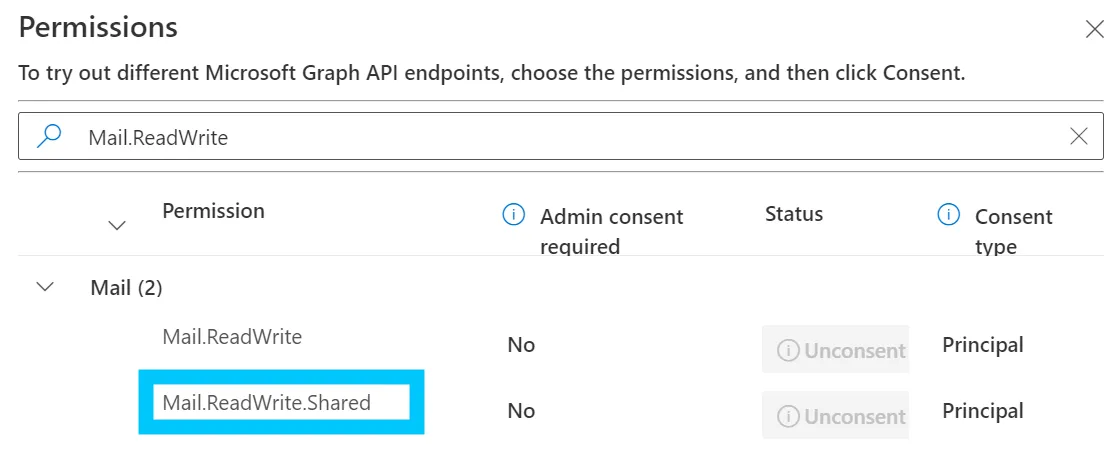
Make sure that Mail.ReadWrite.Shared is consented to, and try re-running the query.
From the output of the query, you can see the id of the folder - copy this and paste it into the parentFolderId variable and you should be good to move onto the next step.
After the variables are set, create a “Send an HTTP request” for Outlook365 block - which allows us to make Microsoft Graph requests within the context of Outlook.
Set the Method to GET and the URI to the following expression:
concat('https://graph.microsoft.com/v1.0/users/', variables('mailboxEmail'), '/mailFolders/', variables('parentFolderId'),'/childFolders?$filter=displayName eq ', variables('quote'), variables('folderName'), variables('quote'))
Rename the block to “Check If Folder Exists” for clarity.
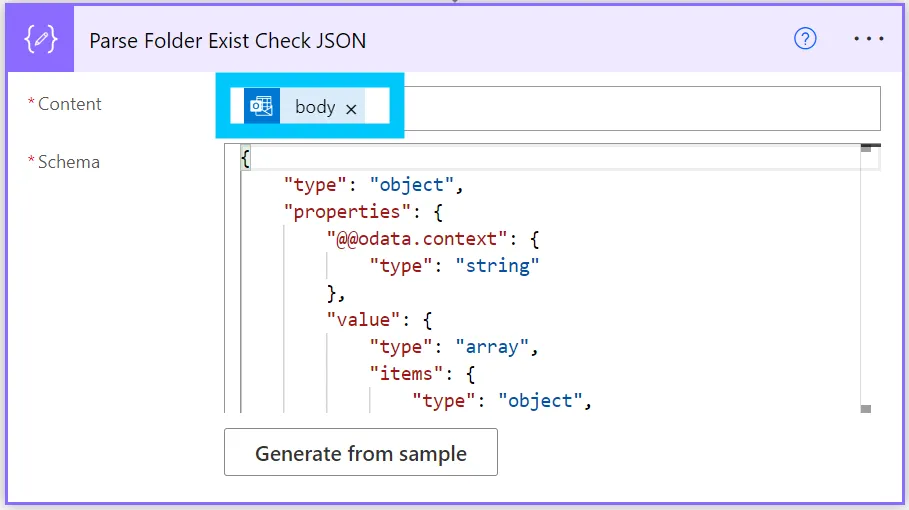
To parse the response, we need to create a Parse JSON block and set the Content field to the output Body of the previous block. Change the name of this new block to “Parse Folder Exist Check JSON” and then in the Schema set the following JSON:
{
  "type": "object",
  "properties": {
    "@@odata.context": {
      "type": "string"
    },
    "value": {
      "type": "array",
      "items": {
        "type": "object",
        "properties": {
          "id": {
            "type": "string"
          },
          "displayName": {
            "type": "string"
          },
          "parentFolderId": {
            "type": "string"
          },
          "childFolderCount": {
            "type": "integer"
          },
          "unreadItemCount": {
            "type": "integer"
          },
          "totalItemCount": {
            "type": "integer"
          },
          "isHidden": {
            "type": "boolean"
          }
        },
        "required": [
          "id",
          "displayName",
          "parentFolderId",
          "childFolderCount",
          "unreadItemCount",
          "totalItemCount",
          "isHidden"
        ]
      }
    }
  }
}
The next step is to check if the folder exists. To do this we need to check the length of the value array in the JSON response. If the length is greater than 0, then we know the folder exists and we can set the folderId variable to the id of the first item in the value array.
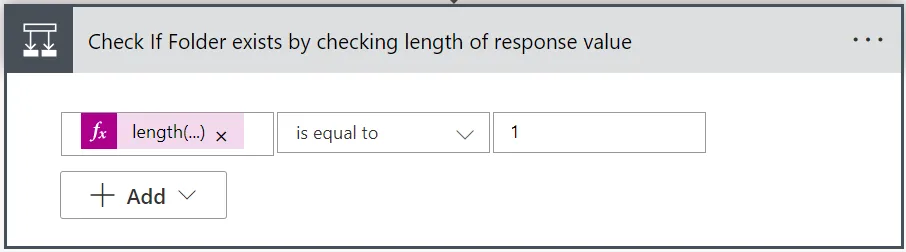
If the length is 0, then we know the folder doesn’t exist and we need to create it. I’m going to break this down into two separate steps - but to start with create an if statement block called “Check If Folder exists by checking the length of response value” and set the condition to the following expression:
length(body('Parse_Folder_Exist_Check_JSON')?['value'])
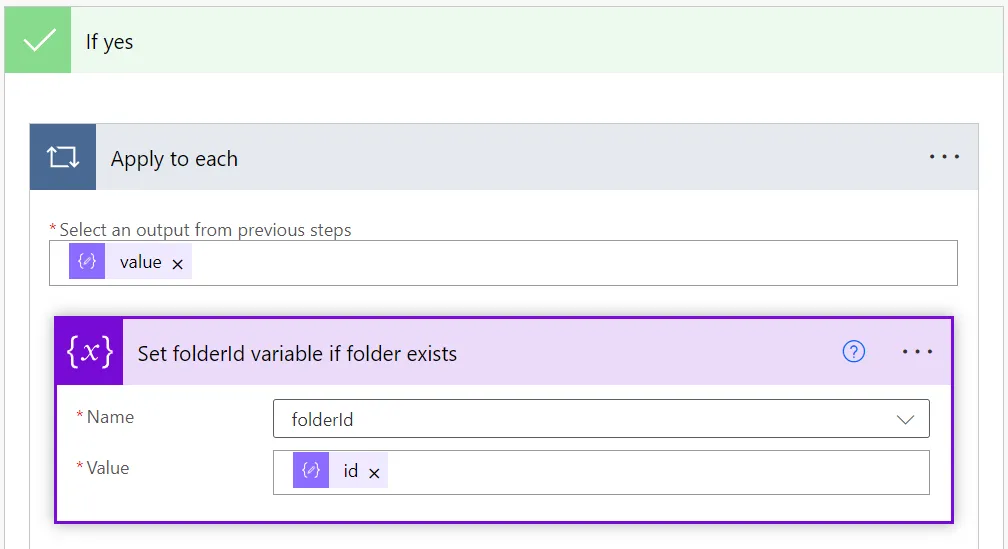
Starting with the true branch, create a new Set variable block and set the folderId variable to the id variable from the “Parse Folder Exist Check JSON” outputs.
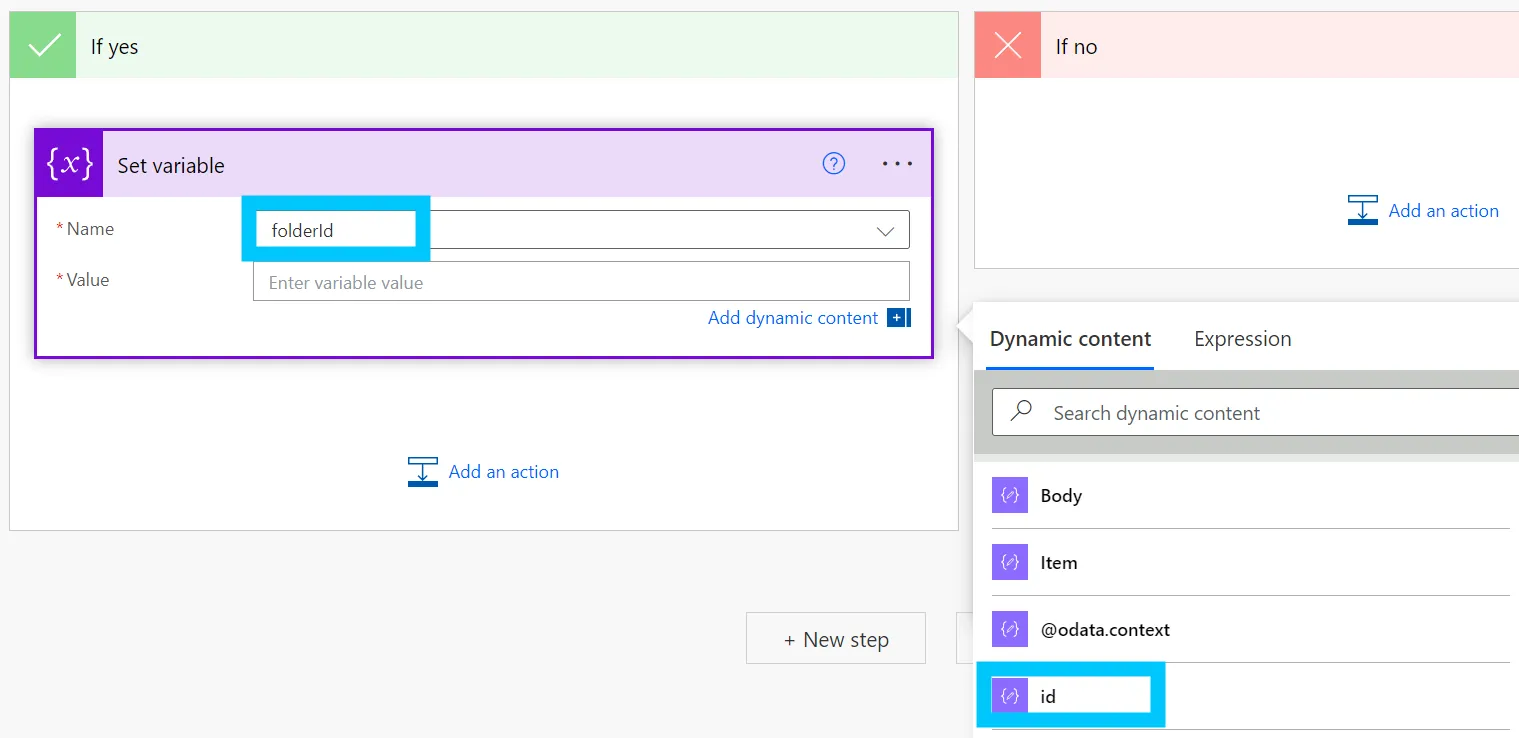
It should automatically create an “Apply to each” expression for you when you click on “id” in the dropdown.
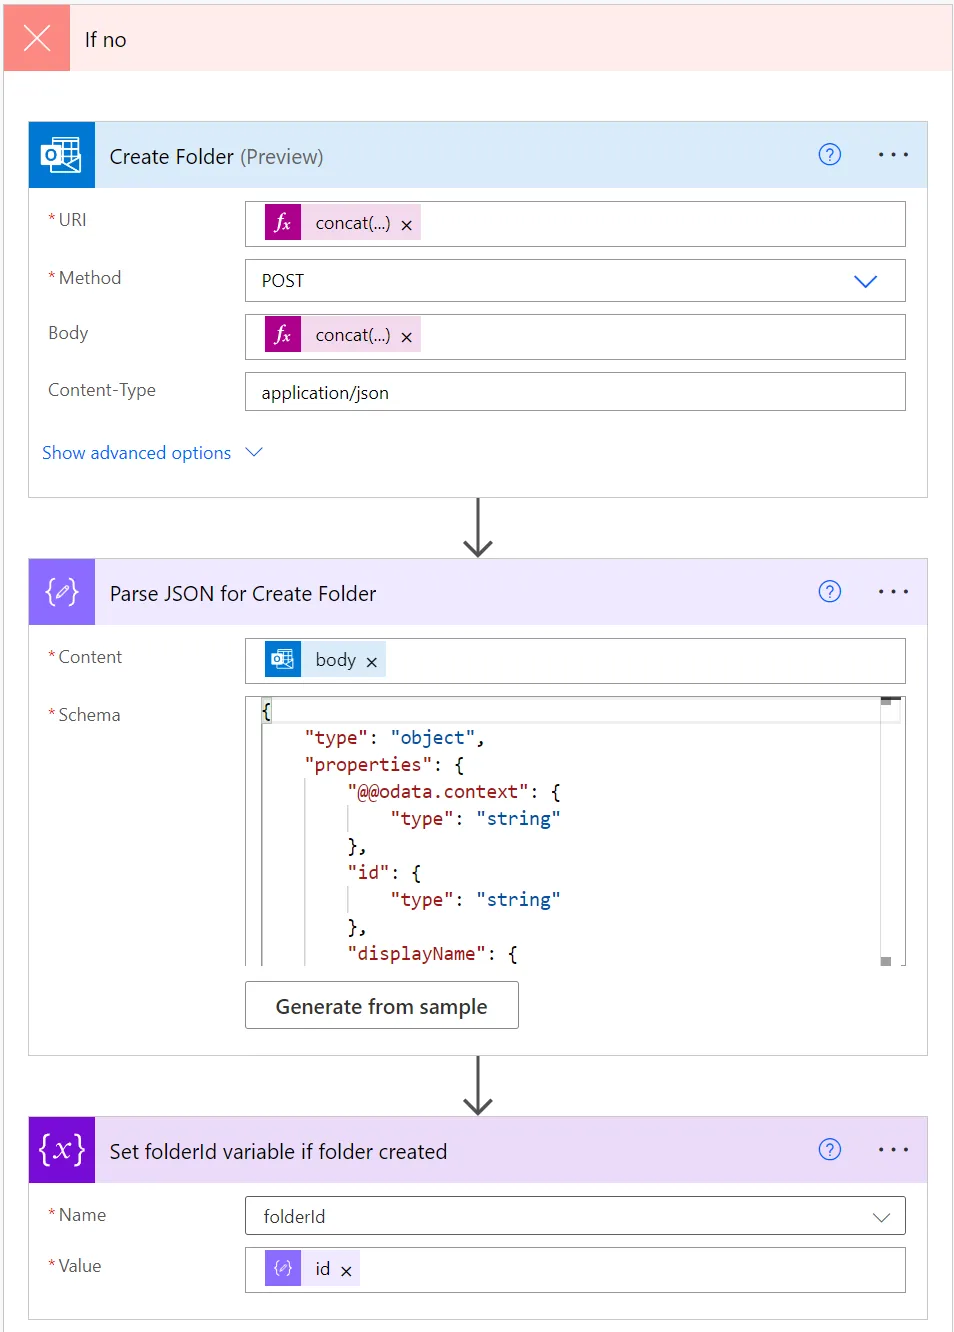
Now we need to create the false branch of the if statement. This is where we will create the folder if it doesn’t exist. To do this we need to create a new “Send an HTTP request” for Outlook365 block and set the Method to POST and the URI to the following expression:
concat('https://graph.microsoft.com/v1.0/users/', variables('mailboxEmail'), '/mailFolders/', variables('parentFolderId'),'/childFolders')
Set the Body to the following expression as well
concat('{"displayName": "', variables('folderName'), '"}')
Set the name of this block to “Create Folder” then create a new Parse JSON block and set the Content field to the output body of the previous block. Change the name of this new block to “Parse JSON for Create Folder” and then in the Schema set the following JSON:
{
  "type": "object",
  "properties": {
    "@@odata.context": {
      "type": "string"
    },
    "id": {
      "type": "string"
    },
    "displayName": {
      "type": "string"
    },
    "parentFolderId": {
      "type": "string"
    },
    "childFolderCount": {
      "type": "integer"
    },
    "unreadItemCount": {
      "type": "integer"
    },
    "totalItemCount": {
      "type": "integer"
    },
    "sizeInBytes": {
      "type": "integer"
    },
    "isHidden": {
      "type": "boolean"
    }
  }
}
Finally set the folderId variable to the id variable from the “Parse JSON for Create Folder” output.
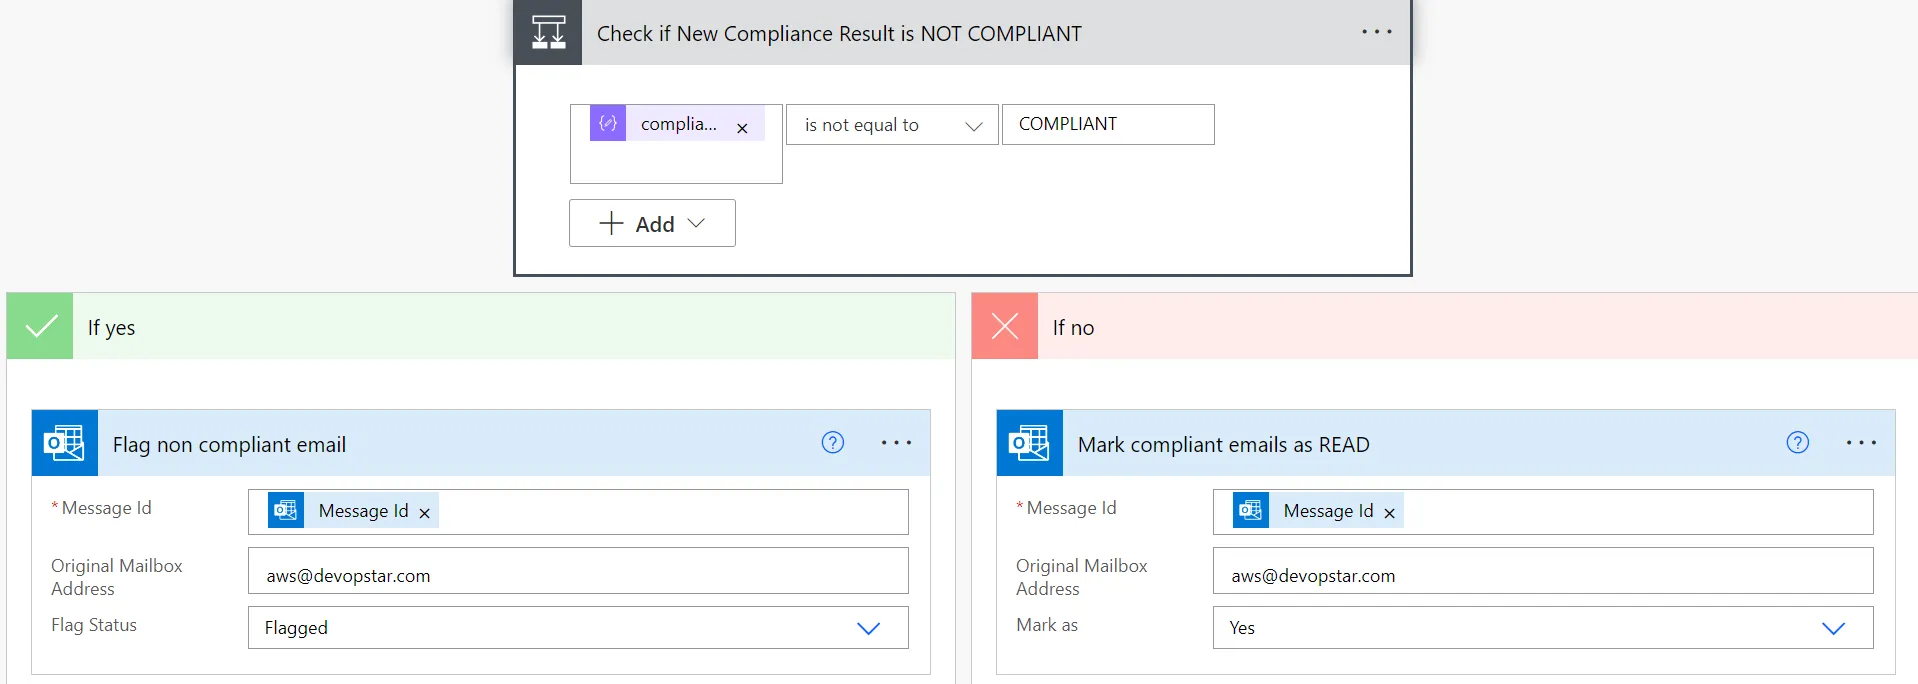
We’re on the home stretch now. We now create a final if statement block called “Check if New Compliance Result is NOT COMPLIANT” and perform a is not equal to check on the complianceResult variable and the string “COMPLIANT”.
If the result is not compliant, then we need to flag the email by using the Flag Email block
Otherwise, we should mark the COMPLIANT emails as read by using the Mark Email as Read block.
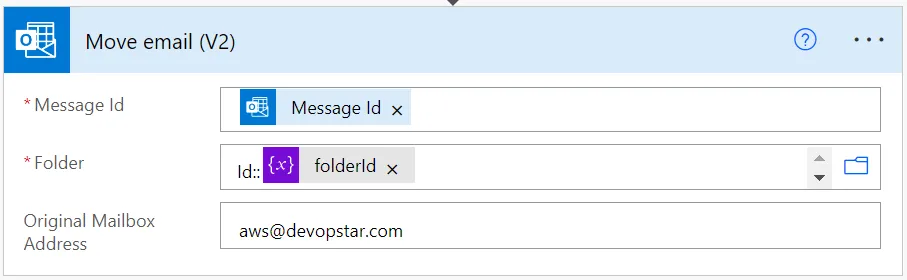
The last step is to move the email to the appropriate folder. To do this we use the Move Email block and set the Folder variable to be in the following format where it is prefixed by Id::
Testing the flow
Now we have the flow built, we can test it. To do this, you will need to forward yourself a copy of the email that AWS SNS sends you - before you do this however, change the “When a Security Rule Compliance Change email arrives” block to trigger on receiving an email from your email address - this is just temporary so you can test the flow.
Once you have forwarded yourself a copy of the email, if the email is NON_COMPLIANT you should see it flagged and moved to a folder named after the configRuleName.
Summary
In this post, we have built a Power Automate flow that will automatically flag and moves emails from AWS Config and Security hub. This is a great way to keep on top of your AWS Security Hub compliance results and ensure that you are only having to deal with the emails that require your attention.
If you have any questions or if there’s anything in this guide that doesn’t make sense, please reach out to me on Twitter @nathangloverAUS or via the contact page.