WSL2 Tips - Never Prompt for SSH Passphrase


In this short guide, I will show you how to use Windows stored credentials to authorize the ssh daemon on reboot. This guide was inspired by Giuseppe Sorrentino's existing guide however with some screenshots and small improvements.
This guide assumes your SSH private key is stored in
~/.ssh/id_rsawithin the Windows Subsystem for Linux. If your key has a different name, make sure the steps in this guide whereid_rsaare present are replaced with your key name.
-
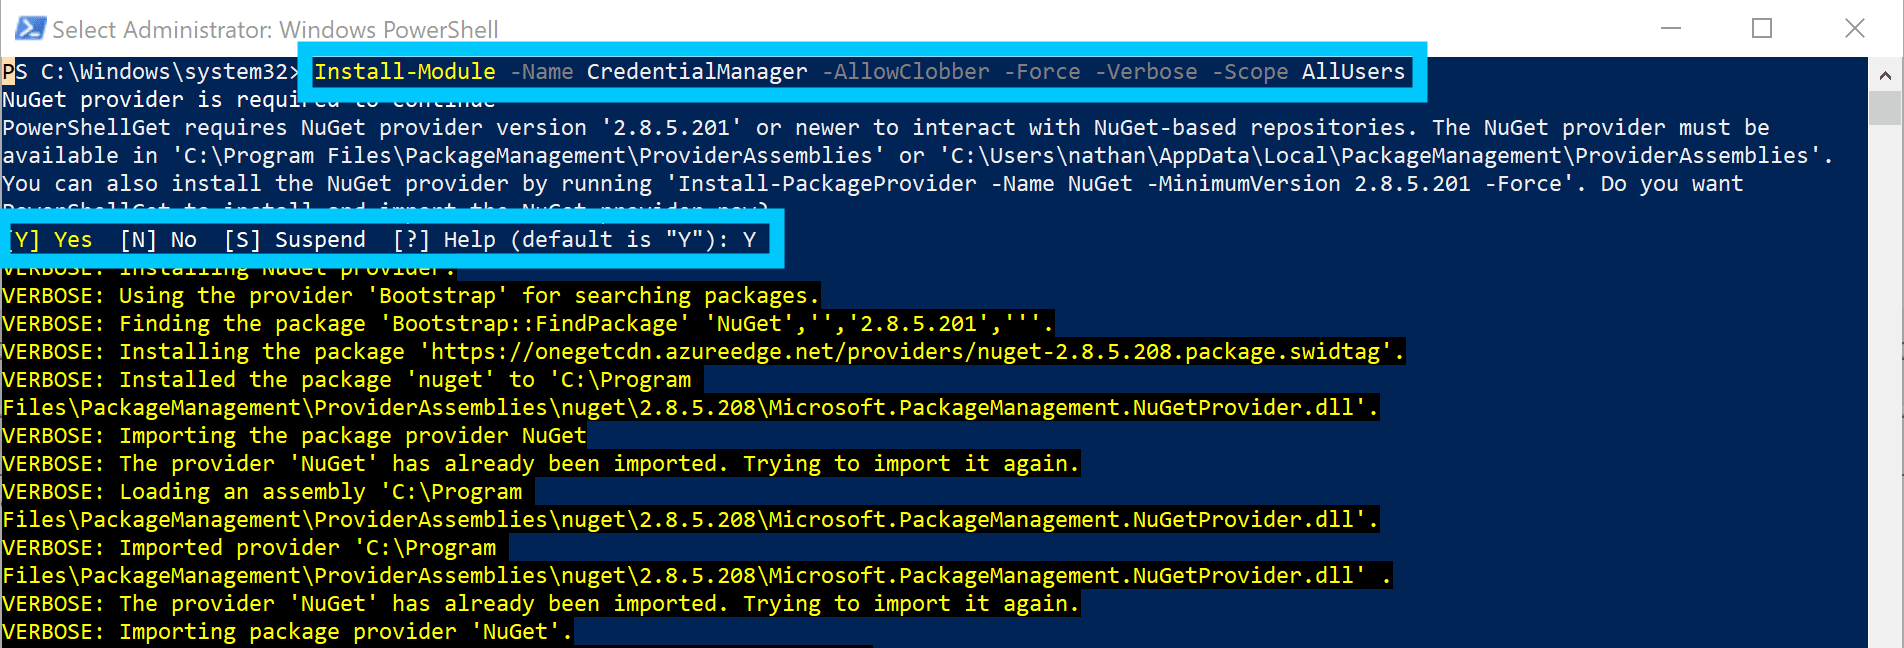
Install the Credential Manager module for Powershell, open up a PowerShell window with Adminsitrator Permissions and run the following:
Install-Module -Name CredentialManager -AllowClobber -Force -Verbose -Scope AllUsers
PowerShell install CredentialManager -
Close the original Powershell window and open a new one (Don't run this Powershell command as Administrator). Provide unrestricted execution policy to the current user in PowerShell.
Set-Executionpolicy -Scope CurrentUser -ExecutionPolicy UnRestricted
PowerShell set unrestricted execution policy -
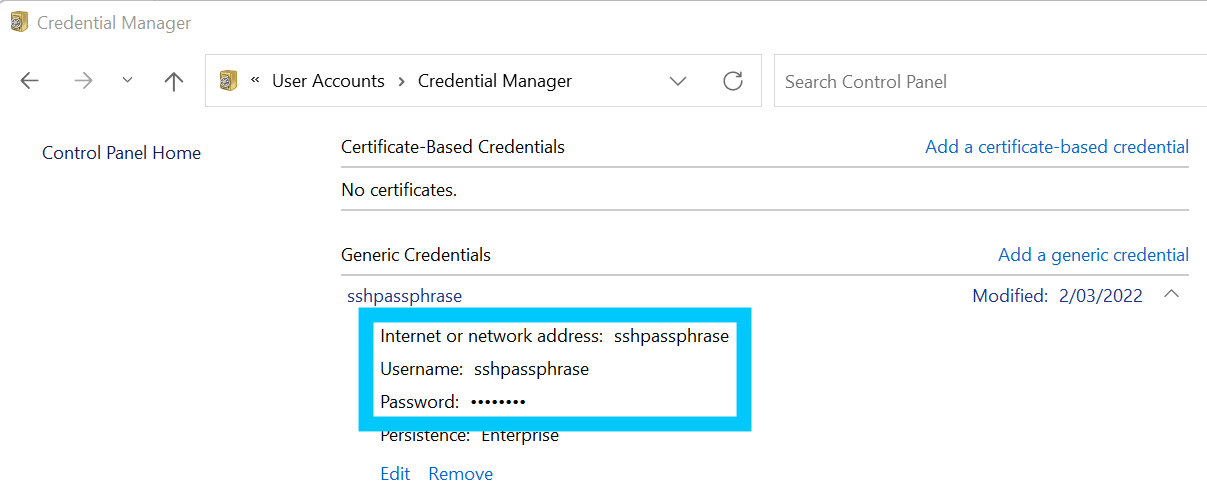
Create a new Generic Credential in the Windows Credential Manager and call it
sshpassphrase.The password should be the passphrase you use when unlocking your SSH key.

Windows Credential Manager -
In a windows Command line, or Powershell terminal, list your available Windows Subsystem for Linux (WSL) distributions and pick the one you want to use.
$ wsl.exe --list --verbose
# PS C:\Users\nate> wsl --list --verbose
#   NAME                   STATE           VERSION
# * Ubuntu                 Running         2
In this example, I have one called
Ubuntuthat will be the WSL environment I want to enable automatic signin for the ssh daemon. -
Create a folder called
wsluin your home directory in Windows, then put a file calledkeychain.ps1in that folder with the following contents.Replace the
wslUsernamevariable with your username within WSL. If you open a new WSL instance and runwhoamiyou can get your username.$wslUsername = "username" $wslDistribution = "Ubuntu" $credentials = Get-StoredCredential -Target sshpassphrase $BSTR = [System.Runtime.InteropServices.Marshal]::SecureStringToBSTR($credentials.Password) $passphrase = [System.Runtime.InteropServices.Marshal]::PtrToStringAuto($BSTR) C:\Windows\System32\wsl.exe -u $wslUsername -d $wslDistribution /home/$wslUsername/wslu/keychain.sh $passphrase -
Open WSL and create a folder in your home directory there called
wslu. In that folder create a file calledkeychain.shwith the following contents.#!/bin/bash SSH_ASKPASS_SCRIPT=/tmp/ssh-askpass-script cat > ${SSH_ASKPASS_SCRIPT} <<EOL #!/bin/bash echo "$1" EOL chmod u+x ${SSH_ASKPASS_SCRIPT} export DISPLAY="0" export SSH_ASKPASS=${SSH_ASKPASS_SCRIPT} /usr/bin/keychain --clear id_rsa rm ${SSH_ASKPASS_SCRIPT}Make the file executable.
chmod +x keychain.sh -
Install
keychainin WSL by running the following command in the WSL terminal.sudo apt update && sudo apt install keychain -
Open your
~/.bash_profilefile in your WSL terminal and add the following line to the end of the file.# Auto start keychain eval $(/usr/bin/keychain --eval --quiet id_rsa) -
Finally, back in Windows open up Task Scheduler and Create a new task called Launch Keychain
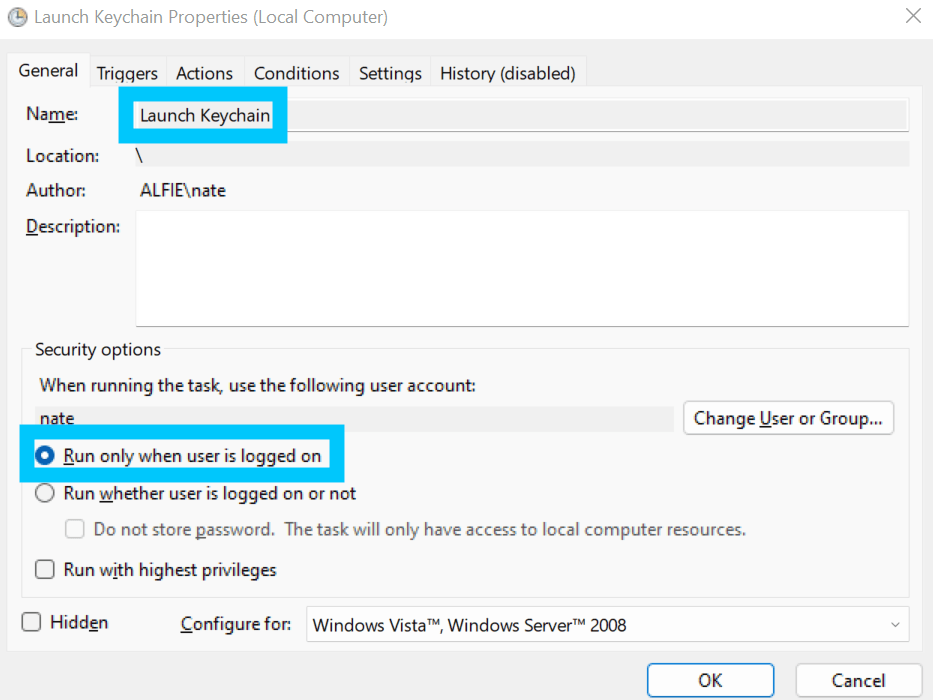
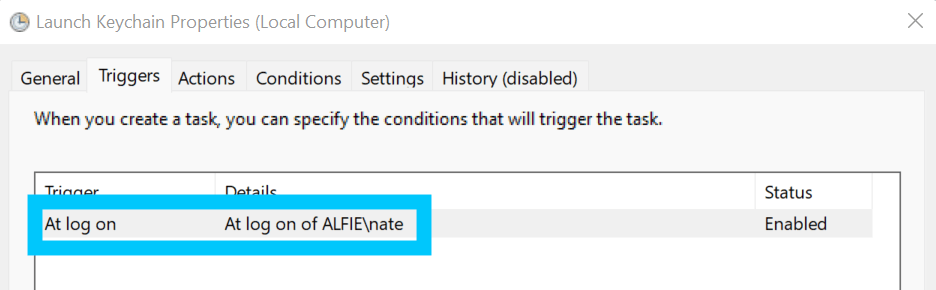
Task Scheduler Have the task trigger At log on for your user
Task Scheduler Make the task run the
keychain.ps1script that we created in your Windows home directory every time you login.powershell -File C:\Users\<username>\wslu\keychain.ps1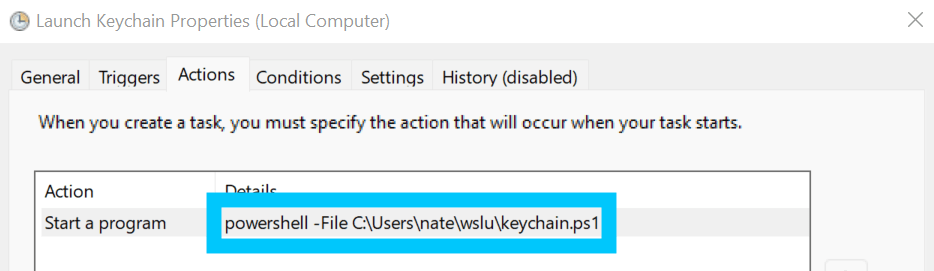
Task Scheduler

To test the workflow, log out and back into your Windows profile and you should see a PowerShell pop up briefly which indicates the authorization has run.
I hope this guide was helpful! If you have any questions, please contact me on Twitter @nathangloverAUS and let me know!