Getting Started with Amazon SageMaker Ground Truth
Note: I am far from an expert on anything in the field of Data Science; so If I use weird lingo, or explain something incorrectly hit me up on twitter @nathangloverAUS.
- To all the awesome data scientists reading this
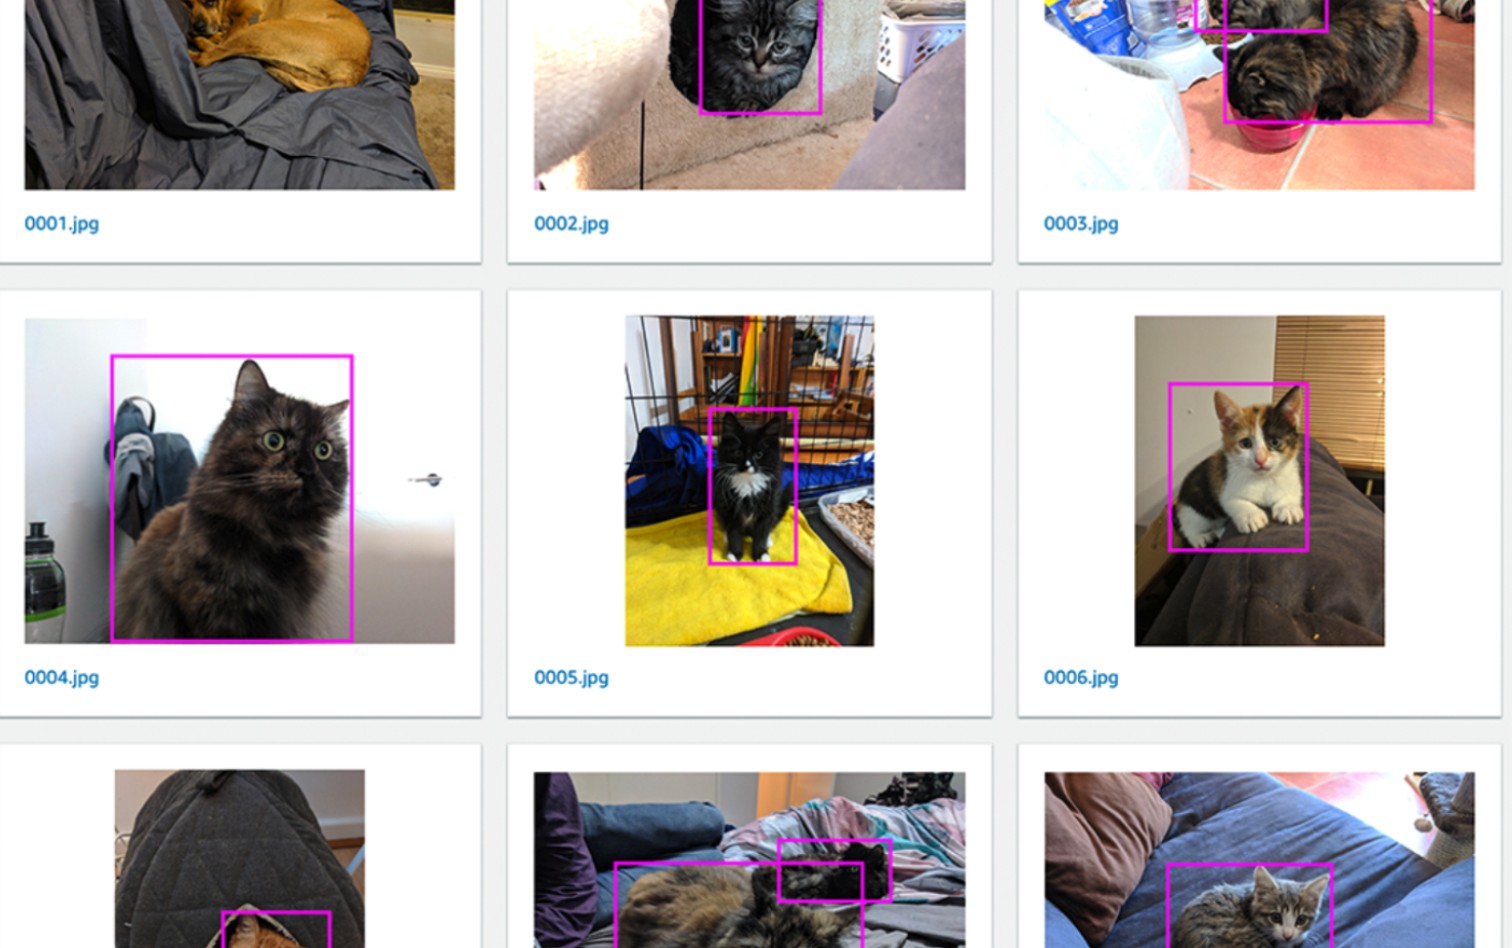
Today I decided to look into Ground Truth; Amazon's recent addition and a sub-service within the SageMaker ecosystem. Ground Truth is a labeling service that allows the outsourcing of the complex task of labeling data sets by hand in a friendly and structured way.
Labeling Data
Labeled data is extremely important for uses where supervised learning is being tried, and where examples of Positive examples are needed to nudge the a model in the right direction. I'll use an example from my thesis project to possibly help illustrate this better.

A requirement I faced was that hands had to be detected in any given image. A dlib Feature detection classifier was was I ended up using for this problem, which takes a large set of images containing hands and then trains a model using the features & characteristics that make up a hand.
In order to achieve this I had to:
- Get a massive dataset of Hands
- Label where in the image the hands were so none of the background was taken into consideration during the training of the model
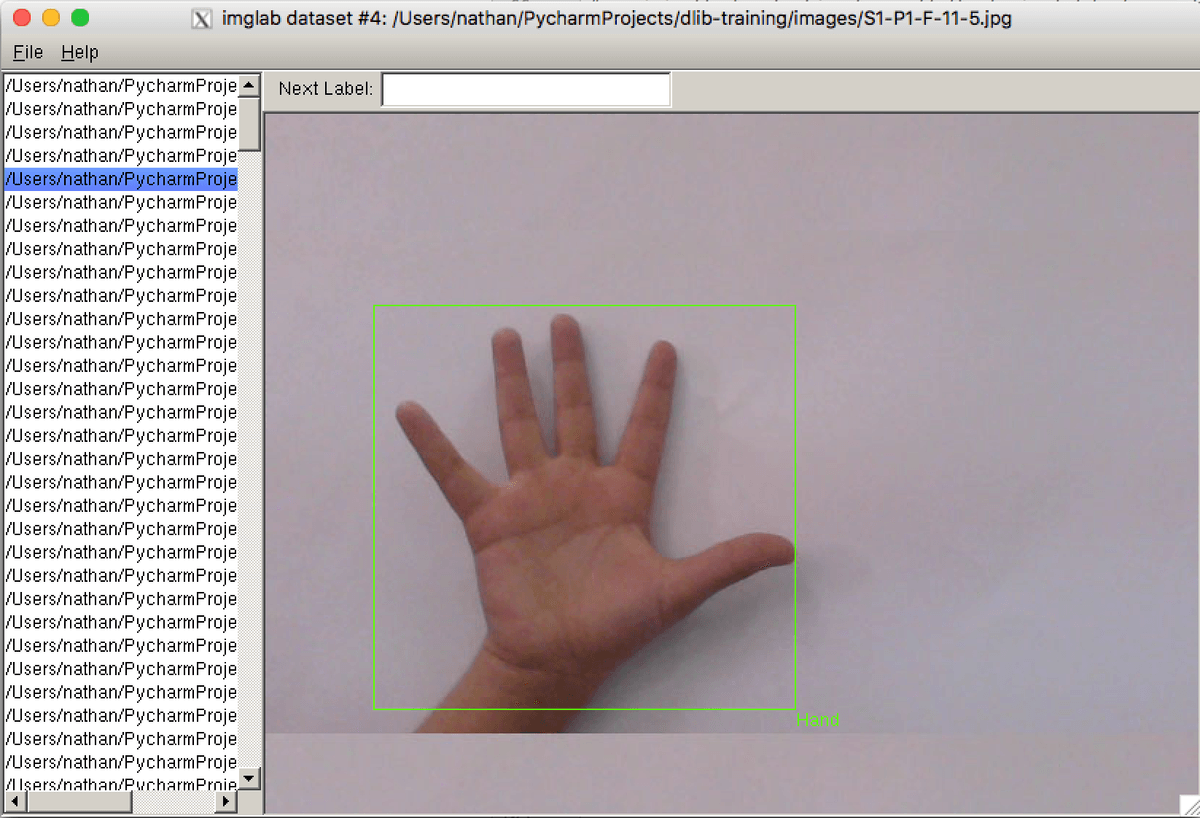
In the end I used imglab to manually label the images, which to be perfectly honest was an extremely time consuming and tedious task. It didn't help that the UI for imglab was far from excellent and required a lot of technical know-how to get everything setup for the labeling process.
Note: imglab appears to have improved a lot since I used it for my thesis (I'm not hating on it, its certainly a useful tool).
Introducing Ground Truth
Ground Truth provides a tightly integrated labeling experience by streamlining the process whilst leveraging existing datasets stored in S3. Ultimately this solution isn't doing anything revolutionary, but it appears to just make the process less of a headache and more unified. Let's jump into an example!
Cat Labeling Project
I've setup a simple little project with everything you'll need to stand up a labeling job. We'll only be using 10 images, so its by no means going to generate a crazy useful set of data; however it will give you enough of an understanding to go off and explore more on your own.
You can pull down the project using the following command; or just download the zip from the GitHub page
git clone https://github.com/t04glovern/aws-ground-truth-cat-labels.gitYou'll need a couple S3 buckets now in order to store you input and output data. For the purpose of this demonstration I'm using:
- devopstar-ground-truth-input
- devopstar-ground-truth-output
You'll have to use something different (and unique), just make sure you use the same thing everywhere.
Buckets can be created with the AWS CLI, or through the AWS S3 console. I'll be using the AWS to demonstrate:
## 'mb' stands for make bucket
aws s3 mb s3://devopstar-ground-truth-input
aws s3 mb s3://devopstar-ground-truth-output
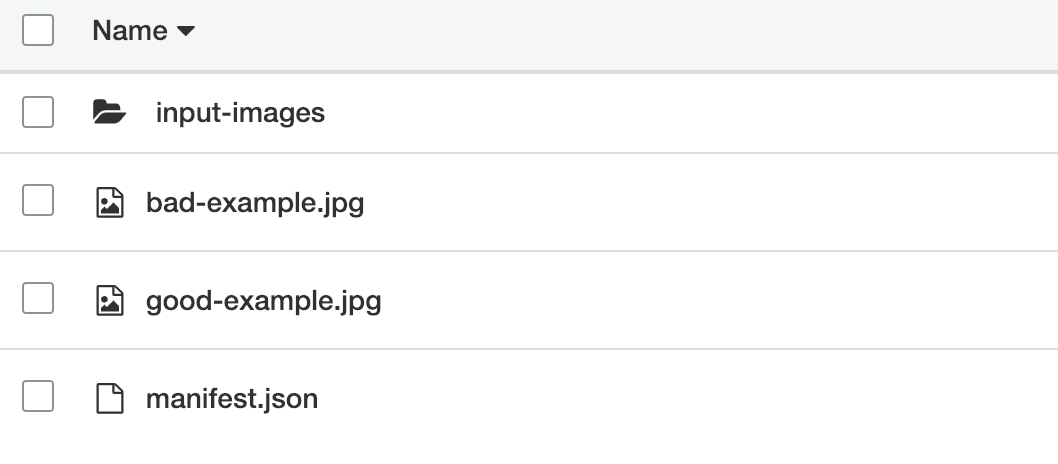
Next we need to copy across our input data; along with some other files I explain shortly.
aws s3 cp res/good-example.jpg s3://devopstar-ground-truth-input/good-example.jpg
aws s3 cp res/bad-example.jpg s3://devopstar-ground-truth-input/bad-example.jpg
aws s3 sync res/input-images s3://devopstar-ground-truth-input/input-images
Input Manifest
There's one more file we'll need to copy; which is the manifest.json. This file is responsible for mapping each item of our input dataset. When you look at the file it'll have the following contents; just ensure you change the bucket name / path to the correct one for your setup
{"source-ref": "s3://devopstar-ground-truth-input/input-images/0001.jpg"}
{"source-ref": "s3://devopstar-ground-truth-input/input-images/0002.jpg"}
{"source-ref": "s3://devopstar-ground-truth-input/input-images/0003.jpg"}
{"source-ref": "s3://devopstar-ground-truth-input/input-images/0004.jpg"}
{"source-ref": "s3://devopstar-ground-truth-input/input-images/0005.jpg"}
{"source-ref": "s3://devopstar-ground-truth-input/input-images/0006.jpg"}
{"source-ref": "s3://devopstar-ground-truth-input/input-images/0007.jpg"}
{"source-ref": "s3://devopstar-ground-truth-input/input-images/0008.jpg"}
{"source-ref": "s3://devopstar-ground-truth-input/input-images/0009.jpg"}
{"source-ref": "s3://devopstar-ground-truth-input/input-images/0010.jpg"}
Once you are happy with the references, you can upload this file to your input bucket also.
aws s3 cp res/manifest.json s3://devopstar-ground-truth-input/manifest.jsonThe resulting structure in your S3 bucket for the input data should be something like the following
Ground Truth Job
We have to create a new job now, this is done through the SageMaker portal under Ground Truth.
Note: As of writing this, Ground Truth is only available in a select few regions. I recommend just jumping into N. Virginia (us-east-1)
Specify the new jobs Name, input bucket (with manifest location), and output bucket path
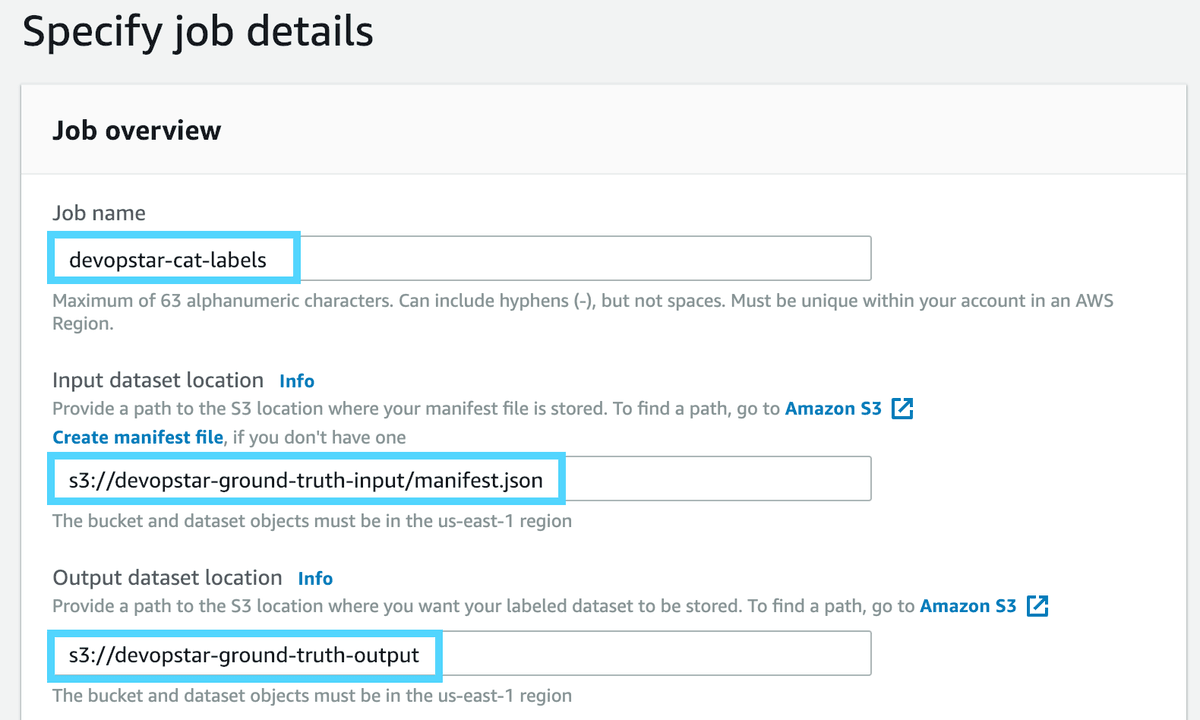
You will have a box asking for an IAM role for the task to run under. Click create new and fill out the S3 buckets you specify option by listing your input and output bucket names.
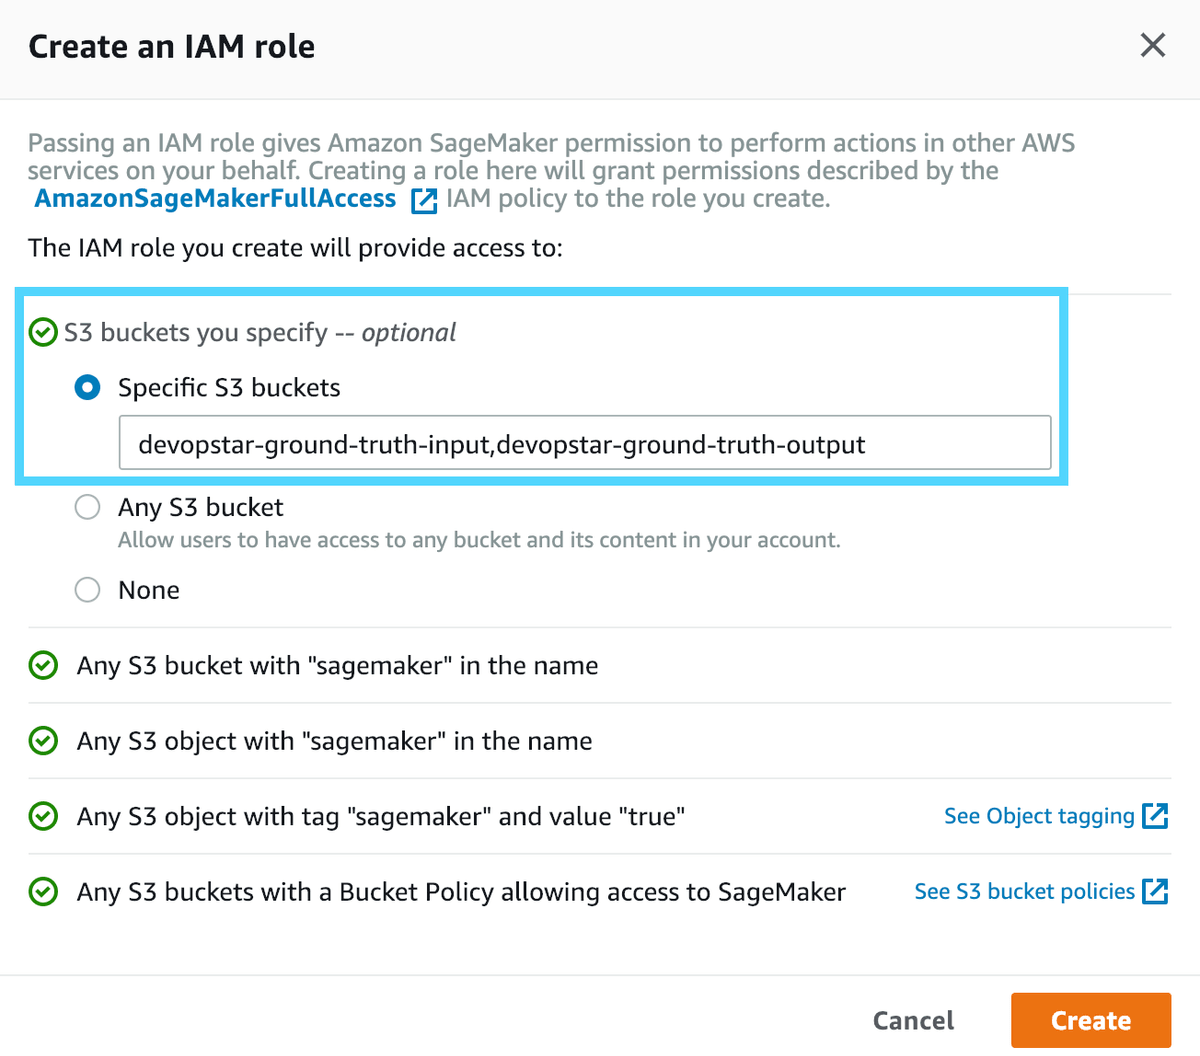
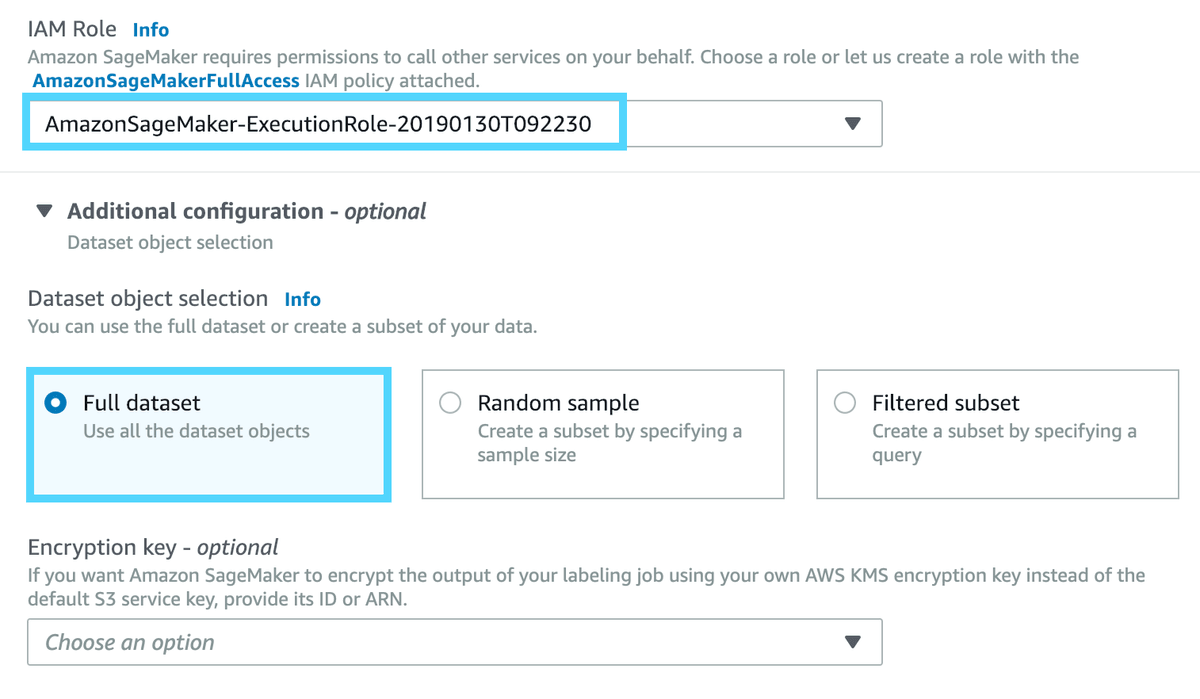
Once the IAM role is created, you can attach it to the previous field. The last option is optional, we'll just select Full dataset for now as it suits our needs perfectly fine.
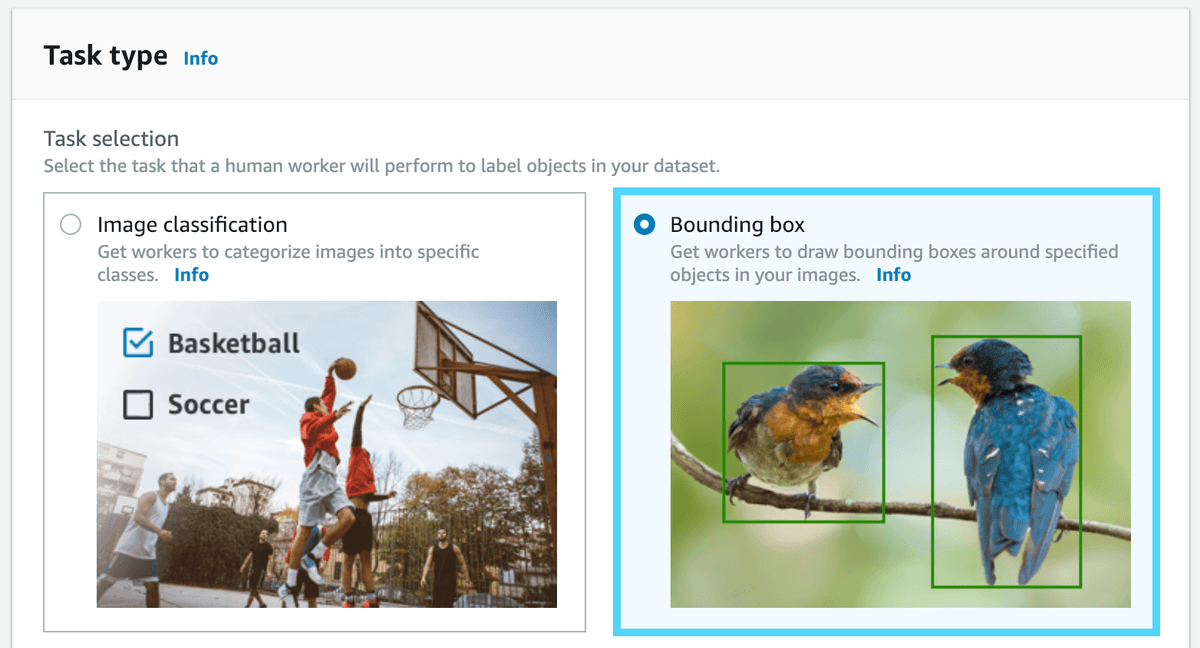
For Task type, we'll select Bounding Boxes; however have a look at the various options you can choose for later on down the track.
Worker Details
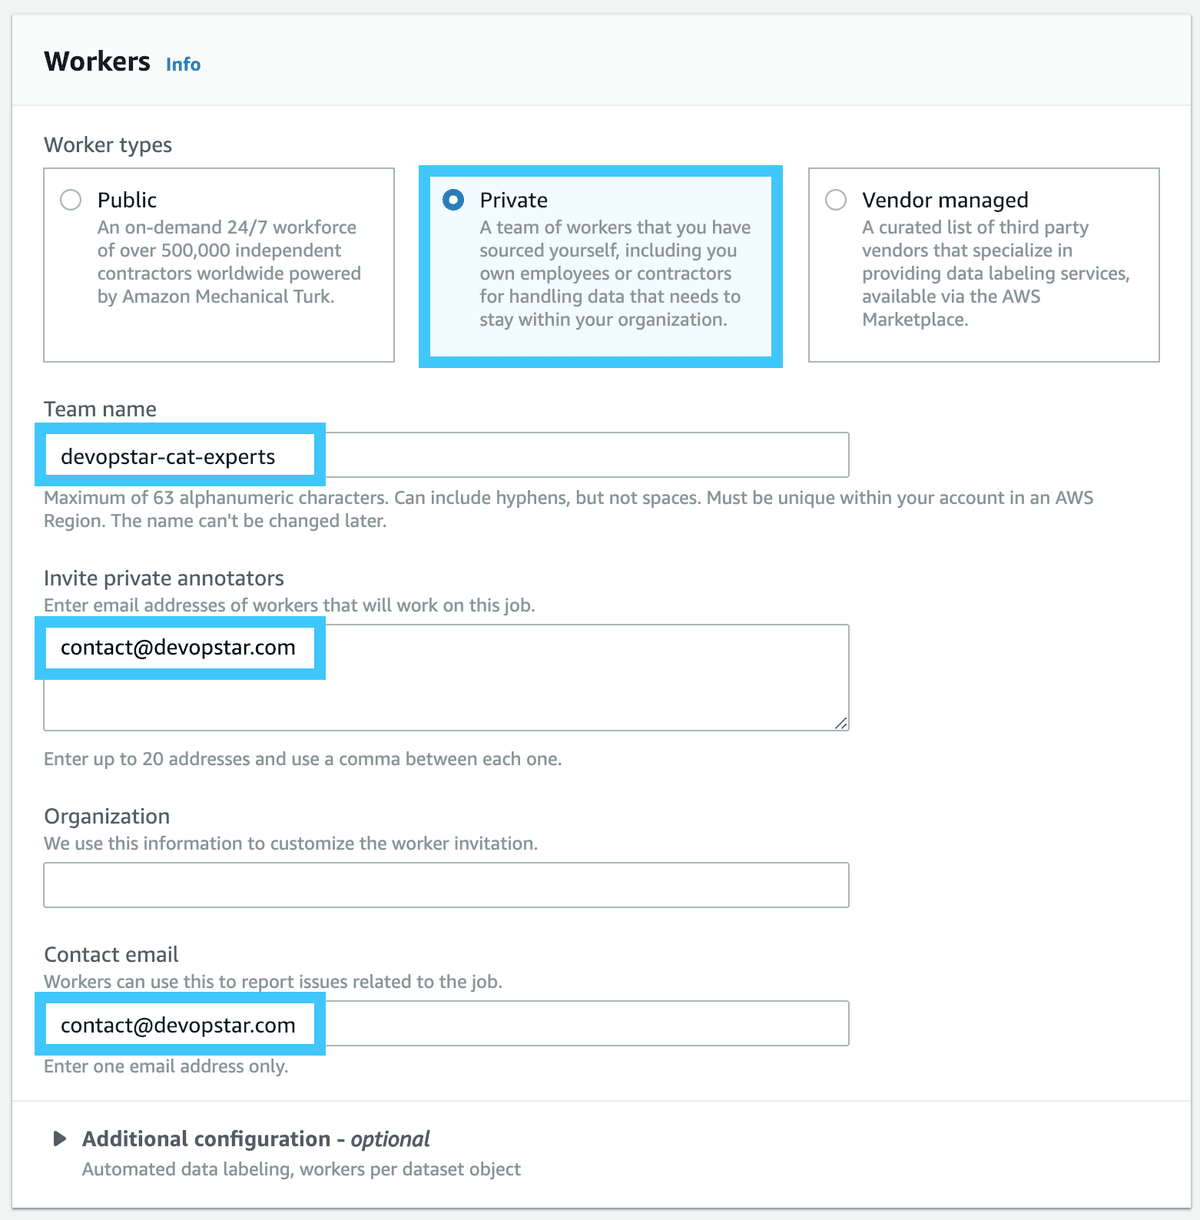
The next section is around specifying Worker details. Workers are the people who will be labeling your data sets, they can be:
- Public resources (leveraging People as an API; aka. Mechanical Turk)
- Private group of people (usually employees in an organisation)
- Vendors (usually a 3rd party company specialising in a type of labeling or experts in a particular field)
Fill out the worker details using a Private Worker.
The final step is we need to design our Box labeling tool. In order to do this we'll use those two images we uploaded to our S3 bucket from before. You will have to quickly make both those files Public explicitly. Do this by right clicking on them and clicking Public
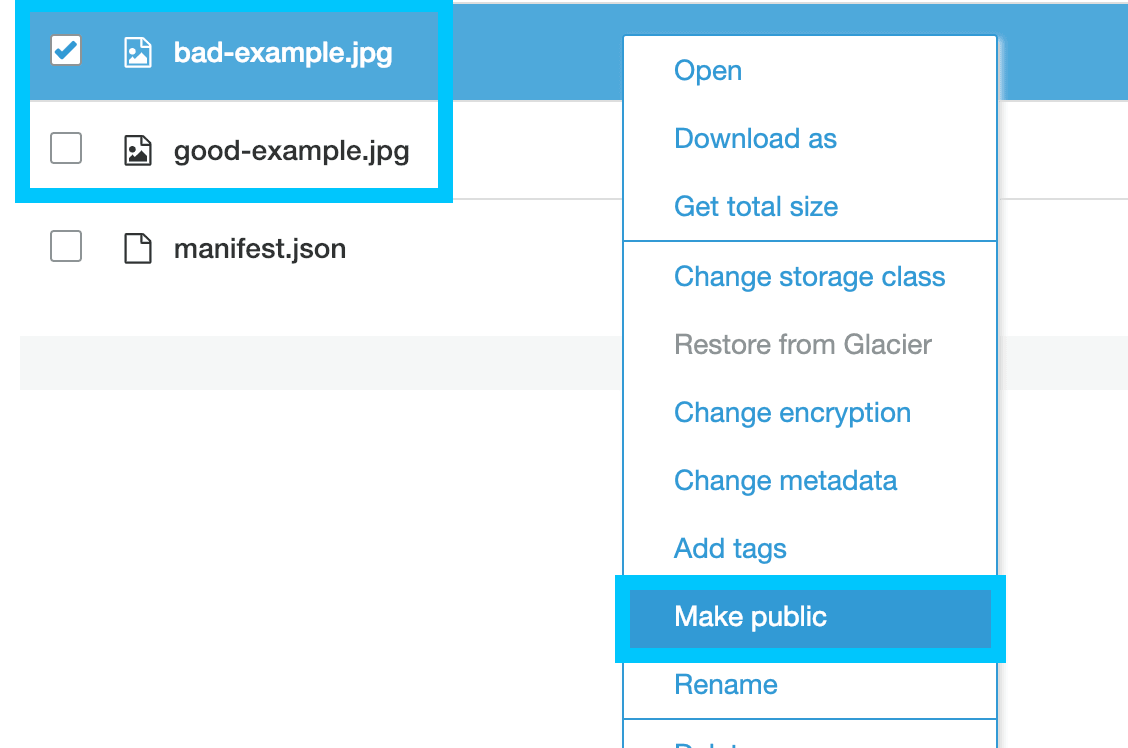
How design how you want the interface to look like for the people labeling your data. This includes replacing the images for Good and Bad examples with the ones we just made bucket from S3.
- https://s3.amazonaws.com/devopstar-ground-truth-input/bad-example.jpg
- https://s3.amazonaws.com/devopstar-ground-truth-input/good-example.jpg
Labeling Data Points
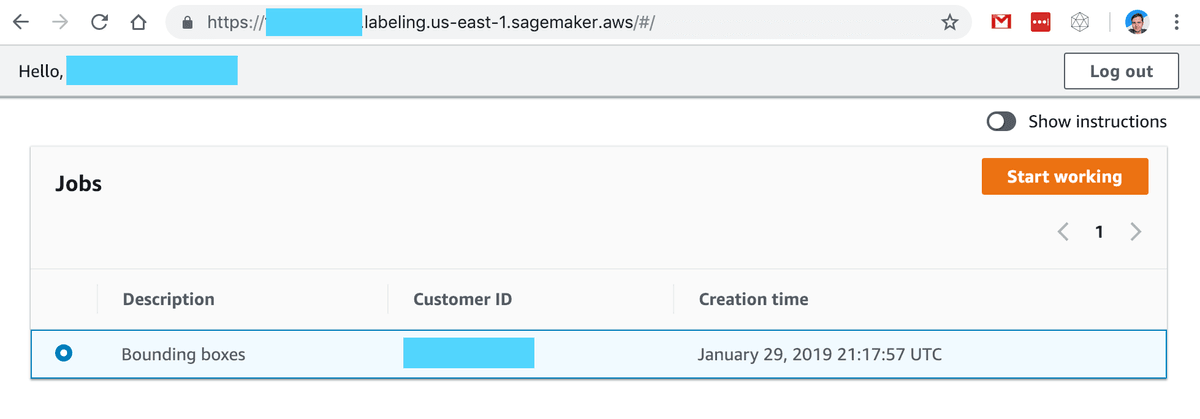
You should receive an email shortly after creating the job that invites you to begin labeling the data points. After logging in you should see your Bounding box task show up; select it and click Start working
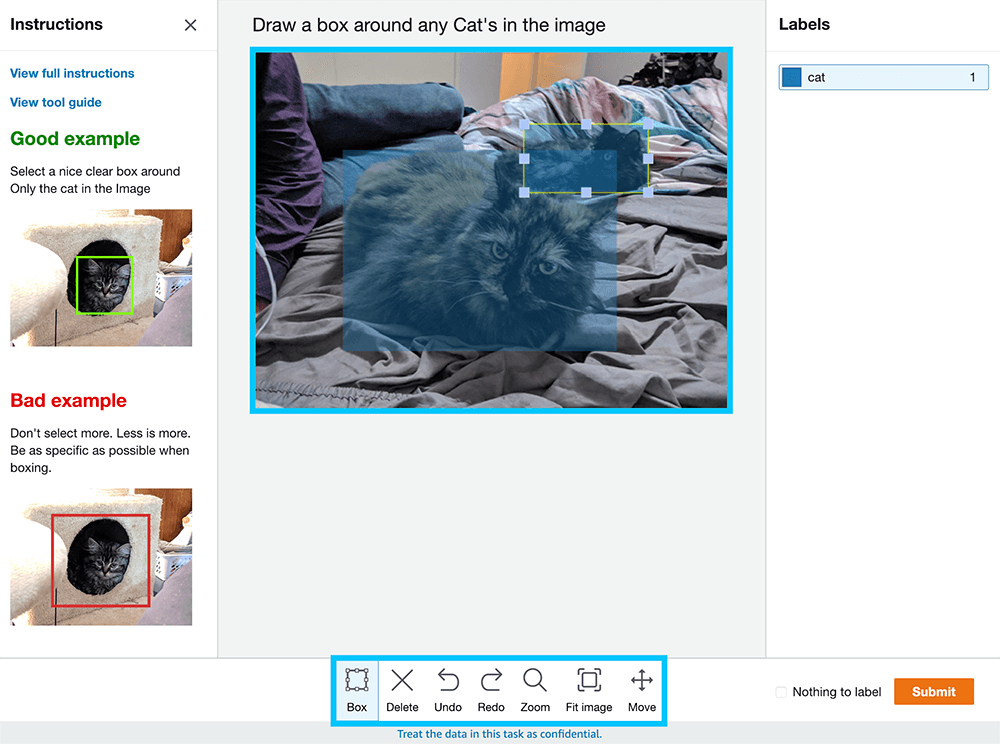
Work through each of the Images drawing boxes around the Cats in the image (using the drawing tools at the bottom of the panel)
If you come across any images that don't have anything to Label; simply click the Nothing to label checkbox and move forward.
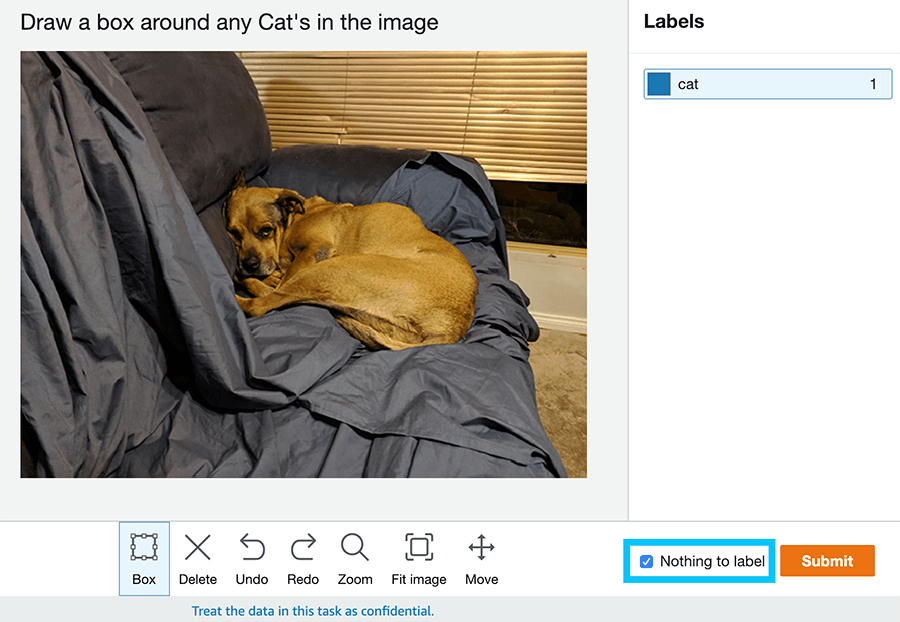
If there's nothing to label, click the Nothing to label checkbox
Finishing Labeling
When you've finished labeling all the items, you will be kicked out of the labeling portal. You can now navigate back to the SageMaker labeling job list (under your developer account) and confirm that the Labeling job is now complete. Clicking on it will show you an overview of the labeled data points
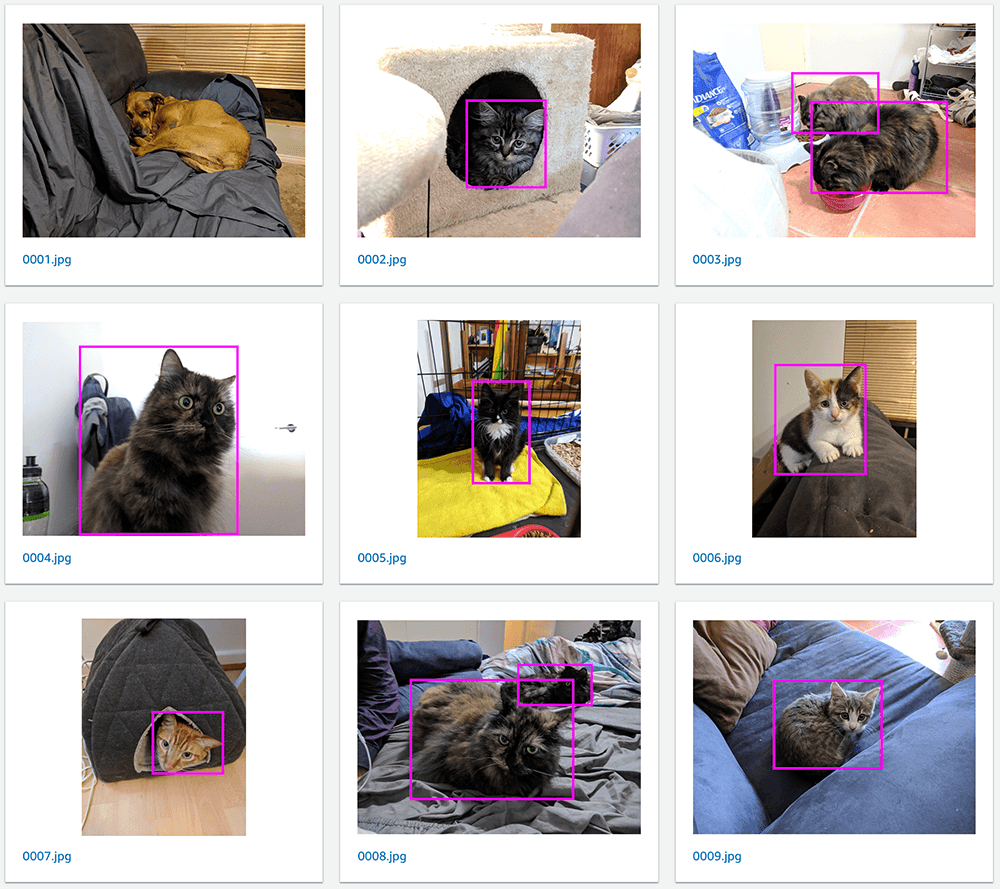
You can view the actual dataset as well by navigating to the Ground Truth Labeling Dataset menu and then clicking on the Output Dataset

Clicking on any of the images within that dataset will reveal a list of tagged labels within the image you are viewing.
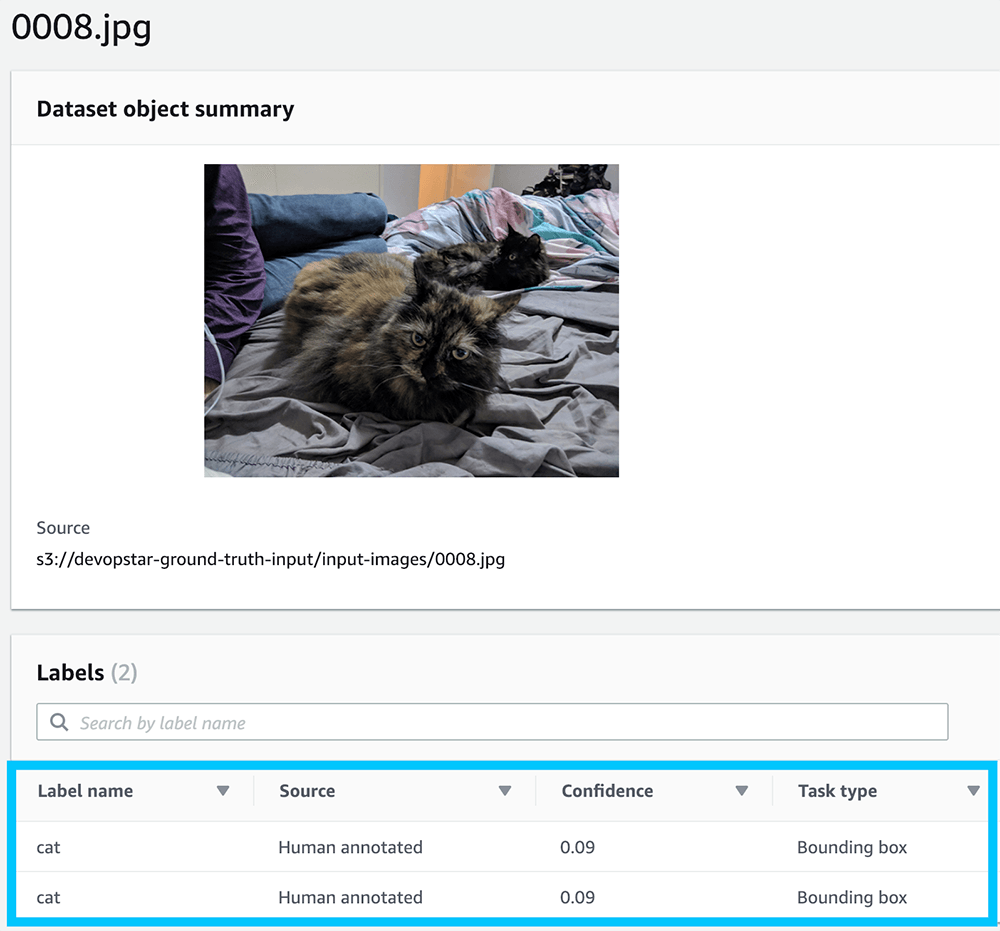
All this data is also stored in the standard format that can be injested by most of the Machine learning algorithms in SageMaker and can be seen in raw form at https://s3.amazonaws.com/devopstar-ground-truth-output/devopstar-cat-labels/manifests/output/output.manifest (obviously replace the link with your bucket / job name).
Below is an example of the output format for the image we we're just looking at above.
{
    "source-ref": "s3://devopstar-ground-truth-input/input-images/0008.jpg",
    "devopstar-cat-labels": {
        "annotations": [{
            "class_id": 0,
            "width": 343,
            "top": 126,
            "height": 252,
            "left": 113
        }, {
            "class_id": 0,
            "width": 155,
            "top": 94,
            "height": 85,
            "left": 340
        }],
        "image_size": [{
            "width": 599,
            "depth": 3,
            "height": 452
        }]
    },
    "devopstar-cat-labels-metadata": {
        "job-name": "labeling-job/devopstar-cat-labels",
        "class-map": {
            "0": "cat"
        },
        "human-annotated": "yes",
        "objects": [{
            "confidence": 0.09
        }, {
            "confidence": 0.09
        }],
        "creation-date": "2019-01-30T16:33:27.802704",
        "type": "groundtruth/object-detection"
    }
}
Clean Up
There's a number of things you can do to clean up after you are done working with Ground Truth. Unfortunately there's a couple issues with deleting things from the UI
S3 Buckets
- These can be deleted from the S3 console
SageMaker WorkForces
- Can be deleted from the Private tab under the Labeling workforces
Cognito Domain / User Pool
Open up the User Pool that was created for you and
- Delete the domain (under App integration)
- Delete the Pool (under the top level of the User Pool Settings)
IAM Role
There was also an execution role created for the two bucket you can delete
- Under Roles find one thats named something like AmazonSageMaker-ExecutionRole-XXXXXXXXXXXXXX