Practical Istio - Init & Install

Table of Contents
- Practical Istio - Introduction
- Practical Istio - Private Kubernetes Deployment
- Practical Istio - Init & Install
- Practical Istio - Ingress Gateway
- Practical Istio - Virtual Services
Introduction
In this post we’ll be coving the most exciting part! We’ll be initialising and installing Istio onto our cluster. The process has the following two parts
- istio-init - Installs CRDs (CustomResourceDefinitions) onto the cluster allowing the kubernetes API to handle new schemas that Istio talks with.
- istio - The main installation of Istio onto the cluster. This piece is in charge of deploying the various components that make up the istio service.
Setup
These steps have been scripted up for you already and are available in the istio.sh script within the t04glovern/gke-istio-bootstrap repository.
Note: The following steps assume you have followed the previous steps and have the k8s directory available in the home path of your bastion server.
Open up the istio.sh file from within the k8s/istio folder. Note the three variable we set at the top of the script
- PROJECT_ID - Set by the first parameter based in from the script (this will be the same as the one you use to deploy the resources in the previous steps.
- ISTIO_VERSION - Used to retrieve the most recent version of istio. Here we set 1.1.8 as it is the most current stable release at the time of writing. Feel free to change it based on the release logs.
- DNS_NAME - IF you do have a DNS name that you will be able to change after deployment, please put it into this field. In the example I own devopstar.com and plan on using gke.devopstar.com to point to my cluster.
- Note: If you don’t own a domain, don’t worry too much now, you’ll make use of the Virtual Hosts extension to spoof the DNS to gke.devopstar.com when the time comes.
istio-init
To init the kubernetes cluster for Istio, simply run the following:
./k8s/istio/istio.sh $PROJECT_ID init
If you’re interested in what the script is actually doing, check the commented block below
# Pull down the version of Istio defined in our version variable.
curl -L https://git.io/getLatestIstio | ISTIO_VERSION=$ISTIO_VERSION sh -

# Change into the directory of the Istio distribution.
cd istio-$ISTIO_VERSION/

# Create the istio-system namespace that resources and components that
# make up Istio will be placed into.
kubectl create namespace istio-system

# Initialise Istio, load in all the custom resource definitions.
helm template install/kubernetes/helm/istio-init \
    --name istio-init \
    --namespace istio-system | kubectl apply -f -

# We'll need to run this line a few times to confirm all the CRDs are
# loaded in before moving forward.
kubectl get crds | grep 'istio.io\|certmanager.k8s.io' | wc -l

# Credentials to access Kiali, a visualisation tool for Istio
# change admin / admin if you would like, just ensure they still
# get base64 encoded.
KIALI_USERNAME=$(echo -n 'admin' | base64)
KIALI_PASSPHRASE=$(echo -n 'admin' | base64)
A custom template for the Kiali Secret is also created with the following content
apiVersion: v1
kind: Secret
metadata:
  name: kiali
  namespace: istio-system
  labels:
    app: kiali
type: Opaque
data:
  username: $KIALI_USERNAME
  passphrase: $KIALI_PASSPHRASE
To check to make sure the istio-init task completed successfully, run the following line until you get an output value of around 53
kubectl get crds | grep 'istio.io\|certmanager.k8s.io' | wc -l
istio
To install the Istio components onto the Kubernetes cluster, run the following:
./k8s/istio/istio.sh $PROJECT_ID install
The commands that get executed behind the scenes this time can be viewed below
# Change into the istio version directory
cd istio-$ISTIO_VERSION/

# Install the Istio components along with a veriety of values
# to enable and setup some features for later
helm template install/kubernetes/helm/istio \
    --name istio \
    --set global.mtls.enabled=false \
    --set tracing.enabled=true \
    --set "kiali.dashboard.jaegerURL=http://$DNS_NAME:15032" \
    --set "kiali.dashboard.grafanaURL=http://$DNS_NAME:15031" \
    --set kiali.enabled=true \
    --set grafana.enabled=true \
    --namespace istio-system | kubectl apply -f -

# Enable Istio sidecar injection on the default namespace
kubectl label namespace default istio-injection=enabled --overwrite
Lets briefly explain what some of these settings are:
- mtls.enabled=false - Disables mutual TLS between pods in the cluster. This is something we might cover later.
- tracing.enabled=true - Installs and configures Jaeger tracing server onto the cluster. Used to give better visibility of distributed performance.
- grafana.enabled=true - Sets up Grafana dashboards and automatically configures metric visibility from prometheus (also installed by default with Istio).
- kiali.enabled=true - Sets up Kiali (along with setting the Jaeger and Grafana endpoints that will be available later on to visualise Istio metrics all in one place.
Testing
Check your Kubernetes cluster by navigating to https://console.cloud.google.com/kubernetes and clicking the Services section.
Note: If you aren’t using Google Kubernetes Engine (GKE) then simply check whatever location you would normally use to visit the cluster. This could be through the providers portal, or via the Kubernetes dashboard if that was made available to you.
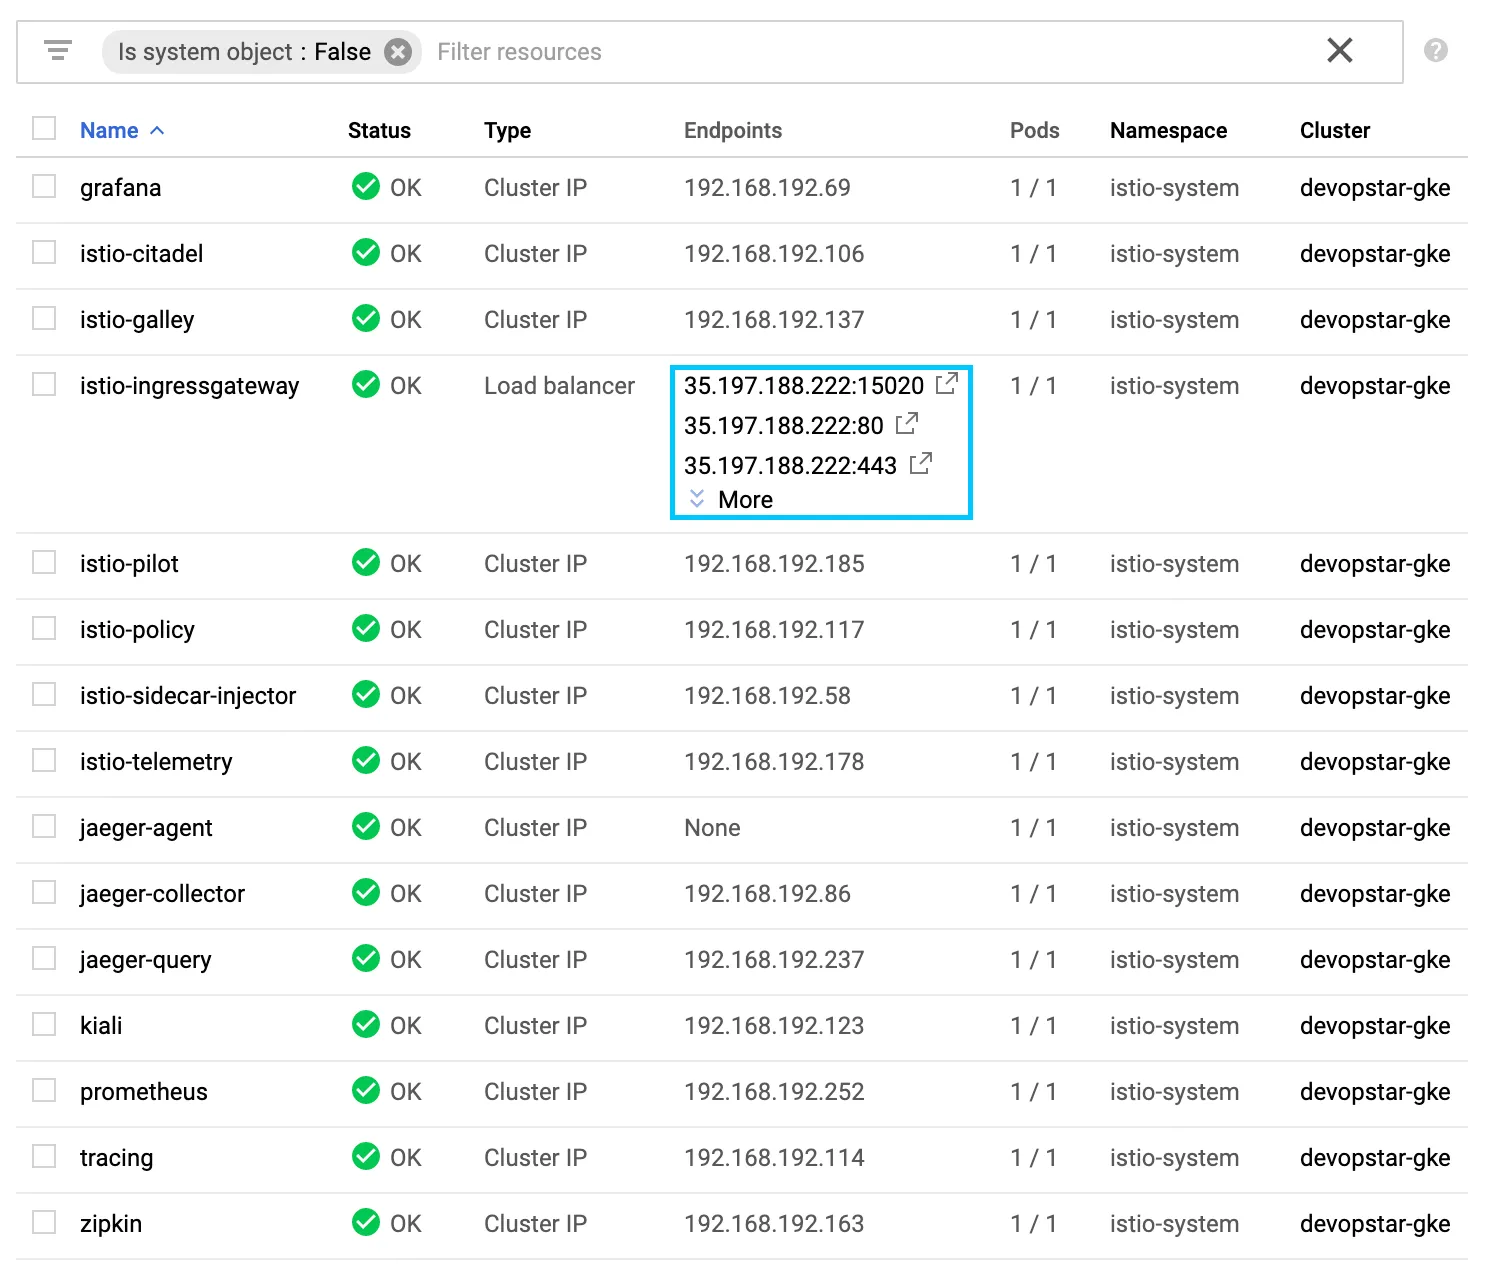
From the list of services created there should also be an ingress gateway, along with a public IP address that was created for you by your cloud provider. Grab this IP address and using the Virtual Hosts extension add the following configuration based on the IP.
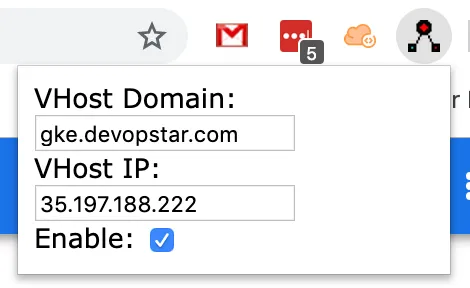
Finally, navigate to http://gke.devopstar.com:15020 and confirm you get a response similar to that shown below
app prober config does not exists for /
Whats Next?
In the next section we’ll begin looking at how to define and configure the Istio Ingress Gateway