Setting Up An OAuth 2.0 Authorizer with JumpCloud


Introduction
Note: This guide was written with the intent of being used with my other post on Federating S3 Access Grants with IAM Identity Center Trusted Identity Propagation. Some of the naming conventions and configurations may not make sense if you are not following along with that guide.
When working with AWS services, you may want to use an external identity provider (IdP) to authenticate users and grant them access to your resources.
In this guide, we will walk through setting up an OAuth 2.0 authorizer with JumpCloud to federate with AWS IAM Identity Center. This will allow you to use JumpCloud as an identity provider (IdP) to authenticate users and grant them access to AWS services.
Create a JumpCloud Account
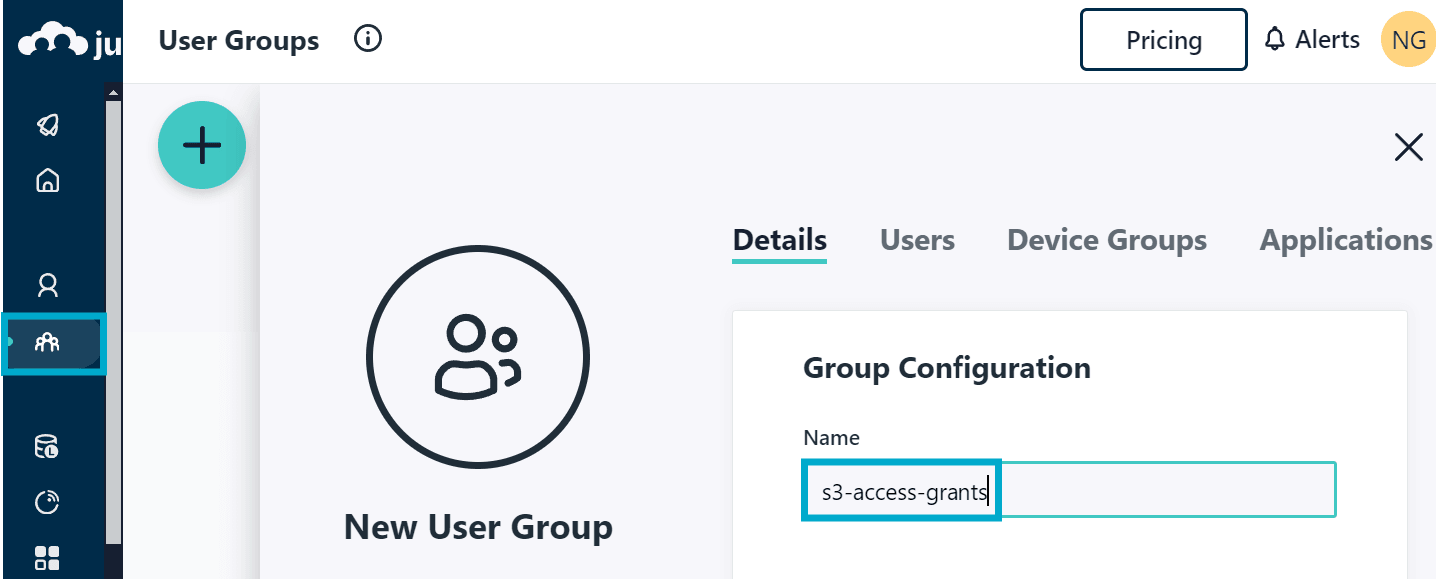
Head over to https://jumpcloud.com/ and create a free account. Once you have an account, log in and click User Groups in the left-hand menu - then create a new group called s3-access-grants.
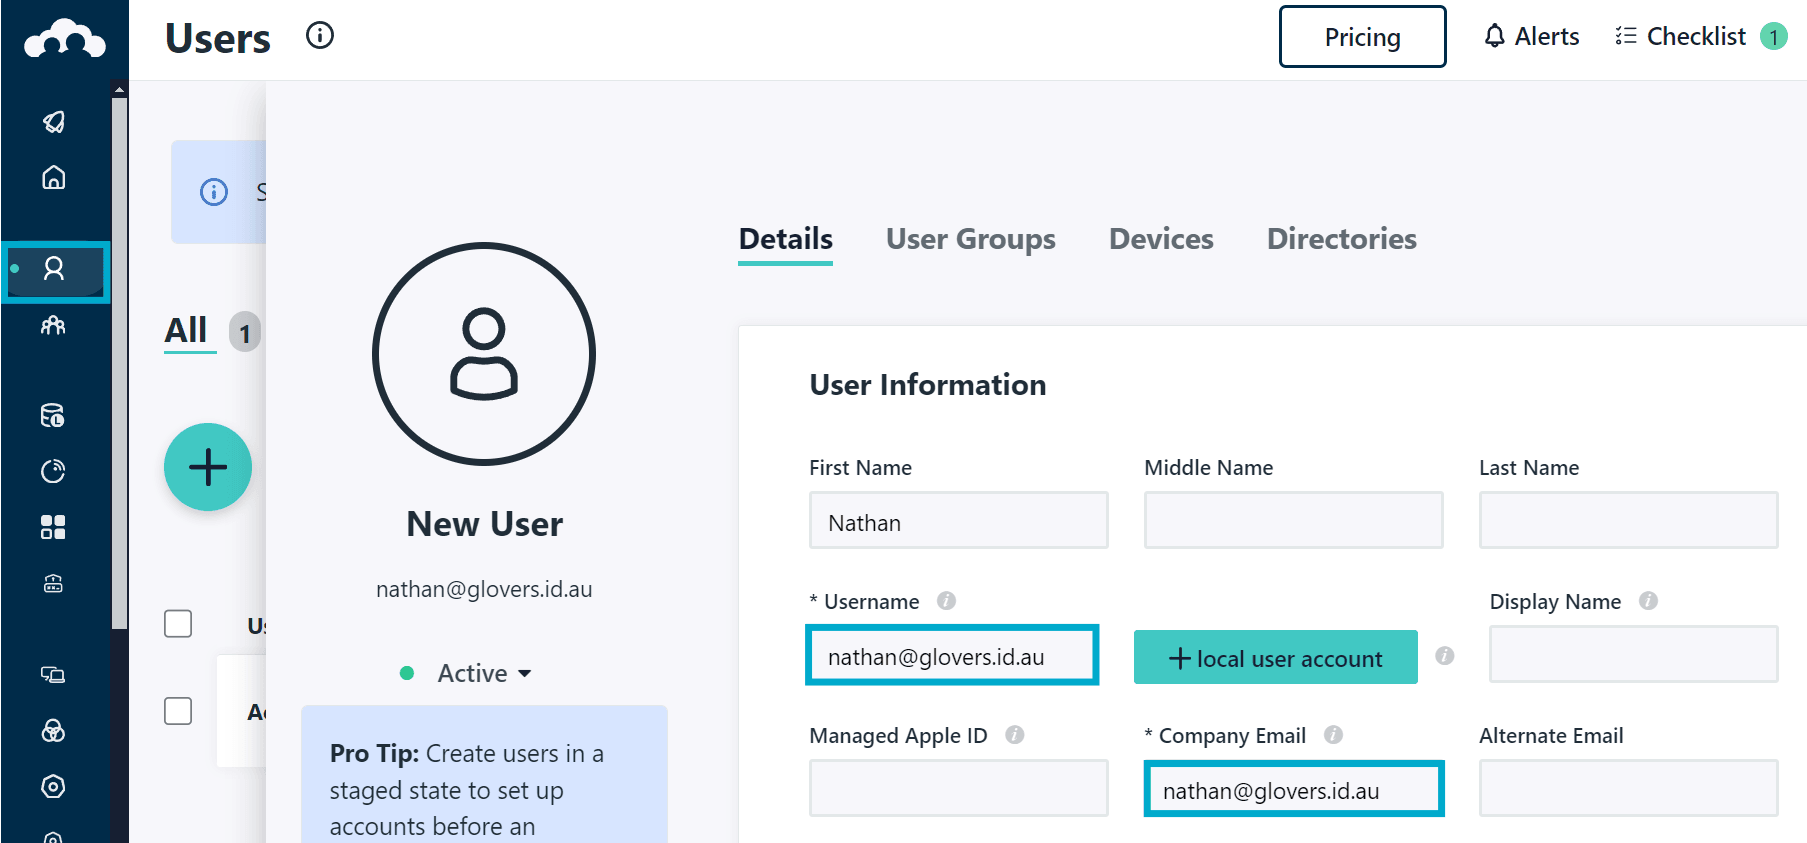
Next, choose Users in the left-hand menu and create a new user call whatever you like - making sure to set the Company Email to the email address of your user in AWS IAM Identity Center.
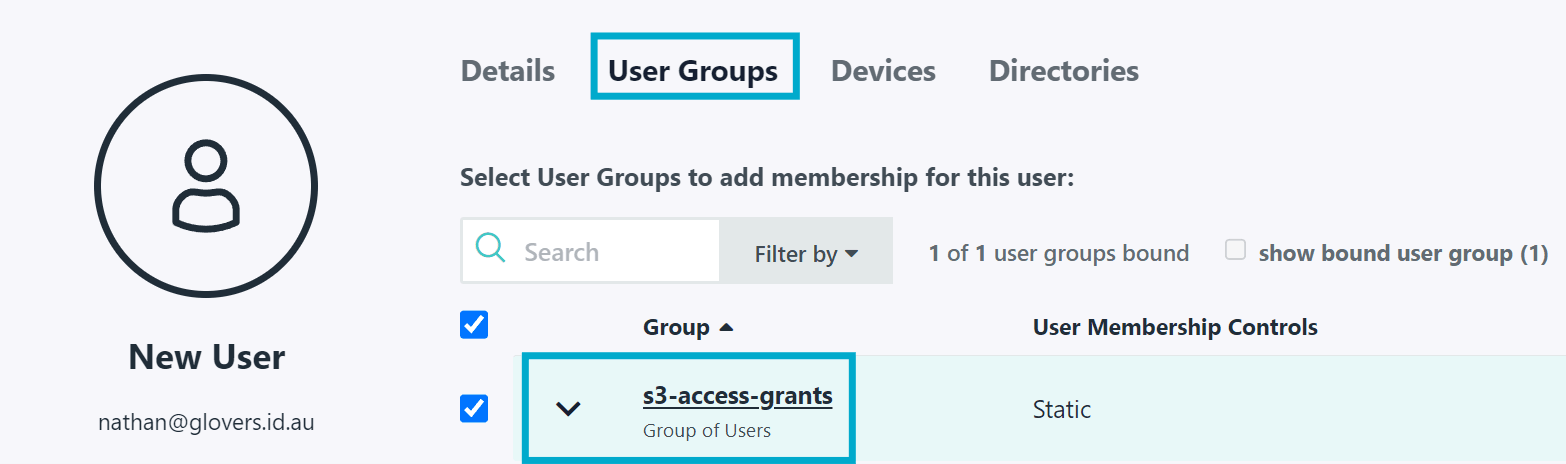
You should also add the user to the s3-access-grants group.
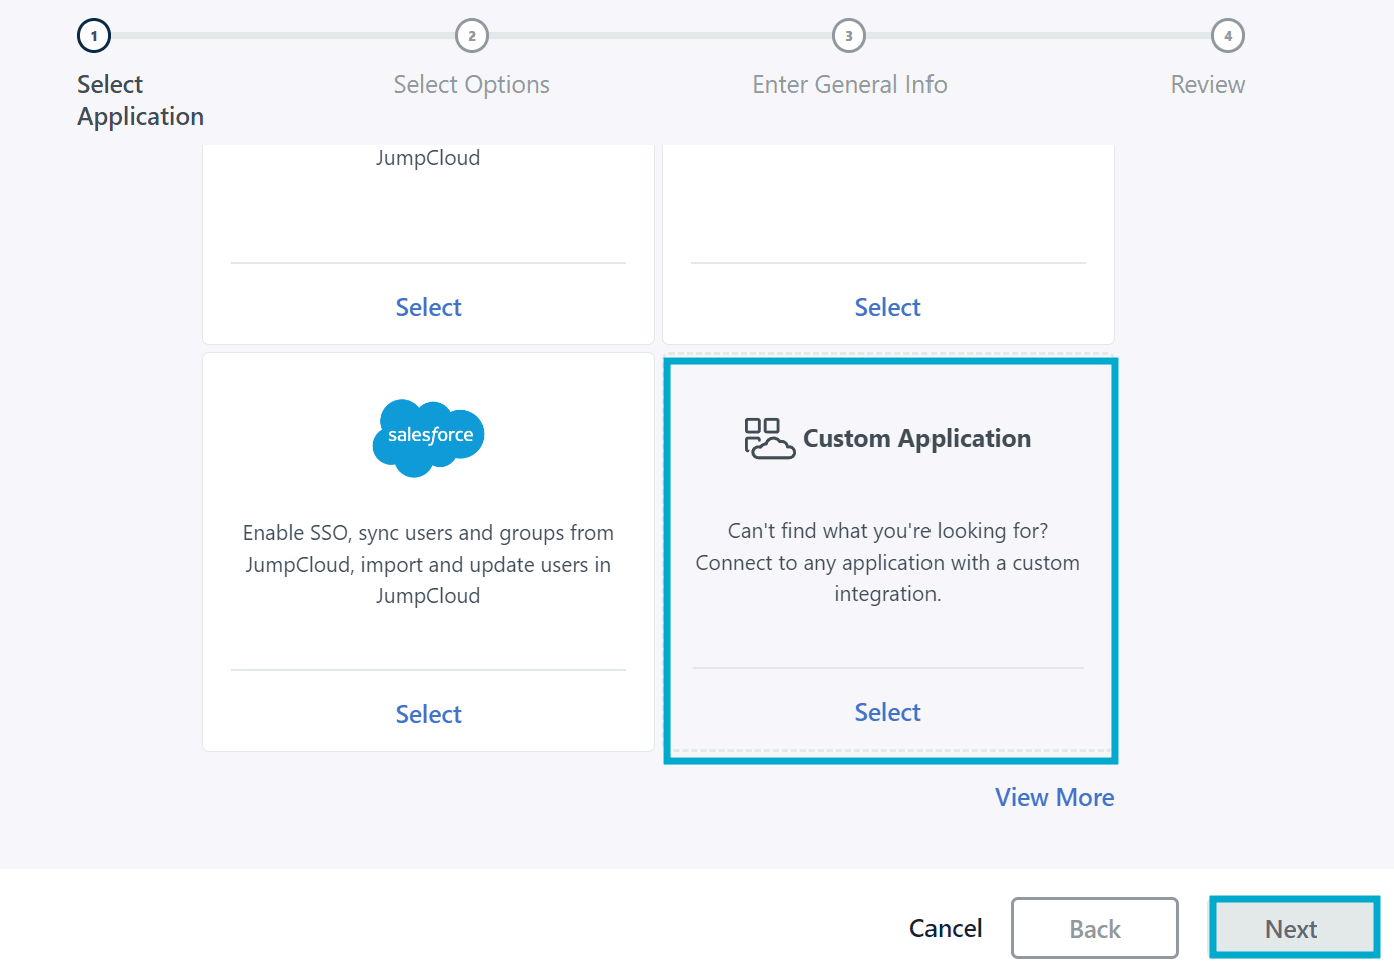
Create an OAuth 2.0 Application
Next, click Applications in the left-hand menu and create a new Custom Application
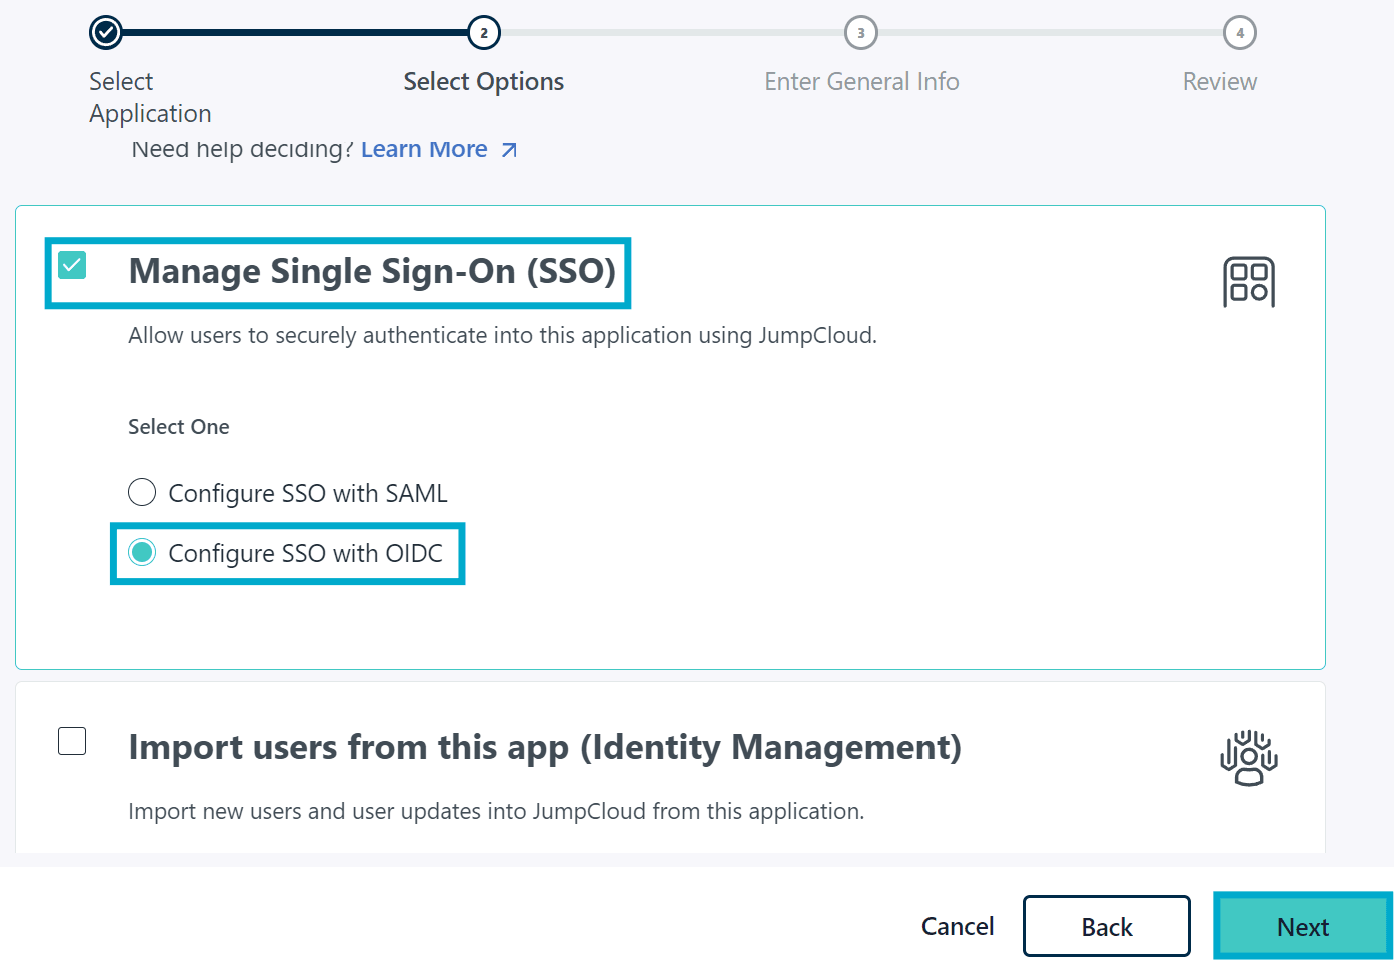
Click through and select Manage Single Sign-On (SSO) then Configure SSO with OIDC.
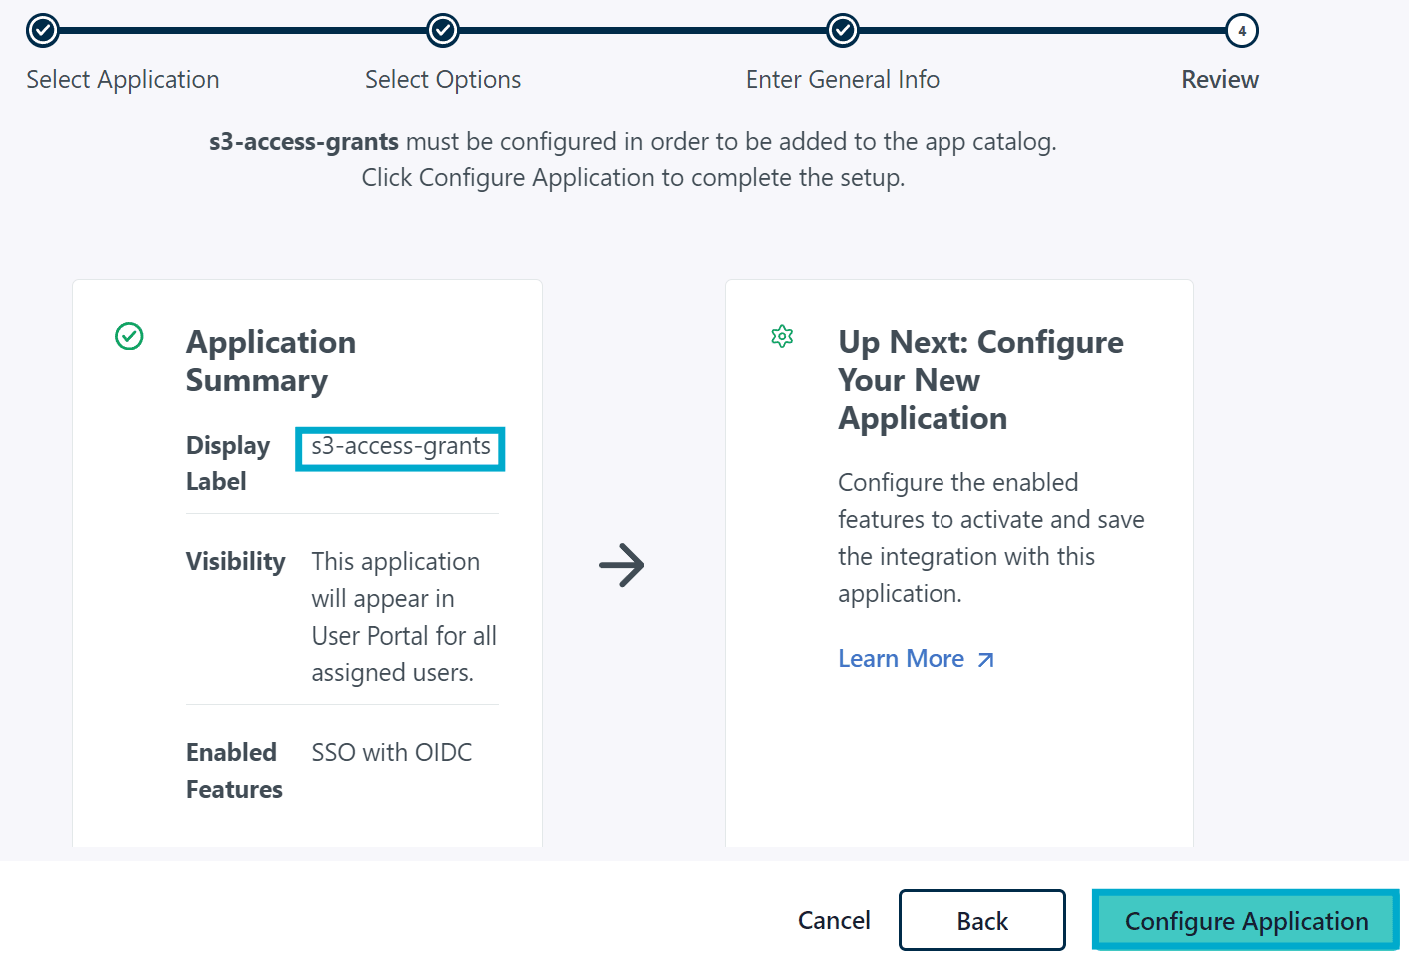
Give the application a name (e.g. s3-access-grants) and click Configure Application.
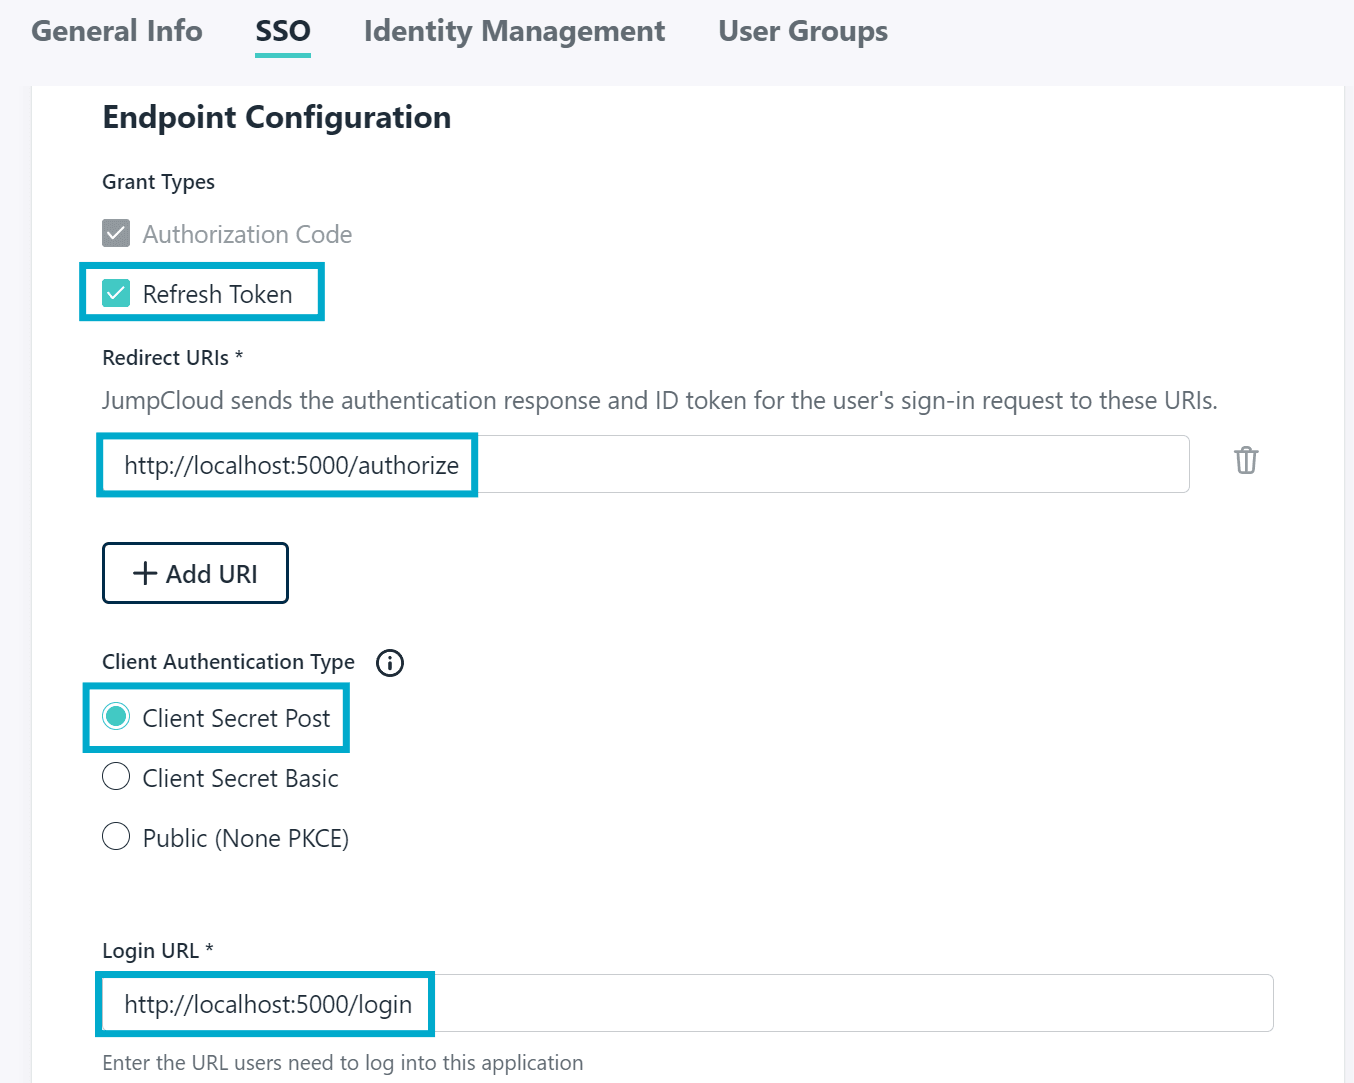
Configure the OAuth 2.0 Application
Once the application is created, click on SSO - then provide the following configuration:
- Refresh Token: ✅
- Redirect URI: http://localhost:5000/authorize
- Client Authentication Type: Client Secret Post
- Login URL: http://localhost:5000/login
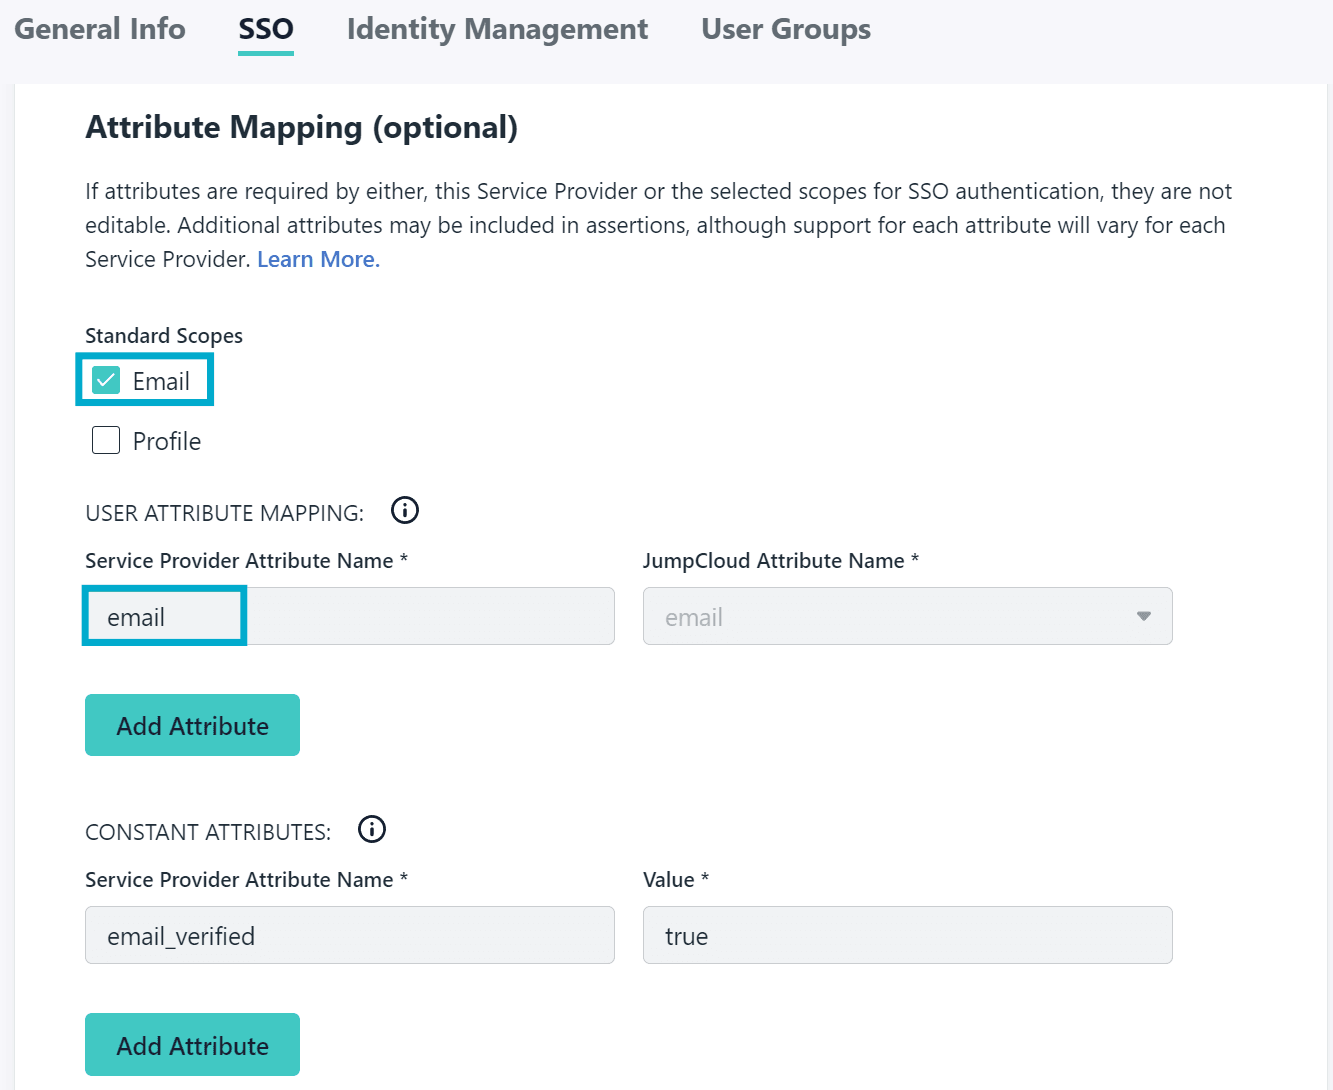
Under Attribute Mapping be sure to select Email as a scope and map it to the email claim.
Click Activate to save the configuration. You will be provided with a Client ID and Client Secret - make a note of these as they will be needed later.

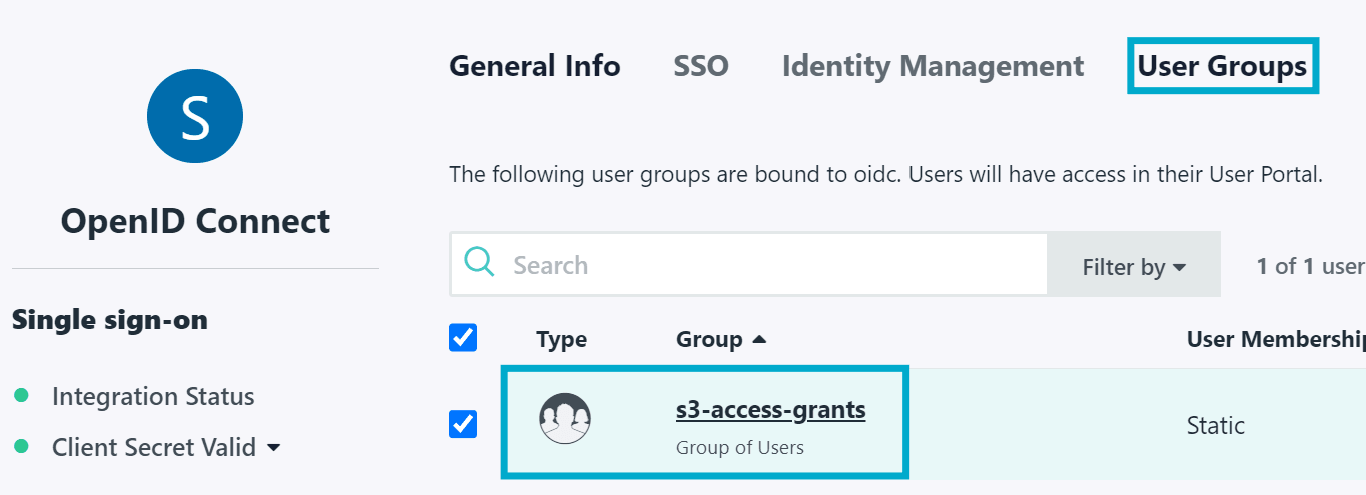
You will also need to assign the s3-access-grants group to the application.