AWS IoT - Device Creation
Welcome to the AWS IoT - Device Creation brick. In this overview we’ll go through creating a brand new AWS IoT Device along with some best practices you might want to follow including
- Create an AWS IoT Thing
- Create an AWS IoT Policy
- Attach an AWS IoT Policy to an AWS IoT Thing
The outcome of this short guide is to help you generate a simple set of certificates with appropriate permissions for use on your small IoT project.
Prerequisites
The following are prerequisites to using this guide
- AWS Account (Free Tier is acceptable)
- Note your Account ID, this can be retrieved from the Account section of your AWS account and it will look something like this:
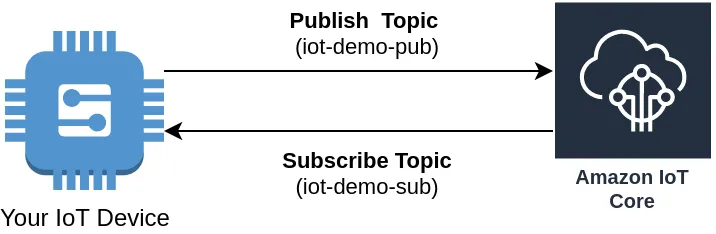
012345678912 - A device, or system that will use your IoT configuration to send/receive data.
- Two topics in mind for Sending (Pub) and Receiving (Sub) data. In this demo we’ll use the following
- iot-demo-pub - Publish topic (data being sent to AWS IoT)
- iot-demo-sub - Subscribe topic (data received from AWS IoT)
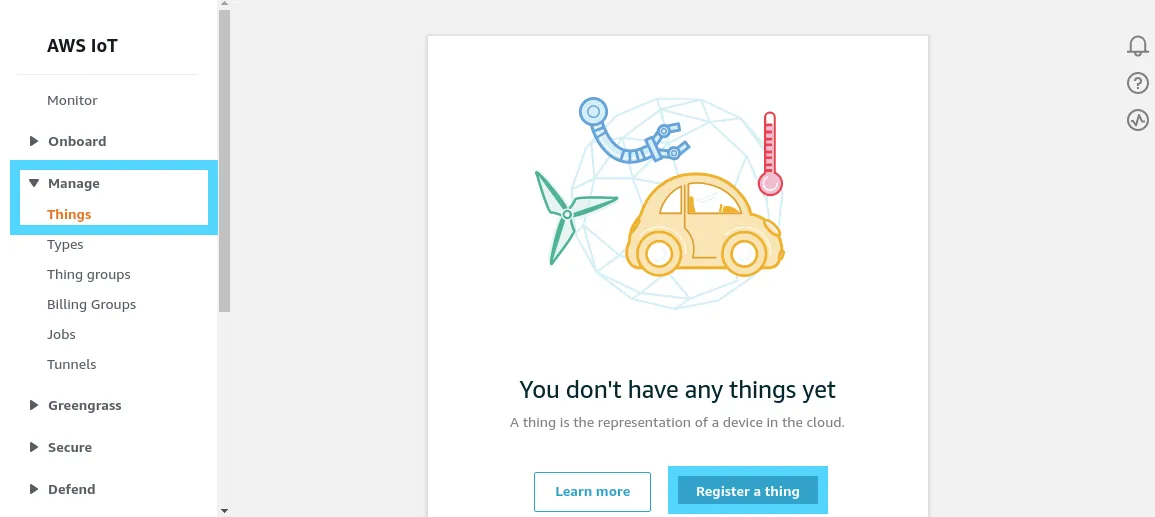
Create an AWS IoT Thing
Navigate to the AWS IoT portal and select Manage > Things, then Register a thing. This will begin the semi-guided device creation process.
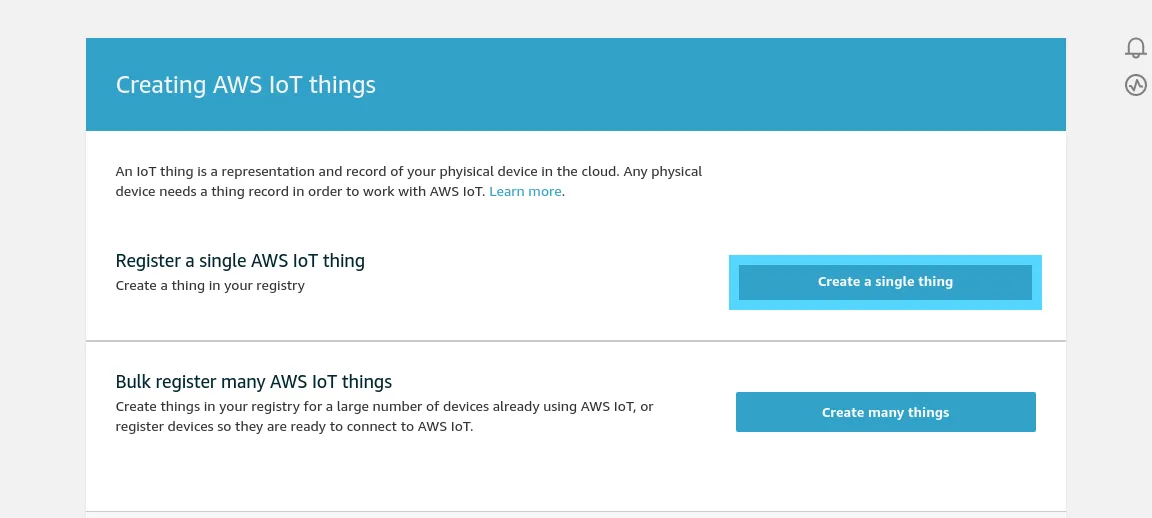
Next click Register a single AWS IoT thing. Later on in your AWS IoT adventures there might be a reason why you’d want to deploy many devices as once, however for today we’ll stick to one device.
Now for the most difficult part of any project, naming things! Give your device a unique name to your account (region).
Note: You can have devices with the same name in different accounts, or in different AWS regions, however in the same region/account they must be unique.
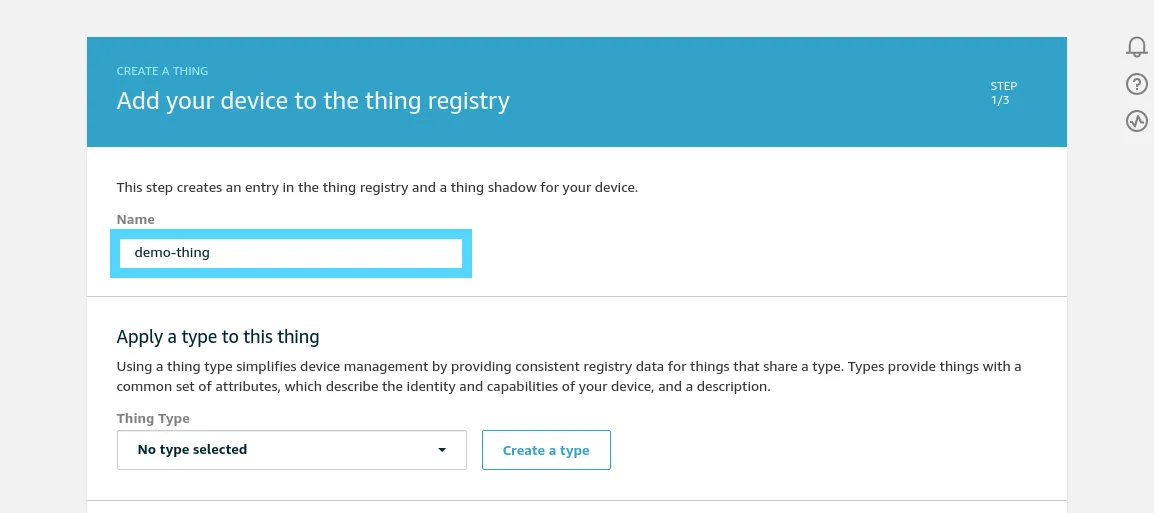
Don’t worry about any of the other settings on this device naming page, scroll to the bottom (past device types, groups and searchable attributes) and click Next.
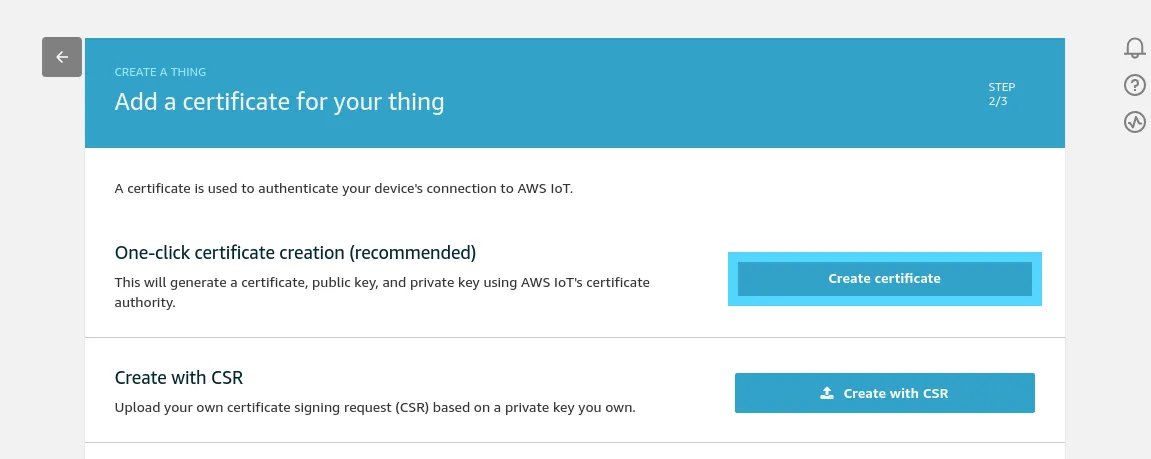
Next we need to generate some new certificates. Click the One-click certificate creation button.
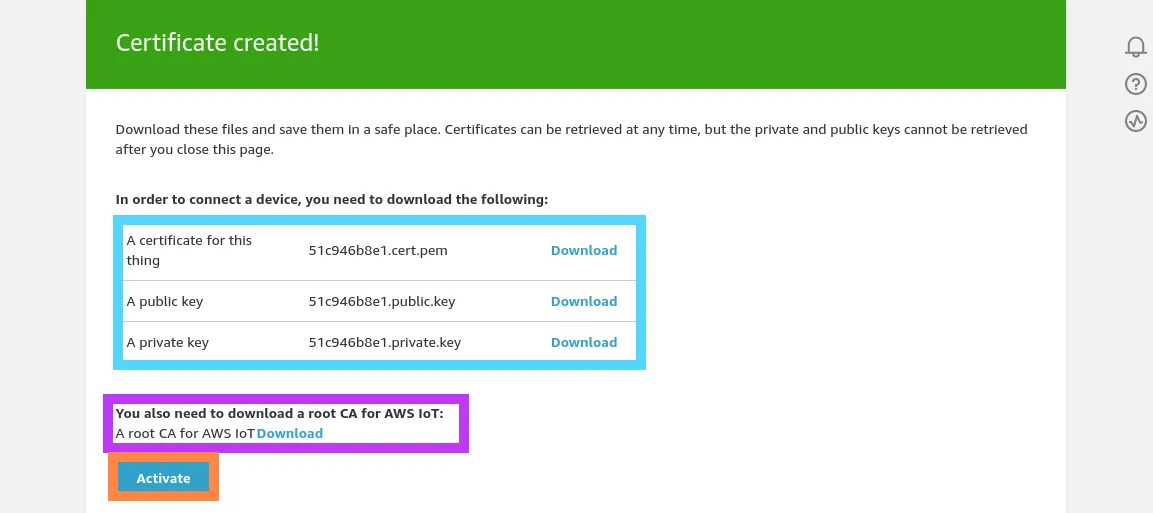
The next screen is very important, you will only get one opportunity to download the certificates required for your device to communicate.
Think of device certificates as keys to your car, only one set exist and you need to look after them if you want to be able to get in
You need to:
- Download a copy of all the 3 certificate (these are the three links with the Download buttons)
- Download the root CA for AWS IoT (this also has a Download button, but it links off to another page. You can find a link to the actual certificate here)
- Click Activate to activate the certificate
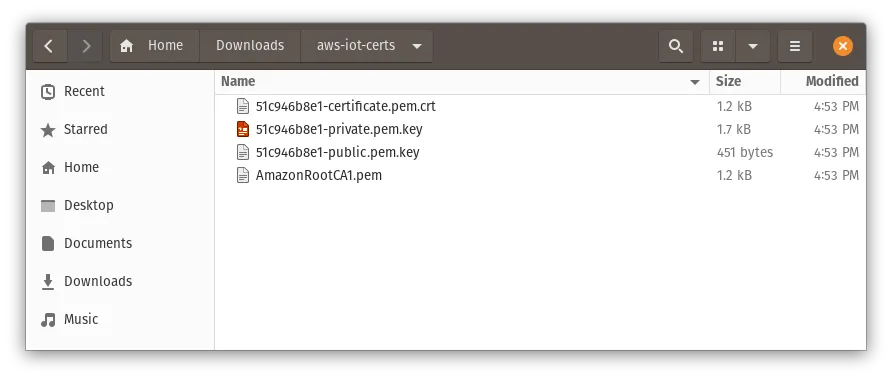
Here’s an example of a folder full of time that you should have when you are done (the names with vary for you).
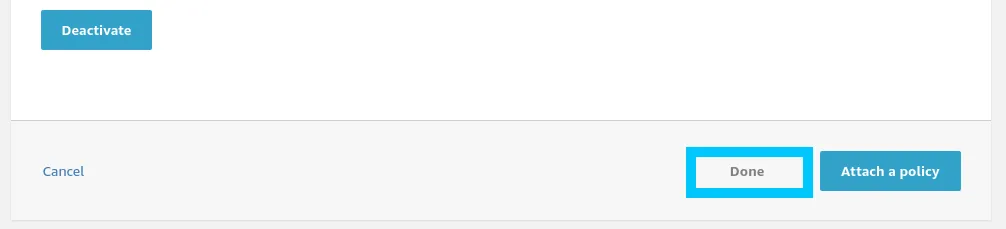
Once the certificates are saved and activated, click the Done button, as we need to create a policy before we can attach it
Create an AWS IoT Policy
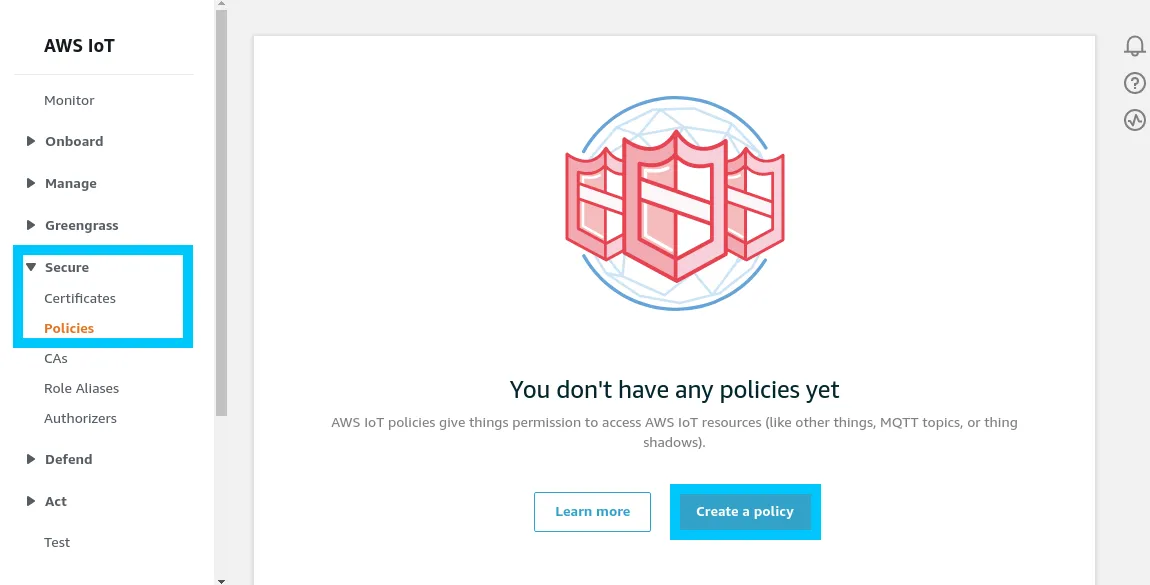
Head back to the AWS IoT main portal and navigate to Secure > Polices then click Create a policy
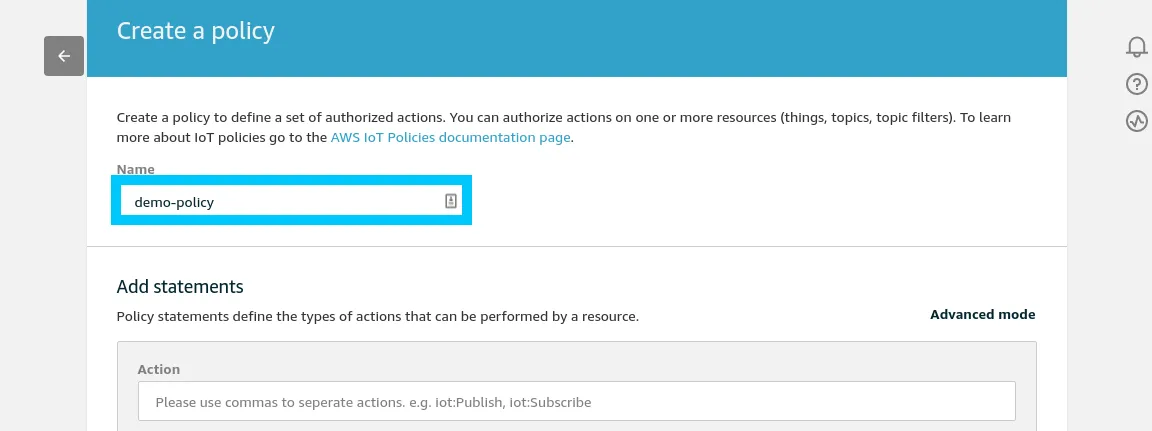
You will now be asked to name your policy and in our case we’re just going with demo-policy.
The policy name, like the device name must be unique to your account + region.
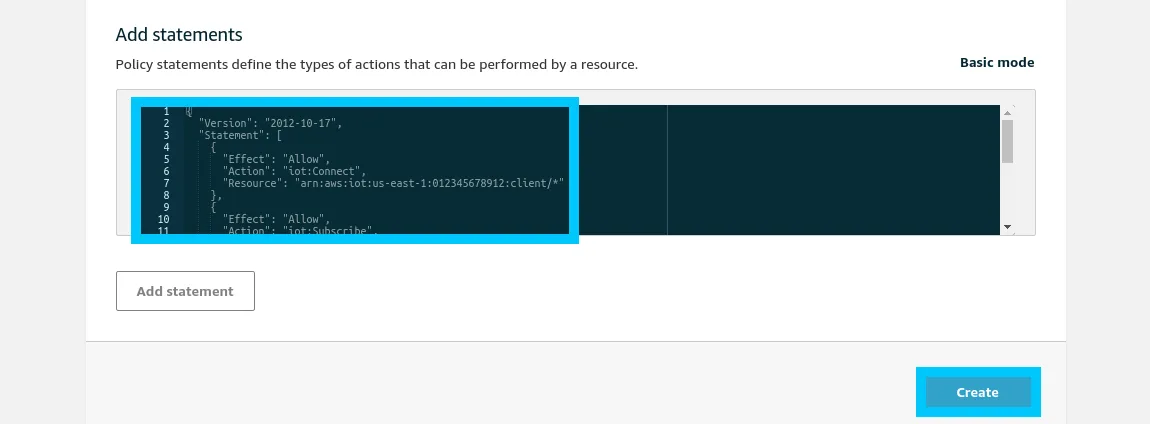
Now comes the slightly more complicated part, we want to lock down our policy so that it can only perform very specific accounts in our account. To do this, click the Advanced mode button under the Add statements box
Do you remember how we needed your AWS Account ID in the prerequisites? You need to substitute it in the policy document below (replacing the 012345678912). Here’s a list of what each statement does
- iot:Connect - Allows any client ID to connect to AWS IoT using the certificate / device we created
- iot:Subscribe - Allows your device to subscribe to the iot-demo-sub topic
- iot:Receive - Allows your device to receive data from the iot-demo-sub topic
- iot:Publish - Allows your device to publish data to the iot-demo-pub topic
Note that if you are not in the us-east-1 region you will also need to change the region as well.
{
  "Version": "2012-10-17",
  "Statement": [
    {
      "Effect": "Allow",
      "Action": "iot:Connect",
      "Resource": "arn:aws:iot:us-east-1:012345678912:client/*"
    },
    {
      "Effect": "Allow",
      "Action": "iot:Subscribe",
      "Resource": "arn:aws:iot:us-east-1:012345678912:topicfilter/iot-demo-sub"
    },
    {
      "Effect": "Allow",
      "Action": "iot:Receive",
      "Resource": "arn:aws:iot:us-east-1:012345678912:topic/iot-demo-sub"
    },
    {
      "Effect": "Allow",
      "Action": "iot:Publish",
      "Resource": "arn:aws:iot:us-east-1:012345678912:topic/iot-demo-pub"
    }
  ]
}
Once the policy statements are in, click the Create button to proceed.
Attach an AWS IoT Policy to an AWS IoT Thing
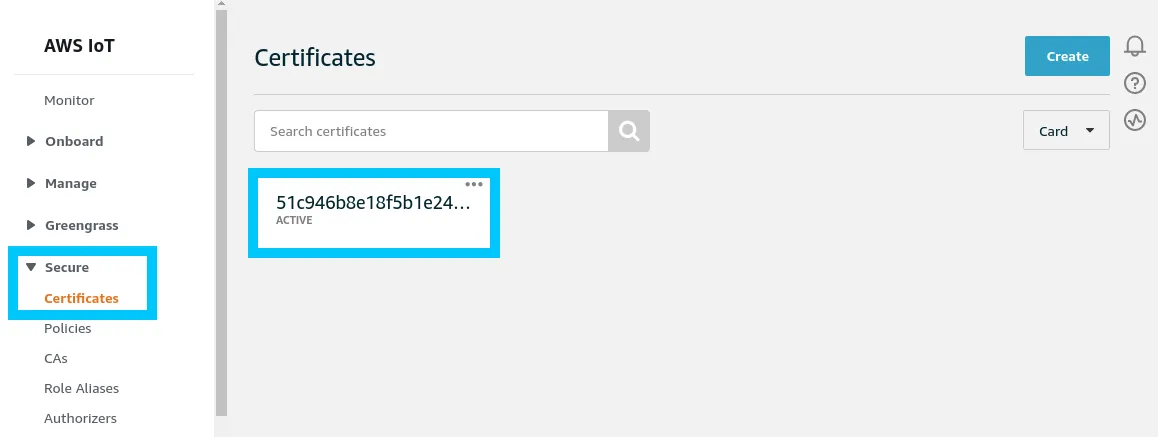
The final step is to attach the policy we just created to the device certificate we made in step one. To accomplish this, navigate to Secure > Certificates and click on the new certificate that was created for you in the first step.
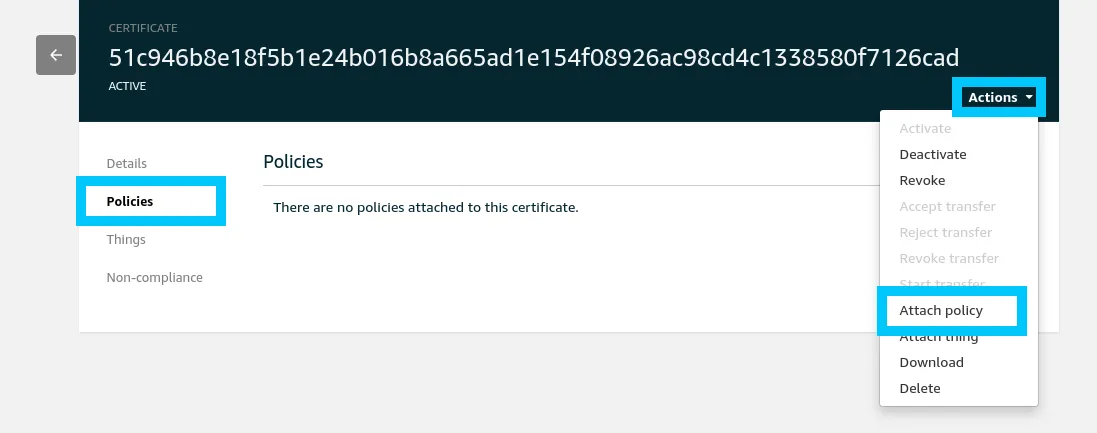
You will be presented with some details about your certificate, but for now click Policies then Actions in the top right corner. From the dropdown click Attach policy.
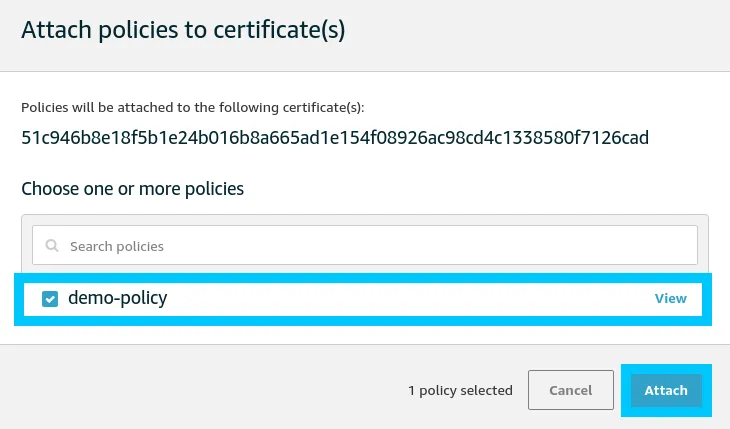
Select the policy we created in step two and then click Attach
Summary
Congratulations! You created a new AWS IoT Device that is ready for use on your next IoT project. You can use the certificates that we downloaded in step one to connect and interact with the topics we gave permission too in step two.
If you had any issues setting things up, or you have other questions, please let me know by reaching out on Twitter @nathangloverAUS or dropping a comment below.