Exporting Amazon WorkMail content programmatically
Recently I was searching the web for a quick and easy way to dump the contents of Amazon WorkMail to file and found there was a severe lack of practical examples for doing it properly.
In this short but sweet post I’m going to sort you (the reader) out, so you don’t need to go through the hoops I had to go through.
Prerequisites
- [Required] AWS Account login with a User or Role that you login with.
- If you don’t know what I mean about role, then you probably use a User account!
- [Required] Amazon WorkMail setup that you plan to export.
- You will need AWS Console access to the WorkMail organisation, and the method outlined in this post can’t be done if you only have access to the mailbox through webmail.
- [Required] AWS CLI setup and configured. Refer to this handy guide to do it.
Step 1: WorkMail Export Roles
Grab a copy of the following CloudFormation template either from below, or from the Git Gist here and save it to a file called template.yml.
AWSTemplateFormatVersion: 2010-09-09
Description: Roles and Resources required to export Amazon WorkMail content programmatically

Resources:
  WorkMailExportBucket:
    Type: AWS::S3::Bucket

  WorkMailExportBucketKey:
    Type: AWS::KMS::Key
    DeletionPolicy: Retain
    Properties:
      Description: Symmetric CMK used to encrypt exported WorkMail
      KeyPolicy:
        Version: '2012-10-17'
        Id: workmail-export-key
        Statement:
        - Sid: Enable IAM User Permissions
          Effect: Allow
          Principal:
            AWS: !Sub 'arn:aws:iam::${AWS::AccountId}:root'
          Action: kms:*
          Resource: '*'
        - Sid: Allow administration of the key
          Effect: Allow
          Principal:
            # AWS: !Sub 'arn:aws:iam::${AWS::AccountId}:role/REPLACE_ROLE_NAME_HERE'
            # AWS: !Sub 'arn:aws:iam::${AWS::AccountId}:user/REPLACE_USERNAME_HERE'
          Action:
            - kms:Create*
            - kms:Describe*
            - kms:Enable*
            - kms:List*
            - kms:Put*
            - kms:Update*
            - kms:Revoke*
            - kms:Disable*
            - kms:Get*
            - kms:Delete*
            - kms:ScheduleKeyDeletion
            - kms:CancelKeyDeletion
          Resource: '*'

  WorkMailExportRole:
    Type: AWS::IAM::Role
    Properties:
      Policies:
        - PolicyName: workmail-export
          PolicyDocument:
            Version: "2012-10-17"
            Statement:
              - Effect: Allow
                Action:
                  - s3:AbortMultipartUpload
                  - s3:PutObject
                  - s3:GetBucketPolicyStatus
                Resource:
                  - !Sub 'arn:aws:s3:::${WorkMailExportBucket}'
                  - !Sub 'arn:aws:s3:::${WorkMailExportBucket}/*'
              - Effect: Allow
                Action:
                  - kms:Decrypt
                  - kms:GenerateDataKey
                Resource:
                  - !GetAtt WorkMailExportBucketKey.Arn
                Condition:
                  StringEquals:
                    kms:ViaService: !Sub 's3.${AWS::Region}.amazonaws.com'
                  StringLike:
                    kms:EncryptionContext:aws:s3:arn: !Sub 'arn:aws:s3:::${WorkMailExportBucket}/*'
      AssumeRolePolicyDocument:
        Version: "2012-10-17"
        Statement:
          - Effect: Allow
            Principal:
              Service: export.workmail.amazonaws.com
            Action: sts:AssumeRole
            Condition:
              StringEquals:
                sts:ExternalId: !Ref AWS::AccountId

Outputs:
  WorkMailBucket:
    Description: Bucket where Amazon WorkMail emails are exported to
    Value: !Ref WorkMailExportBucket

  WorkMailKMSKeyArn:
    Description: ARN of the KMS key used to encrypt exported WorkMail
    Value: !GetAtt WorkMailExportBucketKey.Arn

  WorkMailRoleArn:
    Description: ARN of the IAM role used to export WorkMail
    Value: !GetAtt WorkMailExportRole.Arn
Open up the template.yml file in your favourite text/code editor as we’re going to be making a small change to it to that it’s suitable for your usecase.
Uncomment one of the following two lines and replace REPLACE_ROLE_NAME_HERE or REPLACE_USERNAME_HERE with either:
- The username of your user
- The role you use to login with AWS with.
# AWS: !Sub 'arn:aws:iam::${AWS::AccountId}:role/REPLACE_ROLE_NAME_HERE'
# AWS: !Sub 'arn:aws:iam::${AWS::AccountId}:user/REPLACE_USERNAME_HERE'
For example if my username was nathan, I would uncomment the user line so it looks like the following
- Sid: Allow administration of the key
  Effect: Allow
  Principal:
    # AWS: !Sub 'arn:aws:iam::${AWS::AccountId}:role/REPLACE_ROLE_NAME_HERE'
    AWS: !Sub 'arn:aws:iam::${AWS::AccountId}:user/nathan'
However, if perhaps I login to AWS using a role called Administrators, then I would replace the role like so.
Note that anyone that shares this role with you will also have permissions to download the WorkMail emails once extracted
- Sid: Allow administration of the key
  Effect: Allow
  Principal:
    AWS: !Sub 'arn:aws:iam::${AWS::AccountId}:role/Adminstrators'
    # AWS: !Sub 'arn:aws:iam::${AWS::AccountId}:user/REPLACE_USERNAME_HERE'
With the template correctly edited, open up a terminal with access to the aws cli, and run the following command to deploy the template.
Note, you should deploy this template into the same region where you Amazon WorkMail is deployed. Head to the WorkMail console to verify where you organisation is deployed: https://console.aws.amazon.com/workmail/v2/home. In my case it’s
us-east-1.
aws cloudformation deploy \
  --template-file template.yml \
  --stack-name workmail-export \
  --region us-east-1 \
  --capabilities CAPABILITY_NAMED_IAM
Once the deploy has completed, retrieve the output values from the CloudFormation stack by running the following:
aws cloudformation describe-stacks \
  --stack-name workmail-export \
  --region us-east-1 \
  --query "Stacks[0].Outputs"
# [
#   {
#     "OutputKey": "WorkMailBucket",
#     "OutputValue": "workmail-export-workmailexportbucket-1235qxlijj2mt",
#     "Description": "Bucket where Amazon WorkMail emails are exported to"
#   },
#   {
#     "OutputKey": "WorkMailRoleArn",
#     "OutputValue": "arn:aws:iam::01234567890:role/workmail-export-WorkMailExportRole-WRZX3S4WQPZP",
#     "Description": "ARN of the IAM role used to export WorkMail"
#   },
#   {
#     "OutputKey": "WorkMailKMSKeyArn",
#     "OutputValue": "arn:aws:kms:us-east-1:01234567890:key/xxxxxxxx-xxxx-xxxx-xxxx-ce62c595ffba",
#     "Description": "ARN of the KMS key used to encrypt exported WorkMail"
#   }
# ]
Keep these values in mind as you will need them for the next step.
Step 2: Running WorkMail Export
To run the WorkMail export, the following command should be run in a terminal with access to the aws cli.
Replace the values in each export statement with the outputs from the previous step (the bucket name, the KMS key ARN and the IAM role ARN).
export WorkMailExportBucketKey_arn="arn:aws:kms:us-east-1:01234567890:key/xxxxxxxx-xxxx-xxxx-xxxx-ce62c595ffba"
export WorkMailExportRole_arn="arn:aws:iam::01234567890:role/workmail-export-WorkMailExportRole-WRZX3S4WQPZP"
export WorkMailExportBucket_name="workmail-export-workmailexportbucket-1235qxlijj2mt"
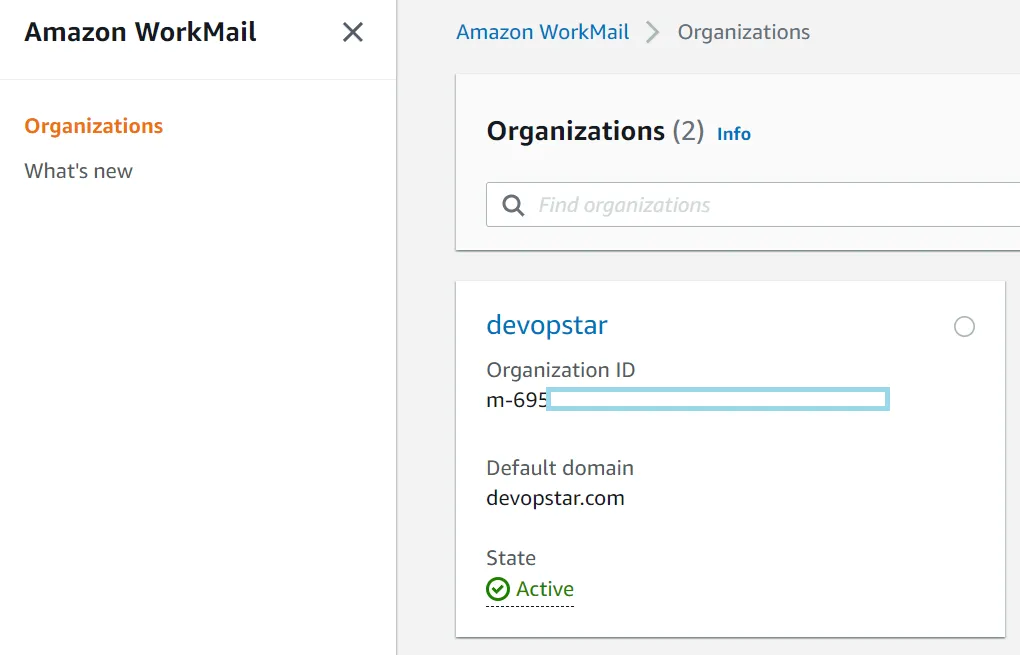
Then navigate to the Amazon WorkMail console and retrieve your Organisation ID.
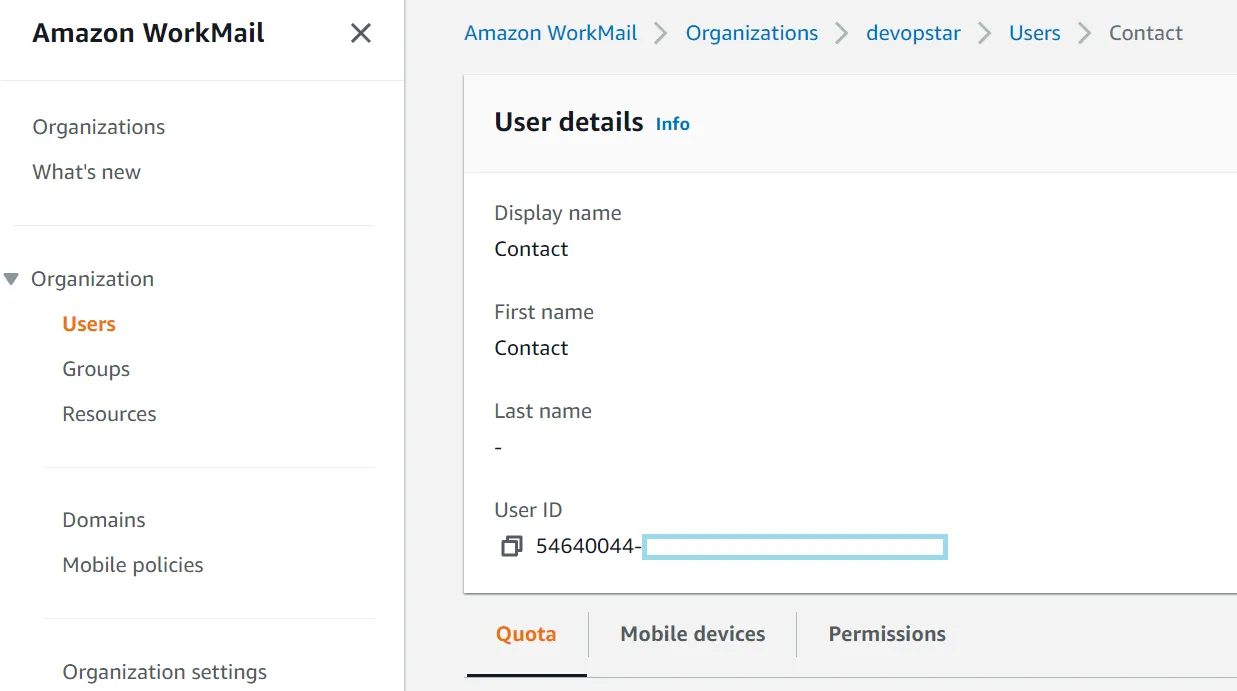
And the User ID of the mailbox you want to export.
Export both of these values in the CLI as well by running the following commands:
export WORKMAIL_ORG_ID="m-695xxxxxxxxxxxxxxxxxxxxxxxxxxx"
export WORKMAIL_USER_ID="54640044-xxxx-xxxx-xxxx-xxxxxxxxxxxx"
Finally, run the mailbox export job with the following command:
aws workmail start-mailbox-export-job \
  --organization-id $WORKMAIL_ORG_ID \
  --entity-id $WORKMAIL_USER_ID \
  --kms-key-arn $WorkMailExportBucketKey_arn \
  --role-arn $WorkMailExportRole_arn \
  --s3-bucket-name $WorkMailExportBucket_name \
  --s3-prefix export
You can check the status of the job by running the commands below (passing the Job ID from the first command to the second):
aws workmail list-mailbox-export-jobs \
  --organization-id $WORKMAIL_ORG_ID

aws workmail describe-mailbox-export-job \
  --organization-id $WORKMAIL_ORG_ID \
  --job-id $JOB_ID_FROM_ABOVE
Step 3: Download the Email Files
The final step is the easiest, you just need to navigate to the S3 console and download the files from the newly created bucket (the one specified in the WorkMailBucket output from the CloudFomration stack)
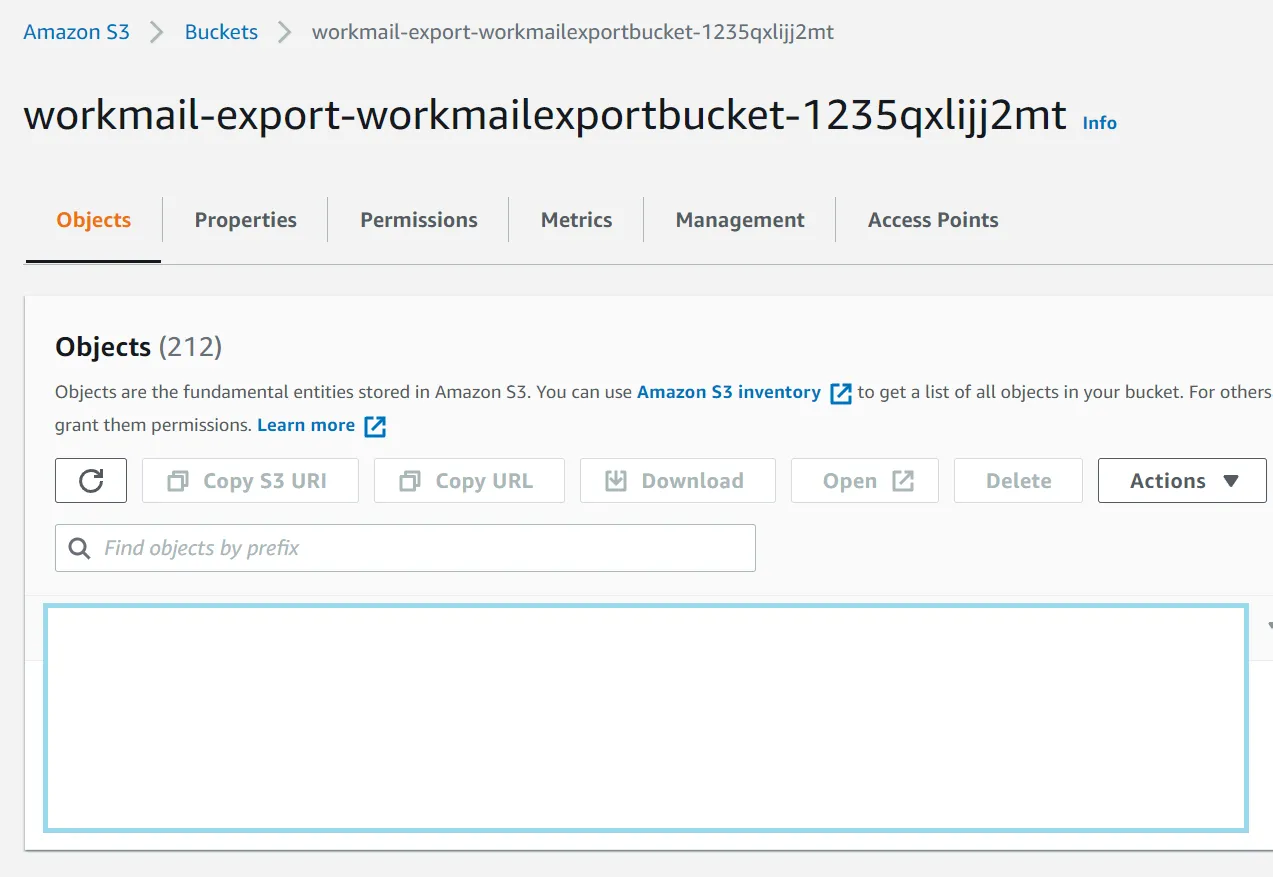
There should be a zip file in the bucket containing all the raw email files from the User/Group specified in the export job above
Step 4: Clean Up
To start with you will have to delete all the files in the S3 bucket created above by hand. You can do this from the S3 console
Then once that is complete, remove all the cloudformation resources we just created by running the following command:
aws cloudformation delete-stack \
  --stack-name workmail-export \
  --region us-east-1
You will also need to disable and schedule a delete of the KMS key that was used for the export
aws kms disable-key \
  --key-id $WorkMailExportBucketKey_arn

aws kms schedule-key-deletion \
  --key-id $WorkMailExportBucketKey_arn \
  --pending-window-in-days 7
Summary
Amazon WorkMail is a simple service that does the job, however its full functionality is not exposed in the AWS console. Hopefully this guide has been helpful to you in harnessing the power of Amazon WorkMail programatically.
I’m interested to hear how the export went for you and if you ran into any problems. hit me up on Twitter @nathangloverAUS with suggestions or questions.