Amplify AppSync - AWS X-Ray Integration


AWS AppSync is an AWS Service that simplifies development by exposing a flexible GraphQL api that can front a variety of backend data sources.
This week a powerful service called AWS X-Ray was integrated natively into AppSync that gives customers the ability to trace requests through their stack.
In this post we will very briefly enable this service on a sample AppSync-backed app using Amplify Framework to demonstrate its power.
Sample Project
To help get started with AppSync we will be using Amplify Framework; mainly due to its very low barrier to entry and overall flexibility for creating application stacks.
NOTE: I've provided a complete version of the project on t04glovern/amplify-xray-demo
To get started, install the Amplify CLI and configure it for use on your system. This can be achieved with the following commands
npm install -g @aws-amplify/cli
amplify configure
Although not required we will be using a React app to front our AppSync API. Run the following commands to setup a brand new React project with Amplify dependencies pre-installed.
# Create React App
npx create-react-app amplify-xray-demo && cd amplify-xray-demo/
npm install aws-amplify aws-amplify-react
Amplify Init
Now we're going to initialize a new Amplify app within the context of our React app. This is done by running amplify init and then selecting the options based on your requirements. Below is a list of options I selected
amplify init- Enter a name for the project: amplify-xray-demo
- Enter a name for the environment: dev
- Choose your default editor: Visual Studio Code
- Choose the type of app that you're building: javascript
- Please tell us about your project: whatever you want
- What javascript framework are you using: react
- Source Directory Path: src
- Distribution Directory Path: build
- Build Command: npm run-script build
- Start Command: npm run-script start
Amplify Add Api
With the project initialized it's time to add a new AppSync API to the project. This is done by running amplify add api and then selecting the options below:
amplify add api- Please select from one of the below-mentioned services: GraphQL
- Provide API name: todo
- Choose the default authorization type for the API: API key
- Enter a description for the API key: whatever you want
- After how many days from now the API key should expire (1-365): 7
- Do you want to configure advanced settings for the GraphQL API: No, I am done.
- Do you have an annotated GraphQL schema?: No
- Do you want a guided schema creation?: Yes
- What best describes your project: Single object with fields (e.g., “Todo” with ID, name, description)
- Do you want to edit the schema now?: Yes
You will be prompted to edit the schema file, don't worry about editing the file; just press enter to continue on the terminal. The schema will look like the example below
type Todo @model {
  id: ID!
  name: String!
  description: String
}
Amplify Push
Finally, we're good to push the environment and expose our API! This is done by running amplify push. You with be asked a couple of questions that can be answered as follows
amplify push
# Current Environment: dev

# | Category | Resource name | Operation | Provider plugin   |
# | -------- | ------------- | --------- | ----------------- |
# | Api | todo | Create | awscloudformation |- Are you sure you want to continue?: Yes
- Do you want to generate code for your newly created GraphQL API: Yes
- Choose the code generation language target: javascript
- Enter the file name pattern of graphql queries, mutations and subscriptions: src/graphql/**/*.js
- Do you want to generate/update all possible GraphQL operations - queries, mutations, and subscriptions: Yes
- Enter maximum statement depth [increase from default if your schema is deeply nested]: 2
React App Code
Once the app finishes pushing you'll have a lot more files in the project folder. specifically, there is a file called aws-exports with all the API configurations pre-populated for you. With this in mind, we can build out an extremely simple notes app (heavily based on the example for React on the Amplify website).
Change the code in src/App.js to be the following:
import React, { Component }  from 'react';
import Amplify, { API, graphqlOperation } from 'aws-amplify';
import awsconfig from './aws-exports';

Amplify.configure(awsconfig);

const listTodos = `query listTodos {
  listTodos{
    items{
      id
      name
      description
    }
  }
}`;

const addTodo = `mutation createTodo($name:String! $description: String!) {
  createTodo(input:{
    name:$name
    description:$description
  }){
    id
    name
    description
  }
}`;

class App extends Component {

  todoMutation = async () => {
    const todoDetails = {
      name: 'Party tonight!',
      description: 'Amplify CLI rocks!'
    };

    const newTodo = await API.graphql(graphqlOperation(addTodo, todoDetails));
    alert(JSON.stringify(newTodo));
  };

  listQuery = async () => {
    console.log('listing todos');
    const allTodos = await API.graphql(graphqlOperation(listTodos));
    alert(JSON.stringify(allTodos));
  };

  render() {
    return (
      <div className="App">
        <button onClick={this.listQuery}>GraphQL Query</button>
        <button onClick={this.todoMutation}>GraphQL Mutation</button>
      </div>
    );
  }
}

export default App;
You can test that the app is working correctly by running the following commands to start a local server
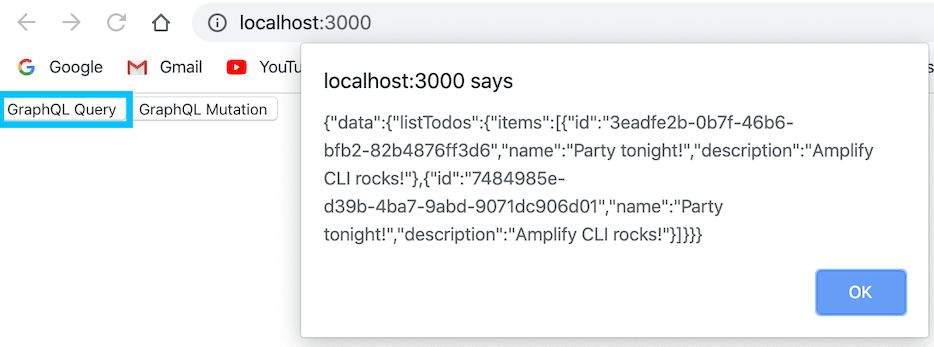
npm install && npm run startThen open the browser on http://localhost:3000/ to view the results. For this example it's extremely simple; as we're just demonstrating how the X-Ray integration works.
If you'd like to see a far more interesting sample, check out my post Building a Serverless Resume with AWS Amplify.
Enabling X-Ray
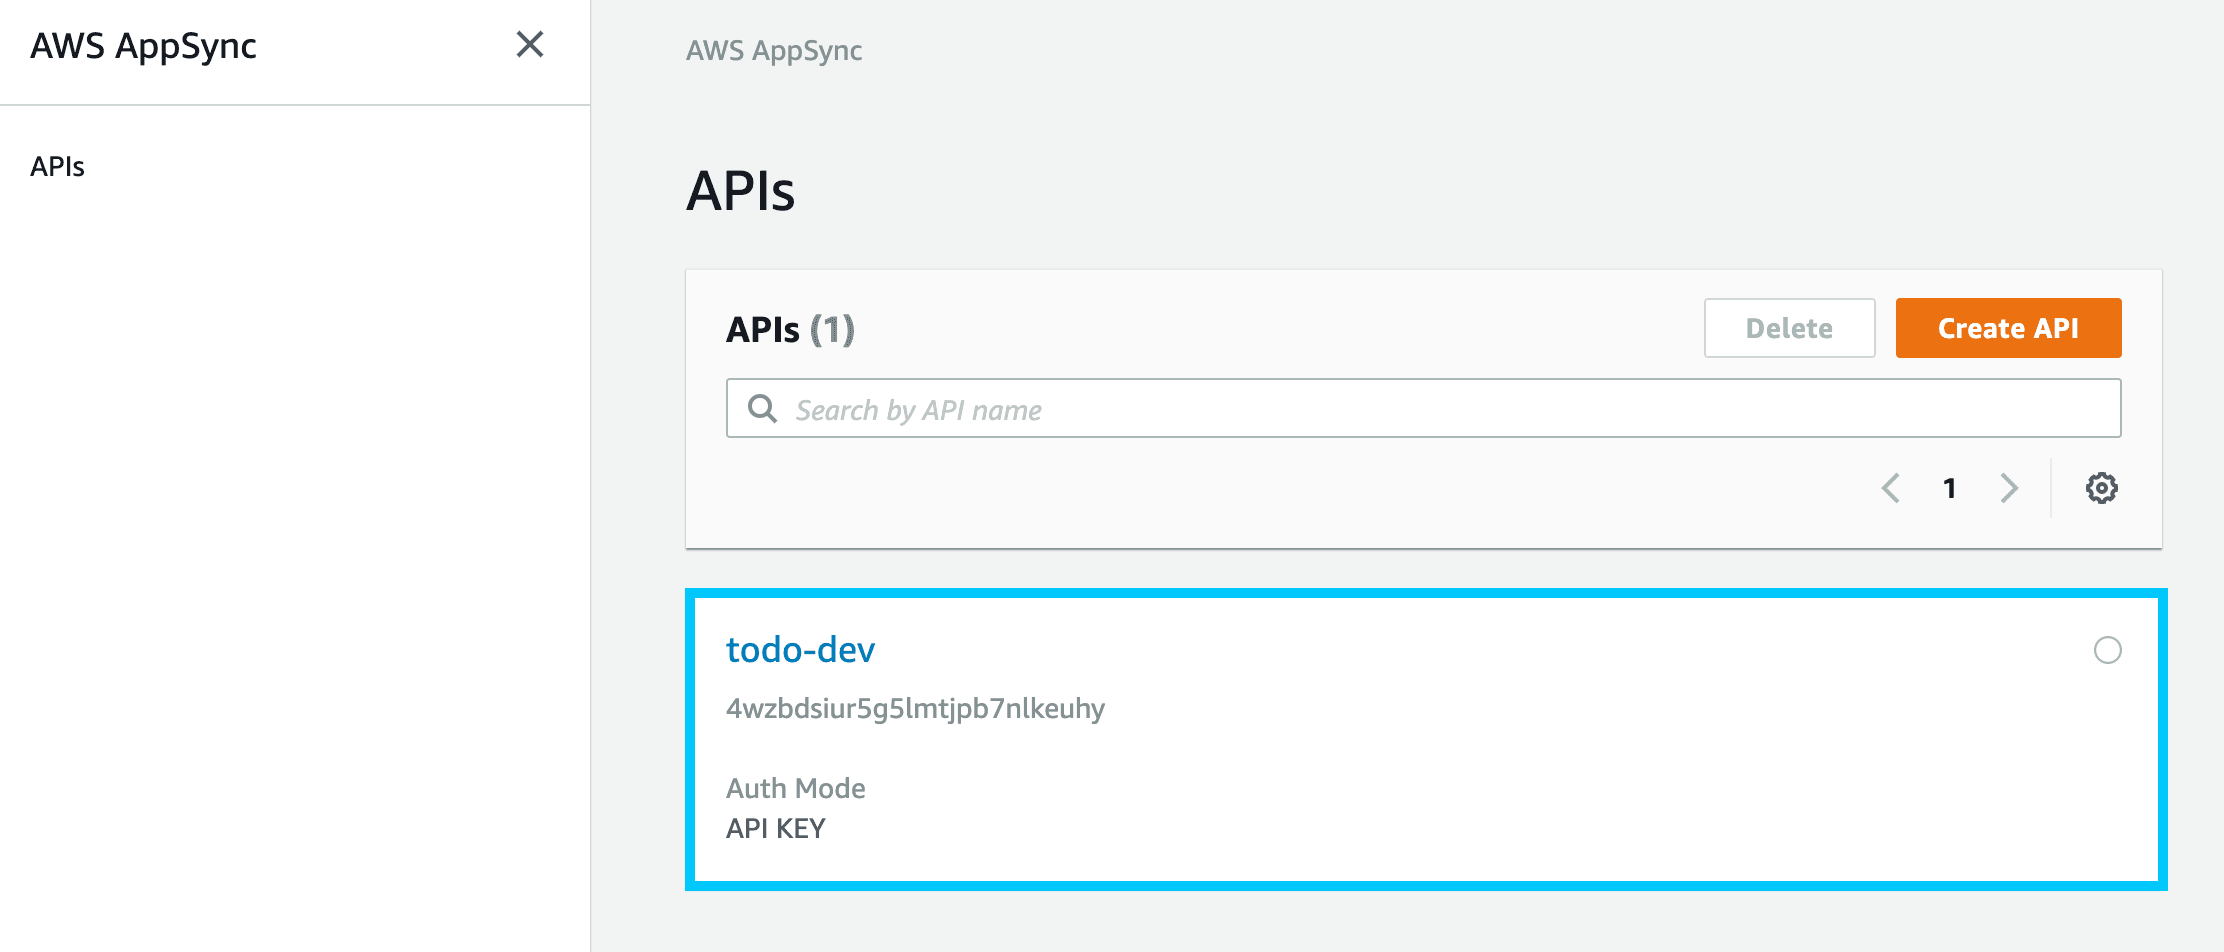
Let's get down to the main course and enable X-Ray support on our AppSync API. To do this, currently, we need to navigate to the AppSync Console and select our todo-dev api from the list.
Hopefully in the future, we'll see X-Ray supported by default, or at the very least configurable from Amplify directly.
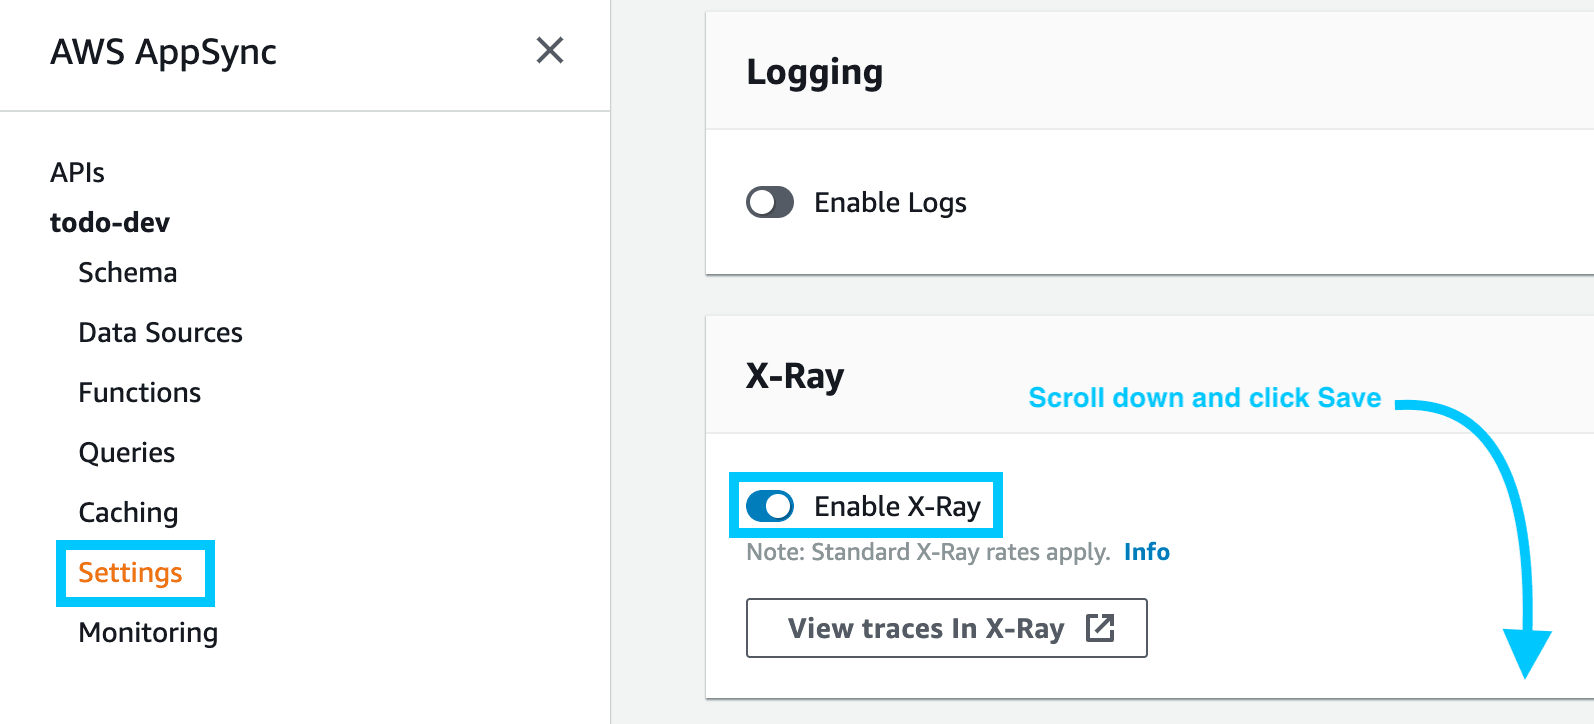
Next, select the Settings option on the left and enable X-Ray tracing (about halfway down the page). Make sure you click Save before navigating away!
Testing X-Ray
To test our X-Ray tracing we need to generate some requests through the API.
To do this simply launch the web server locally (run
npm run startif it isn't already started).
Then make some sample requests by clicking GraphQL Mutation and clicking away the alert that pops up. Feel free to do this a couple of times to generate a couple of traces.

Then click the GraphQL Query button to pull back a list of items stored in the TODO app. Again, click away the alert and query several times to generate some sample traces.
Finally! The fun part, is we navigate to the AWS X-Ray console and select Traces on the left. You will see a list of traces in the bottom panel, each can be identified by a UUID.
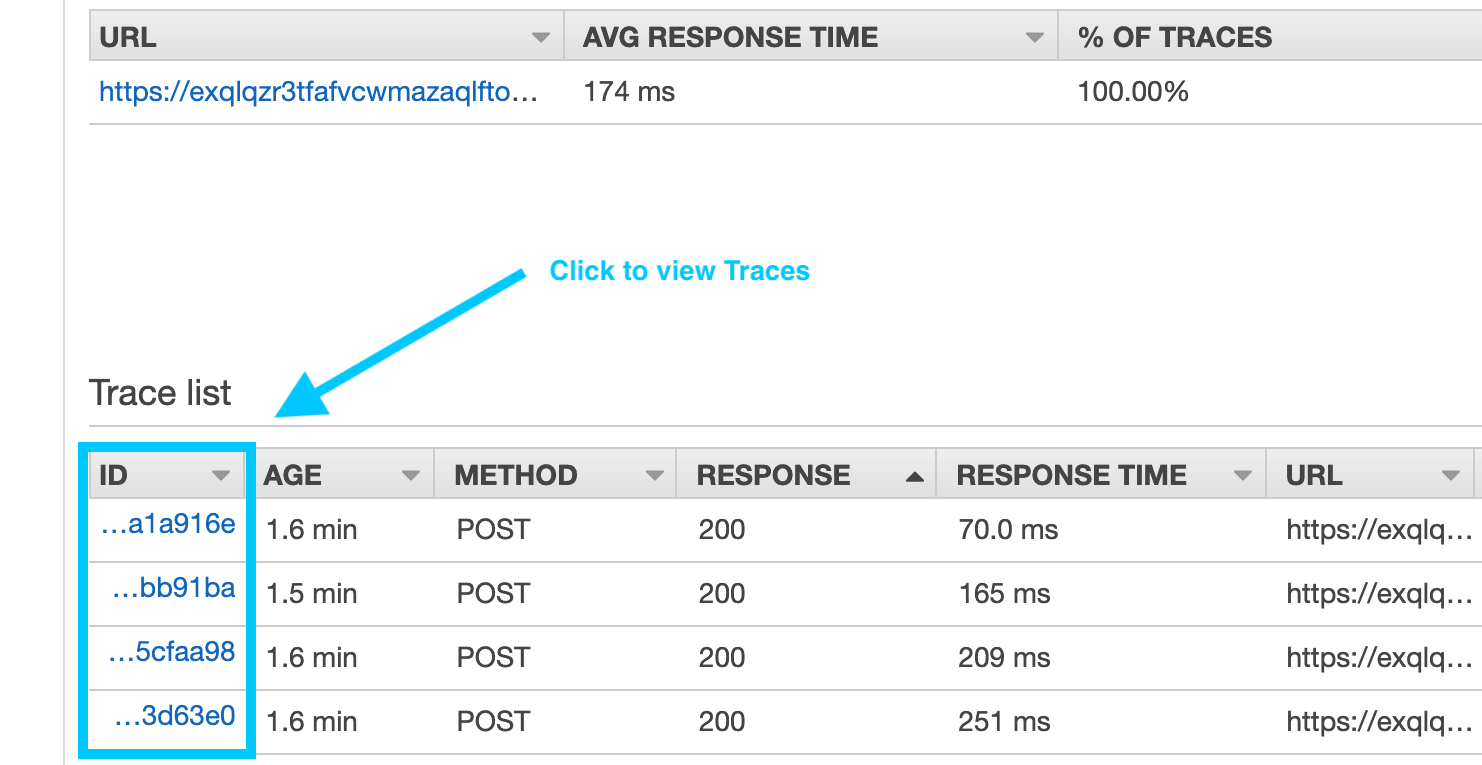
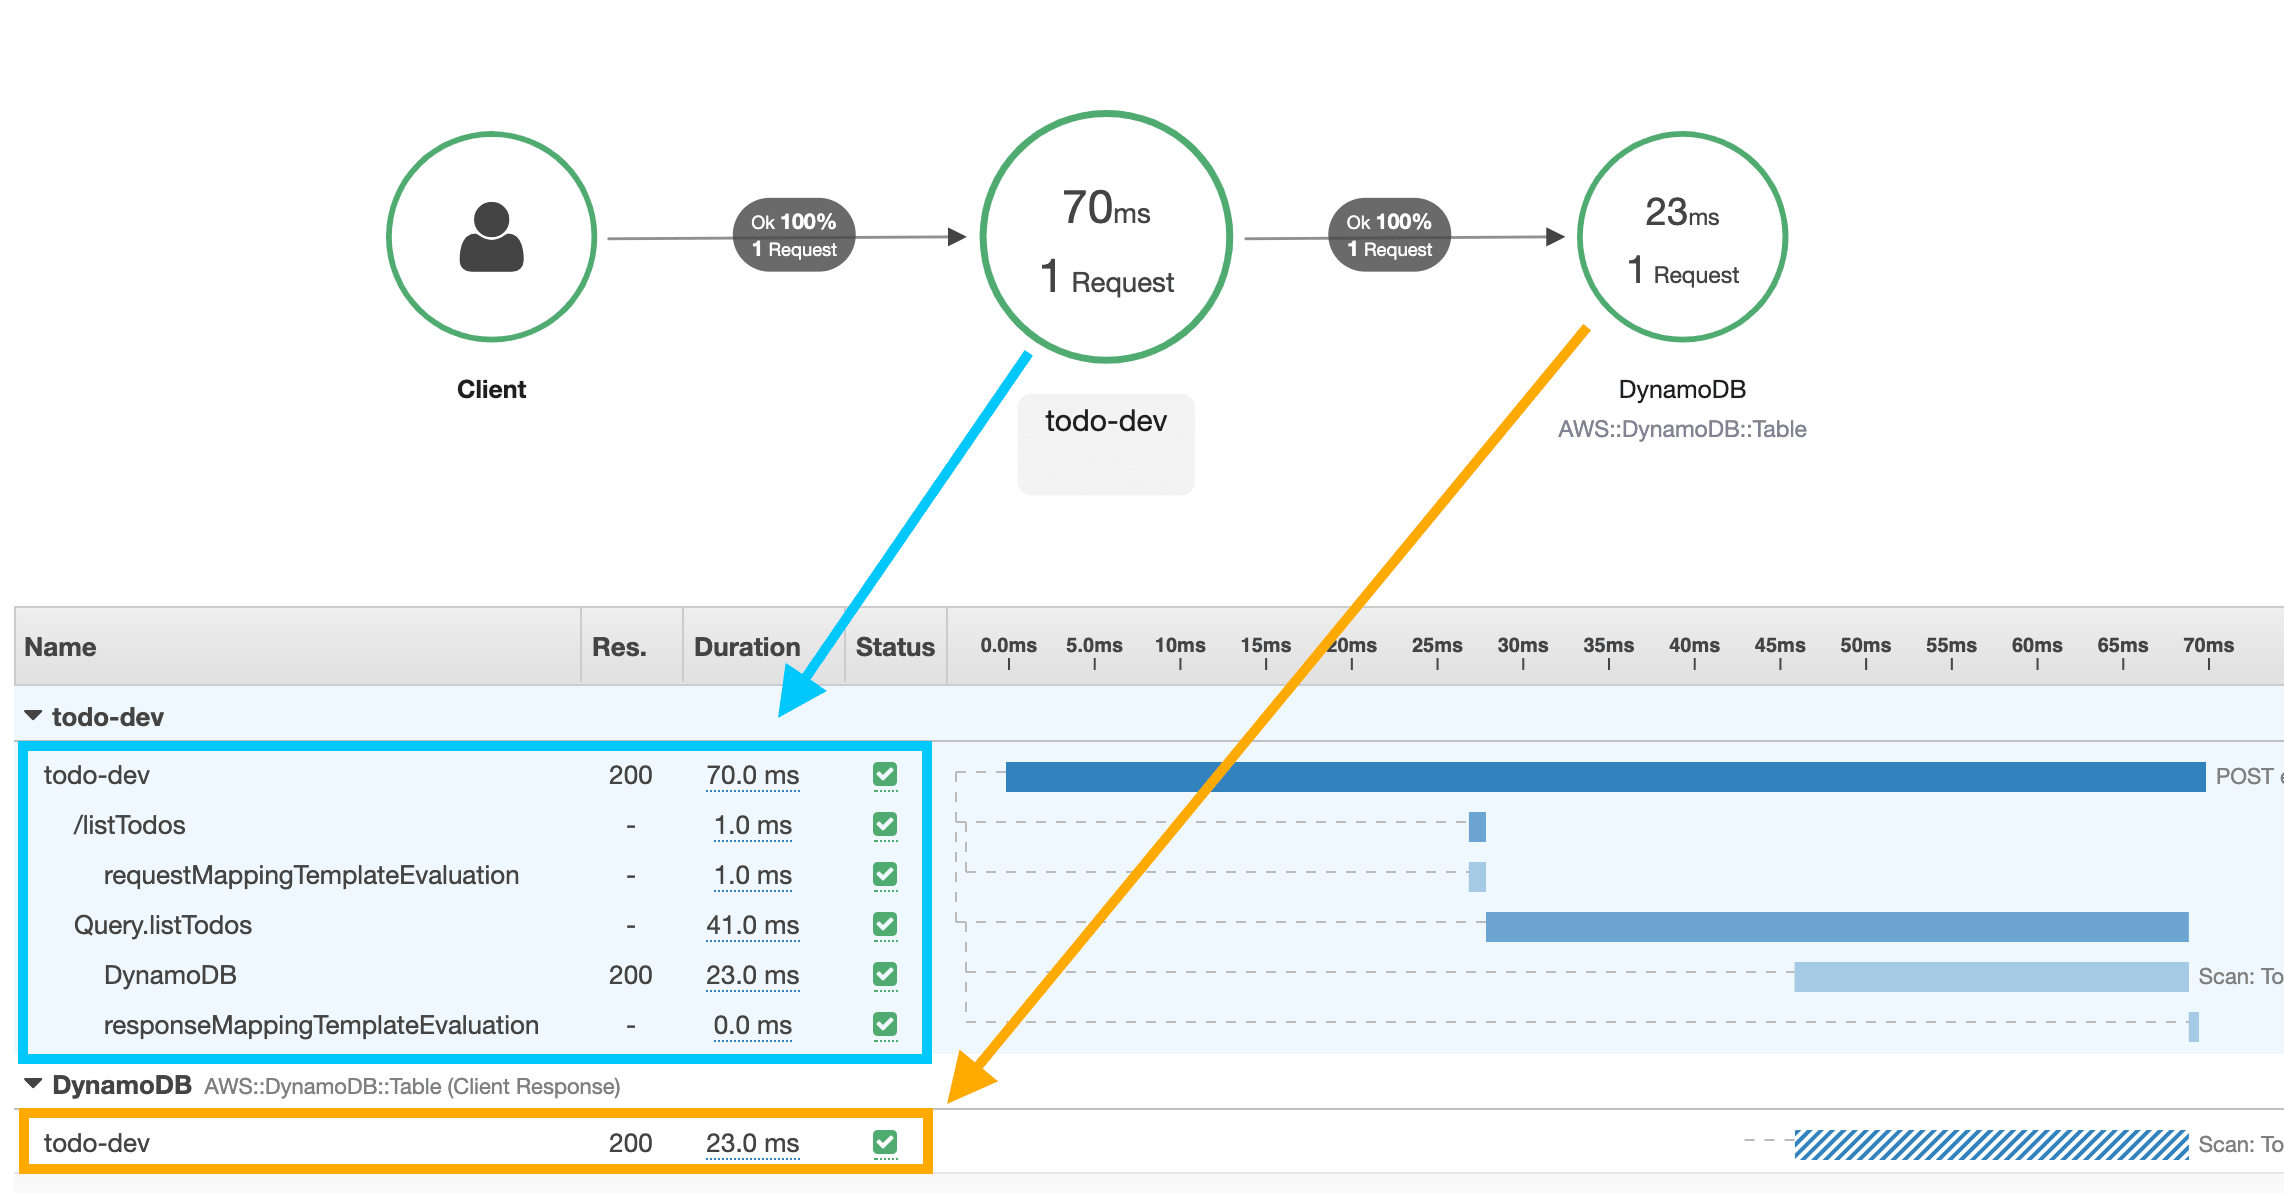
If you click on one of the traces you will be presented with a lot of details about the request that passed through the system. Each section indicates the flow of the request to another part of the system.
In the case below we have the AppSync API in front of a DynamoDB database.
The next part is a little more difficult to do, but we're going to try to simulate a bunch of requests to view changes in the traces generated by AWS X-Ray. To do this we'll slightly adjust the code in src/App.js so that:
- The
todoMutationhas the alert commented out - A for loop is added to the render block to generate 1000 items
  todoMutation = async () => {
    const todoDetails = {
      name: 'Party tonight!',
      description: 'Amplify CLI rocks!'
    };

    const newTodo = await API.graphql(graphqlOperation(addTodo, todoDetails));
    //alert(JSON.stringify(newTodo));
  };

...

  render() {
    for (let index = 0; index < 1000; index++) {
      this.todoMutation();
    }
    return (
      <div className="App">
        <button onClick={this.listQuery}>GraphQL Query</button>
        <button onClick={this.todoMutation}>GraphQL Mutation</button>
      </div>
    );
  }
Start the Web app again and you'll find if you check the background network traffic that you are generating a large number of requests to the AppSync API.
Now to view all the to-do entries in bulk (as this generates the most traffic) we have to make a really small change to the listTodos query so we explicitly ask for a 1000 item limit. This is because by default scan queries are limited to 10.
I also HIGHLY recommend changing the preferred output of the listQuery to be console.log() instead of alert
const listTodos = `query listTodos {
listTodos(limit: 1000) {
items{
id
name
description
}
}
}`;
...
listQuery = async () => {
console.log('listing todos');
const allTodos = await API.graphql(graphqlOperation(listTodos));
console.log(JSON.stringify(allTodos))
//alert(JSON.stringify(allTodos));
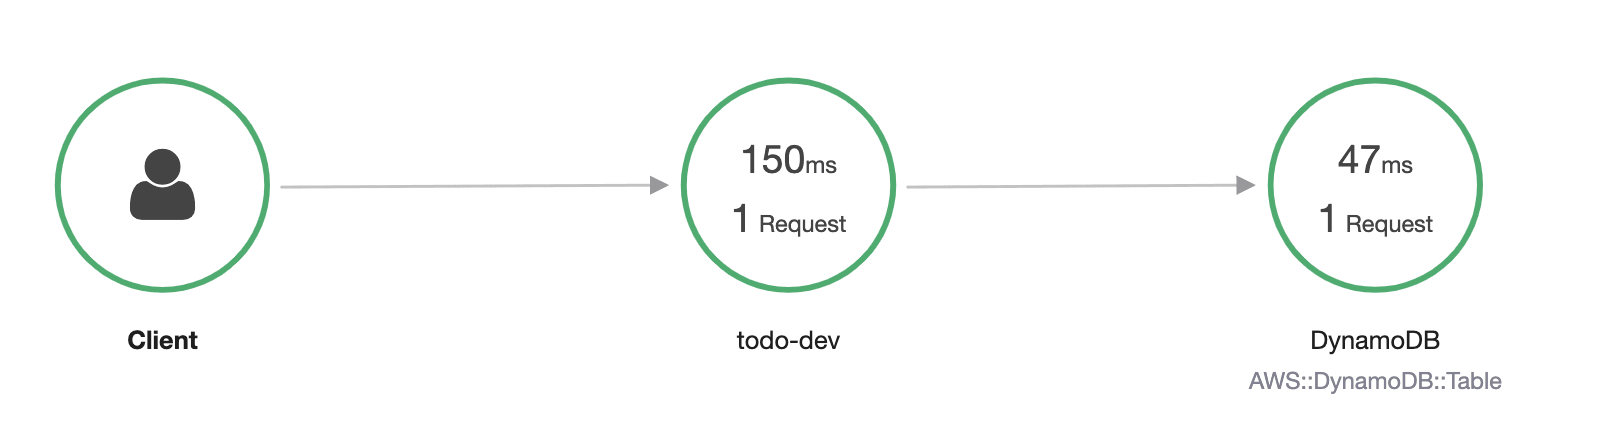
};Now check the latest traces in the AWS X-Ray console and you'll find that the execution time to fulfill the request has doubled.
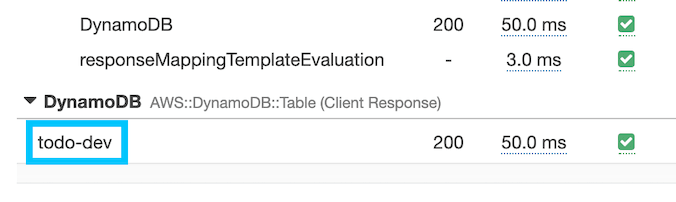
Clicking the todo-dev title in the waterfall trace along the bottom will open a new panel with more details about the request itself.
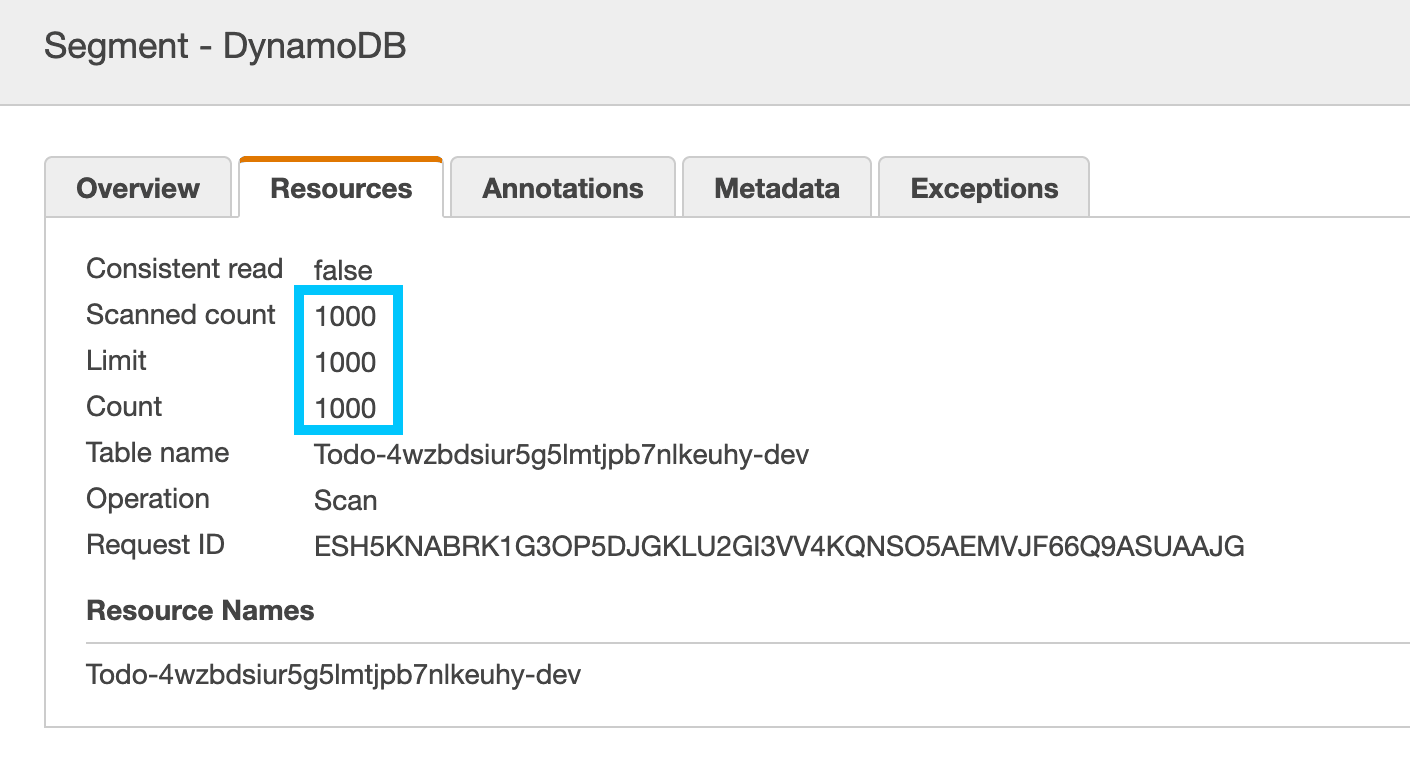
An example of the detailed output can be seen below; you can see details on what specific request parameters the query to DynamoDB was making.
Deleting Project
Deleting an Amplify project is very straightforward and simply requires the following to be run
amplify deleteSummary
AppSync is a powerful service that helps enable teams to collaborate better when shared data sources are involved. It provides a flexible interface to data through a common pattern. When you tie in this new X-Ray feature you get a service that also provides excellent visibility to the inner workings of the requests served over your app.
If you have any awesome examples of X-Ray traces at scale or stories about using AppSync; I'd love to hear about them! Please hit me up on Twitter @nathangloverAUS.