OpenCV 4.0 Serverless Lambda

OpenCV version 4.0 came out recently and It's not uncommon for me to have a use case for processing images. For this reason I worked on building a small serverless example of using OpenCV 4.0 on lambda; deployed using serverless framework.
Overview
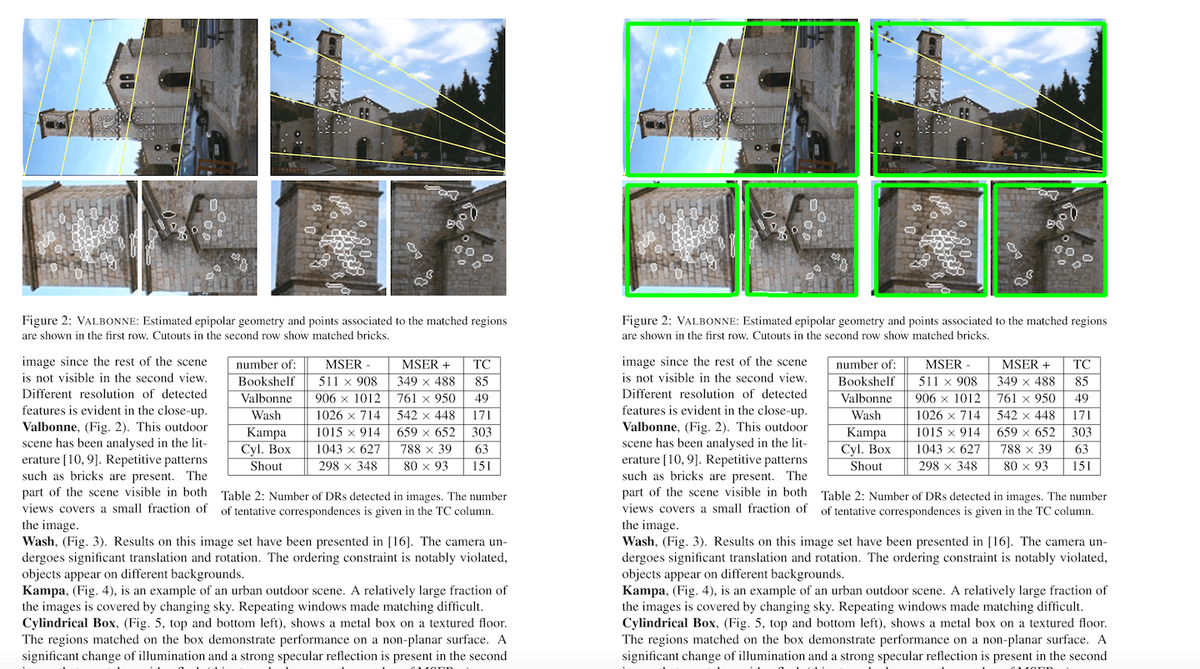
The goal of this post is to quickly show you how to perform a simple image processing technique using OpenCV. You can see an example of what we want to achieve below.

Setup
The code for this post can be found at https://github.com/t04glovern/aws-opencv-serverless. I would recommend pulling it down using the following
git clone https://github.com/t04glovern/aws-opencv-serverless.gitIf you are starting a version of this repo from scratch, you can go ahead an create a new serverless project by running the following
mkdir opencv-serverless
cd opencv-serverless
serverless create --template aws-python3 --name opencv-serverless
Python Requirements
In order to include OpenCV and a few other small pip packages on the lambda we'll need to make use of a nice serverless plugin called serverless-python-requirements. You can install it by running the following
serverless plugin install -n serverless-python-requirementsNext create a requirements.txt file within the opencv-serverless directory and put the following in it.
opencv-python==4.1.0.25
numpy==1.16.3
Finally add some custom parameters to serverless.yml to adjust the way python is dockerized.
...
custom:
  pythonRequirements:
    dockerizePip: non-linux
    noDeploy: []
...
OpenCV handler
Next we need to create our OpenCV code within the handler.py file that would have been created for you. Go ahead and replace the contents with the following:
import boto3
import cv2
import numpy as np
import uuid
import os

s3Client = boto3.client('s3')


def opencv(event, context):
    bucketName = event['Records'][0]['s3']['bucket']['name']
    bucketKey = event['Records'][0]['s3']['object']['key']

    download_path = '/tmp/{}{}'.format(uuid.uuid4(), bucketKey)
    output_path = '/tmp/{}'.format(bucketKey)

    s3Client.download_file(bucketName, bucketKey, download_path)

    try:
        img = cv2.imread(download_path)
        gray = cv2.cvtColor(img,cv2.COLOR_BGR2GRAY)

        kernel = cv2.getStructuringElement(cv2.MORPH_RECT, (8,8))
        gray = cv2.dilate(gray, kernel, iterations=1)

        ret,gray = cv2.threshold(gray, 254, 255, cv2.THRESH_TOZERO)
        ret,gray = cv2.threshold(gray, 0, 255, cv2.THRESH_BINARY_INV)

        gray = cv2.morphologyEx(gray, cv2.MORPH_CLOSE, kernel)
        gray = cv2.morphologyEx(gray, cv2.MORPH_OPEN, kernel)

        contours, _ = cv2.findContours(gray, cv2.RETR_TREE, cv2.CHAIN_APPROX_SIMPLE)

        for index in range(len(contours)):
            i = contours[index]
            area = cv2.contourArea(i)
            if area > 500:
                peri = cv2.arcLength(i,True)
                approx = cv2.approxPolyDP(i,0.1*peri,True)
                if len(approx)==4:
                        hull = cv2.convexHull(contours[index])
                        cv2.imwrite(output_path, cv2.drawContours(img, [hull], 0, (0,255,0),3))
    except Exception as e:
        print(e)
        print('Error processing file with OpenCV')
        raise e
    try:
        s3Client.upload_file(output_path, os.environ['OPENCV_OUTPUT_BUCKET'], bucketKey)
    except Exception as e:
        print(e)
        print('Error uploading file to output bucket')
        raise e
    return bucketKey
Huge thanks to lorenagdl for their C++ implementation of the code above.
The process is:
- file will come in to a bucket
- Bucket event fires and lambda gets the bucket name and key
- Processes the image with OpenCV
- Spits the output into an output bucket
Serverless Events and Resources
The final step is to add a couple things to our serverless.yml for the remaining resources, events and permissions.
custom
Although not specifically required, I'm going to hardcode the bucket names I'd like to assign to this project. For your implementation you will need to make sure you change these to something unique.
custom:
  pythonRequirements:
    dockerizePip: non-linux
    noDeploy: []
  OPENCV_PROCESS_BUCKET: devopstar-opencv-processing-bucket
  OPENCV_OUTPUT_BUCKET: devopstar-opencv-output-bucket
provider
Here we add the iamRoleStatements that allow our lambda to GET and PUT to S3. We're also defining an environment variable to pass to the lambda code.
provider:
  name: aws
  runtime: python3.7
  iamRoleStatements:
    - Effect: Allow
      Action:
        - s3:GetObject
      Resource:
        - arn:aws:s3:::${self:custom.OPENCV_PROCESS_BUCKET}/*
    - Effect: Allow
      Action:
        - s3:PutObject
      Resource:
        - arn:aws:s3:::${self:custom.OPENCV_OUTPUT_BUCKET}/*
  environment:
    OPENCV_OUTPUT_BUCKET: ${self:custom.OPENCV_OUTPUT_BUCKET}
functions
Defining a function called opencv we're also adding an event to the lambda that will fire off whenever an item is put into the bucket
functions:
  opencv:
    handler: handler.opencv
    events:
      - s3:
          bucket: ${self:custom.OPENCV_PROCESS_BUCKET}
          event: s3:ObjectCreated:*
resources
Finally we define the resource definition for the output bucket that will be receiving our processed images.
resources:
  Resources:

    S3Bucket:
      Type: AWS::S3::Bucket
      Properties:
        BucketName: ${self:custom.OPENCV_OUTPUT_BUCKET}
Deploy
Deploying our new serverless function is actually super easy
serverless deployTesting
To test if the function is working, you can run the following command to put and retrieve images (make sure to replace the bucket names with your own).
aws s3 cp in/square-test.png s3://devopstar-opencv-processing-bucket/square-test.png
aws s3 cp s3://devopstar-opencv-output-bucket/square-test.png out/square-test.png