Bootstrap GKE with Deployment Manager on GCP
Over the past couple months I’ve been forcing myself to branch out into other cloud providers. Google Cloud Platform (GCP) has been on my radar mostly, so if some of the most recent content has been a little less AWS’ie’ this is been why.
The Problem (Rant)
One of the problems with moving away from AWS that I didn’t expect to be such a pain in the posterior was Infrastructure as Code (IaC). Over the year that I worked on AWS exclusively I’d built up quite a collection of CloudFormation & Serverless framework examples that I could use to quickly get infrastructure up and parameterized in a repeatable way.
Google’s service for infrastructure as code is called Deployment Manager. To be brutally honest it’s pretty trash. However it’s not for the reason most people might think. Deployment Manager talks to Google Cloud APIs to create, update and destroy resources; however you have to write the layer that talks to the APIs yourself and then stub these calls out yourself into YAML/jinja templates.
See the example below of three files iam_member.py.schema, iam_member.py and iam.yaml
def generate_config(context):
    """ Entry point for the deployment resources. """

    project_id = context.properties.get('projectId', context.env['project'])

    resources = []
    for ii, role in  enumerate(context.properties['roles']):
        for i, member in enumerate(role['members']):
            policy_get_name = 'get-iam-policy-{}-{}-{}'.format(context.env['name'], ii, i)

            resources.append(
                {
                    'name': policy_get_name,
                    'type': 'gcp-types/cloudresourcemanager-v1:virtual.projects.iamMemberBinding',
                    'properties':
                    {
                        'resource': project_id,
                        'role': role['role'],
                        'member': member
                    }
                }
            )

    return {"resources": resources}
info:
  title: IAM policy member
  author: Sourced Group Inc.
  description: Manages an IAM policy member

imports:
  - path: iam_member.py

required:
  - roles

properties:
  projectId:
    type: string
    description:  |
     Overwrite of project ID in case IAM bindings are referencing to
     a different project.
  roles:
    type: array
    description: An array of roles and members.
    items:
      role:
        type: string
        description: The role to grant to members.
      members:
        type: array
        description: A list of identities.
        items:
          type: string
          description: |
            Specifies the identity requesting access to a Cloud Platform
            resource. Can have the following values:
              - user:{emailid} - An email address that represents a specific
                IAM User account. For example, user:name@example.com
              - serviceAccount:{emailid} - An email address that represents a
                Service Account. For example,
                serviceAccount:my-other-app@appspot.gserviceaccount.com
              - group:{emailid} - An email address that represents a Google group.
                For example, group:admins@example.com
              - domain:{domain} - A Cloud Identity or G Suite domain name that
                represents all the users of that domain. For example, acme.com
                or example.com.
imports:
  - path: templates/iam_member/iam_member.py
    name: iam_member.py

resources:
  - name: iam-member-test
    type: iam_member.py
    properties:
      roles:
        - role: roles/editor
          members:
            - user:
            - serviceAccount:

An abstraction layer for resource types does not exist in any well maintained way. All the responsibility for this falls back onto developers.
Why is this a problem?
When Google services get added, changed or deprecated it is the communities responsibility to pick up the slack. For the example of Kubernetes features are added and removed pretty frequently. Sure, an API endpoint for these features is exposed to users; however because there’s no single point of management for the resources schema we end up with hundreds of variations floating around.
Using Kubernetes (GKE) as the example again, under the deploymentmanager-samples repository on GitHub there’s a reliable looking GKE template. However it hasn’t been updated in over 5 months and has a number of open PR’s on it with changes adding the new functionality.
How can we solve this?
Honestly I believe Google either needs to:
- Maintain these templates better (hire a bunch more Community facing dev’s who’s responsibility is entirely on keeping deployment manager updated
- Standards internally that force teams to write and update resource schema’s before they’re allowed to ship code.
Until the management of these templates gets resolved properly, I’ve decided to take my own experiences and build a small bootstrapped version of a GKE deployment using the latest version as of the time writing (1.12.7-gke.7).
Architecture Overview
Below is the reference architecture for the deployment code we’ll be going through in this post
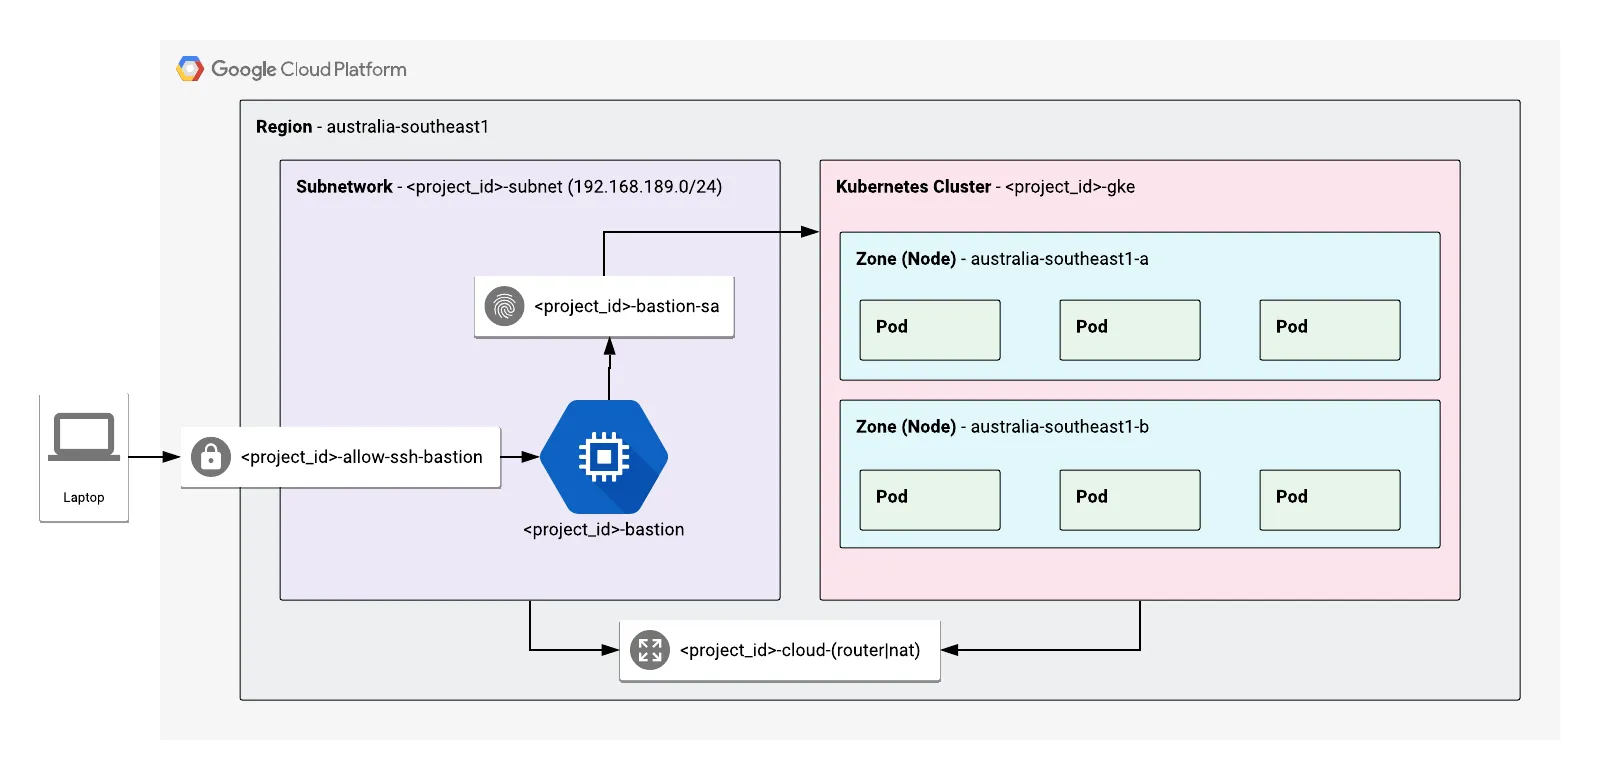
Private GKE Cluster within GCP
You can find the repository that goes along with this post at: https://github.com/t04glovern/gke-dm-bootstrap. I recommend pulling down the repo locally to work with.
git clone https://github.com/t04glovern/gke-dm-bootstrap.git
Project Setup
Before getting started it’s important that you have a Google Cloud account created. Also ensure that a billing method has been added (feel free to use the free trial you get when signing up for this tutorial).
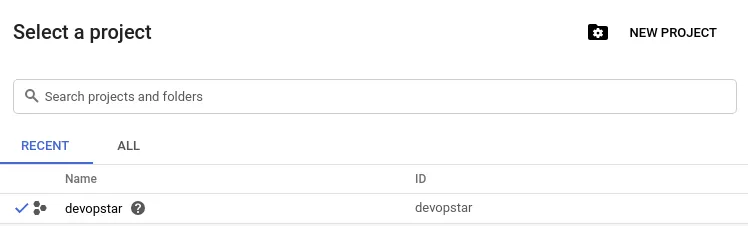
Go ahead and create a new project that can be used for the remainder of this tutorial. Don’t worry about an Organisation, however ensure that when you’ve created your project you note down the ID. In my case I got devopstar.
SDK / CLI
I’m going to be installing the GCP SDK on a Debian based system, however there are instructions specific to all other operating systems available at https://cloud.google.com/sdk/install.
# Create an environment variable for the correct distribution
export CLOUD_SDK_REPO="cloud-sdk-$(lsb_release -c -s)"

# Add the Cloud SDK distribution URI as a package source
echo "deb http://packages.cloud.google.com/apt $CLOUD_SDK_REPO main" | sudo tee -a /etc/apt/sources.list.d/google-cloud-sdk.list

# Import the Google Cloud public key
curl https://packages.cloud.google.com/apt/doc/apt-key.gpg | sudo apt-key add -

# Update and install the Cloud SDK
sudo apt-get update && sudo apt-get install google-cloud-sdk
Init CLI
Next initialise the CLI by running the following.
gcloud init
The alternative way to configure a project / authenticate is to run the following:
# Login to GCloud
gcloud auth login

# Set the project
gcloud config set project $PROJECT_ID
Deployment
There’s a script within the root directory of the project called deploy.sh that handles most of the resource creation for you given command line parameters.
The general structure is ./deploy.sh $project_id $resource $action where:
- project_id: Project ID retrieved from the previous step (mine was devopstar)
- resource: Lowercase name of the resource we want to deploy. You can find the yaml files referred to within the
resourcesfolder - action: create or delete
I’ll be including the delete version of each command as well for when you cleanup.
IAM
Deployment manager needs IAM permissions for particular tasks. Specifically a permission of roles/owner has to be applied to the cloudservices.gserviceaccount.com service account. You can accomplish this using the script by running the following:
# Create
./deploy.sh $PROJECT_ID iam create

# Delete
./deploy.sh $PROJECT_ID iam delete
Network
Network configuration for a simple GCP VPC and a Subnet to go with it. The configuration that is applied by default can be found in the resources/network.yaml file
  - name: devopstar-network
    type: network.py
    properties:
      name: devopstar-network
      autoCreateSubnetworks: false
      subnetworks:
        - name: devopstar-subnet
          region: australia-southeast1
          ipCidrRange: 192.168.189.0/24
          privateIpGoogleAccess: true
          enableFlowLogs: false
Note: The CIDR range defined here is the IP range we’ll be setting up our Kubernetes internal load balancer’s on later on.
To deploy this resource via deployment manager run the following:
# Create
./deploy.sh $PROJECT_ID network create

# Delete
./deploy.sh $PROJECT_ID network delete
Cloud Router (NAT)
Another issue many people face when deploying private Kubernetes clusters is that they don’t have any way of pulling resources from the outside world. This means that if Docker containers are hosted on DockerHub instead of internally we’ll have no way to make requests to pull them.
This can be solved by adding a Cloud Router with NAT functionality on the Sub-network that was just created. The configuration that is applied by default can be found in the resources/cloud_router.yaml file
  - name: devopstar-cloud-router
    type: cloud_router.py
    properties:
      name: devopstar-cloud-router
      network: devopstar-network
      region: australia-southeast1
      asn: 65001
      nat-name: devopstar-nat
To deploy this resource via deployment manager run the following:
# Create
./deploy.sh $PROJECT_ID cloud-router create

# Delete
./deploy.sh $PROJECT_ID cloud-router delete
GKE
The largest portion of the deployment is GKE. The default settings prescribed can be viewed below. Note that the cluster created will have 2 nodes and scale out to 4 max as defined in the autoscaling parameter per node in the pool.
imports:
  - path: templates/gke/gke.py
    name: gke.py

resources:
  - name: devopstar-gke
    type: gke.py
    properties:
      clusterLocationType: Regional
      region: australia-southeast1
      cluster:
        name: devopstar-gke
        description: DevOpStar k8s Cluster
        network: devopstar-network
        subnetwork: devopstar-subnet
        initialClusterVersion: 1.14.10-gke.24
        nodePools:
          - name: devopstar-gke-pool
            initialNodeCount: 1
            version: 1.14.10-gke.24
            config:
              machineType: n1-standard-1
              oauthScopes:
                - https://www.googleapis.com/auth/compute
                - https://www.googleapis.com/auth/devstorage.read_only
                - https://www.googleapis.com/auth/logging.write
                - https://www.googleapis.com/auth/monitoring
            autoscaling:
              enabled: True
              minNodeCount: 1
              maxNodeCount: 2
            management:
              autoUpgrade: True
              autoRepair: True
        locations:
          - australia-southeast1-a
          - australia-southeast1-b
        loggingService: logging.googleapis.com/kubernetes
        monitoringService: monitoring.googleapis.com/kubernetes
        privateClusterConfig:
          enablePrivateNodes: True
          enablePrivateEndpoint: True
          masterIpv4CidrBlock: 172.16.0.0/28
        ipAllocationPolicy:
          useIpAliases: True
          clusterIpv4CidrBlock: 10.1.0.0/16
          servicesIpv4CidrBlock: 192.168.192.0/24
        masterAuth:
          clientCertificateConfig:
            issueClientCertificate: True
To deploy this resource via deployment manager run the following:
# Create
./deploy.sh $PROJECT_ID gke create

# Delete
./deploy.sh $PROJECT_ID gke delete
Bastion
Finally we deploy the Bastion server which acts as a public facing endpoint for us to SSH into. Once connected to the bastion server we’re able to manage Kubernetes safely.
Part of the setup also includes a Service account with appropriate permission to Kubernetes GCP API’s. Service accounts can be assumed automatically by users connecting to the bastion host and using the kubectl tool. There is also a firewall rule that is created that allows 0.0.0.0/0 on port 22 (obviously you still need to be authenticated to get in though).
  - name: devopstar-bastion-sa
    type: iam.v1.serviceAccount
    properties:
      accountId: bastion
      displayName: Bastion Service Account

  - name: devopstar-bastion-iam-member
    type: iam_member.py
    properties:
      roles:
        - role: roles/container.admin
          members:
            - serviceAccount:$(ref.devopstar-bastion-sa.email)
        - role: roles/compute.instanceAdmin
          members:
            - serviceAccount:$(ref.devopstar-bastion-sa.email)

  - name: devopstar-bastion
    type: instance.py
    properties:
      serviceAccounts:
        - email: $(ref.devopstar-bastion-sa.email)
          scopes:
            - https://www.googleapis.com/auth/cloud-platform
      zone: australia-southeast1-a
      diskImage: projects/ubuntu-os-cloud/global/images/family/ubuntu-1910
      diskSizeGb: 10
      machineType: f1-micro
      hasExternalIp: true
      diskType: pd-standard
      network: devopstar-network
      subnetwork: regions/australia-southeast1/subnetworks/devopstar-subnet
      metadata:
        items:
          - key: startup-script
            value: sudo apt-get update && sudo snap install kubectl --classic && sudo snap install helm --classic
      tags:
        items:
          - bastion

  - name: devopstar-allow-ssh-bastion
    type: firewall.py
    properties:
      network: devopstar-network
      rules:
        - name: allow-ssh-to-bastion
          allowed:
            - IPProtocol: tcp
              ports:
                - "22"
          description: Allow SSH from anywhere to Bastion
          direction: INGRESS
          sourceRanges:
            - 0.0.0.0/0
          targetTags:
            - bastion
To deploy this resource via deployment manager run the following:
# Create
./deploy.sh $PROJECT_ID bastion create

# Delete
./deploy.sh $PROJECT_ID bastion delete
Manage Cluster
We’ve go the cluster up and running! Excellent, now we’re able to connect to the bastion server using the GCP CLI. Run the following command (substitute in your project ID):
gcloud compute ssh $PROJECT_ID-bastion \
    --project $PROJECT_ID \
    --zone australia-southeast1-a
Then pull the repo down locally to the bastion server
git clone https://github.com/t04glovern/gke-dm-bootstrap.git
Kubernetes Connect
From within the Bastion server we’re able to connect to the Kubernetes control plane by running the following command (substitute in your project ID):
gcloud container clusters get-credentials $PROJECT_ID-gke \
    --project $PROJECT_ID \
    --region australia-southeast1
Role-based Access Control (RBAC) [Skip]
NOTE: This step is only required for Helm 2.0 or lower. By default you should have Helm 3.0+ installed on the bastion, so it is likely safe to skip this step
Our next step is to deploy an RBAC configuration that is used by Helm. Helm is a framework for packaging and deploying Kubernetes configuration templates. We’re going to give appropriate permissions to a service account called tiller on the cluster.
cd gke-dm-bootstrap/k8s

# Create tiller service account & cluster role binding
kubectl create -f rbac-config.yaml

# init helm with the service account
helm init --service-account tiller --history-max 200
Helm
To test everything is working correctly we’ll use Helm to deploy a packaged version of Nginx to the cluster.
nginx External
Deploy the external version of Nginx run running the following:
# From within the k8s folder
cd gke-dm-bootstrap/k8s

# Install the helm templates as 'nginx'
helm install nginx ./nginx/

# Get the external IP
kubectl get services
# NAME            TYPE           CLUSTER-IP        EXTERNAL-IP     PORT(S)        AGE
# kubernetes      ClusterIP      192.168.192.1               443/TCP        115m
# nginx-service   LoadBalancer   192.168.192.132   35.244.100.27   80:30251/TCP   9m

curl http://35.244.100.27
# DevOpStar Nginx Kubernetes

# Congratulations!
nginx Internal
Edit the k8s/nginx/templates/service.yaml file and un-comment the following lines:
  annotations:
    cloud.google.com/load-balancer-type: Internal

...

  loadBalancerIP: {{ .Values.staticIp }}
You can update the staticIp value in the k8s/nginx/values.yaml file
# Upgrade the helm templates called 'nginx'
helm upgrade nginx ./nginx/

curl http://192.168.189.50
# DevOpStar Nginx Kubernetes

# Congratulations!
Deleting Packages
When happy with the deployment you can run the following command can be run to delete the running nginx service from the Kubernetes cluster.
helm delete nginx