Flutter CI/CD Deployments & Publication to Google Play

When Flutter launched in beta at the start of last year, it was clear from the get go that it was something special. It allowed developers to write mobile application code in 1 language, and maintain a single repository for both their Android and iOS builds.
The State of Flutter CI/CD (April 2018)
Let’s go back in time to April 2018. It didn’t take people long to come up with a way to do CI/CD reasonably effectively either. Flutter has a testing framework baked in that works well, and the deployment and signing of APKs / iOS releases are perfectly fine to deal with (excluding not being able to sign iOS without a Mac).
Having a look at how we accomplished building and publishing back then, I’m surprised we’d even bothered. At the time we were using TravisCI to perform a very complicated set of build steps that eventually resulted in a signed APK being uploaded to the release page of the Git repo.
.travis.yml ## Build step definitions
ci/android.sh ## Builds the android APK
ci/build.sh ## Responsible to signing the APK with jarsigner
ci/setup.sh ## Install all project dependencies
Each of these files are at-least 30-70 lines long and contained a lot of magic numbers and hardcoded version subversions (likely do to compatibility issues between updates). At the end of the day, it worked well enough, but it ultimately only completed half the job, and still required manual publishing of the APK to the Google Play console once complete.
State of Flutter CI/CD (Today)
Recently at Flutter Live there were a series of announcements and advancements in the development ecosystem of Flutter. Specifically Nevercode was revealed to have partnered with Google to launch a Dedicated CI/CD tool for Flutter apps. In this post we’re going to go through the process of setting up an existing repository with Codemagic, this new service!
What you’ll need
- Flutter repository (if you plan to following all the way to the end you will need to have your app deployed to Google Play)
- Create / Login with GitHub to https://codemagic.io
Once you’ve logged in you’ll be presented with a list of your published repos. One great part of Codemagic, is how it will automatically put your Dart / Flutter repositories near the top of the list.

Open up the repository you are wanting to work with and you’ll be asked to configure some of the apps custom steps.
- Build triggering
- Build
- Test
- Publish
Let’s go through and configure each of these steps.
Build triggering
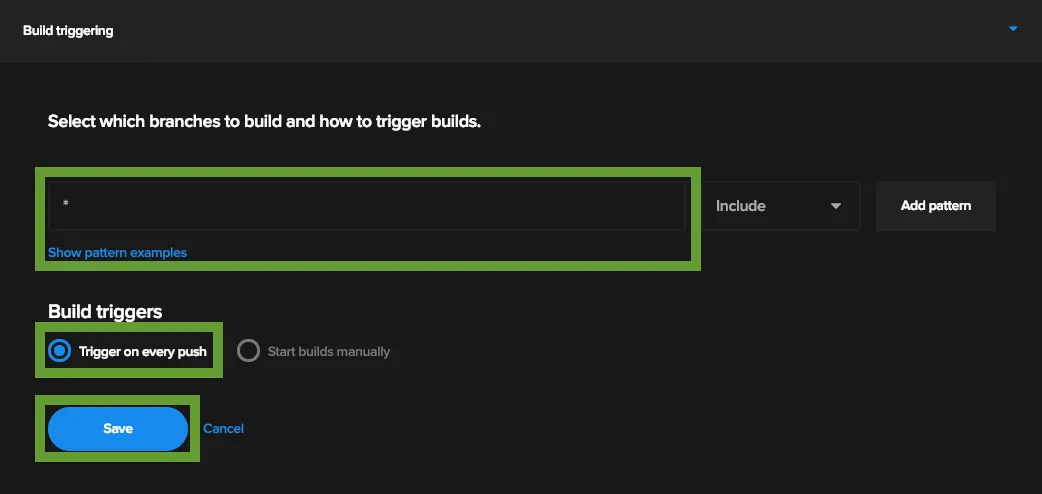
In this window we can define explicitly when we want to trigger builds to occur. By default they will trigger whenever a push occurs on the repository, however you can be more specific and say that we only want to trigger this step on a branch containing the word feature.
NOTE: the example below is just for demonstration; just leave it as * if you are following along on your own project!
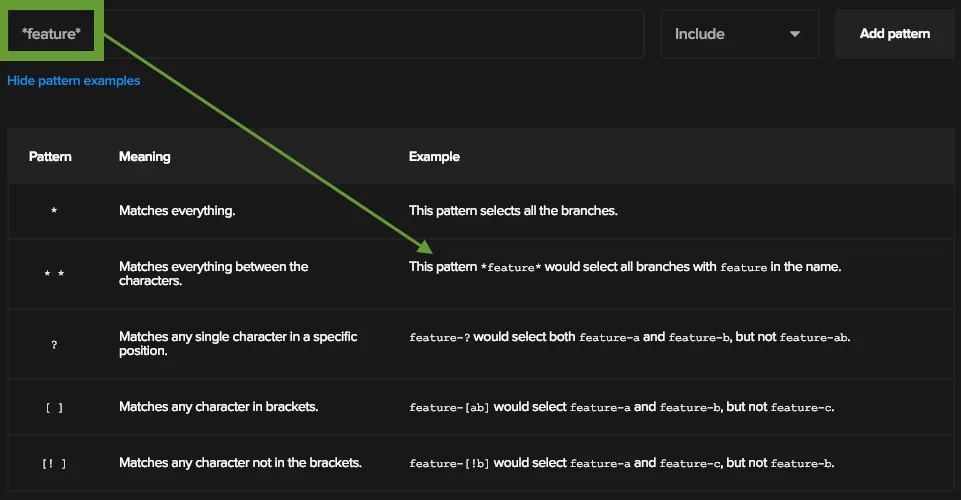
Example of how you can define a specific branch. For this example, leave it on *
Build
The Build step requires us to define what version of Flutter we want to build with. In this case we’ll use the current Stable channel, however for some production environments its a better idea to lock your build to a known-to-be-working version.
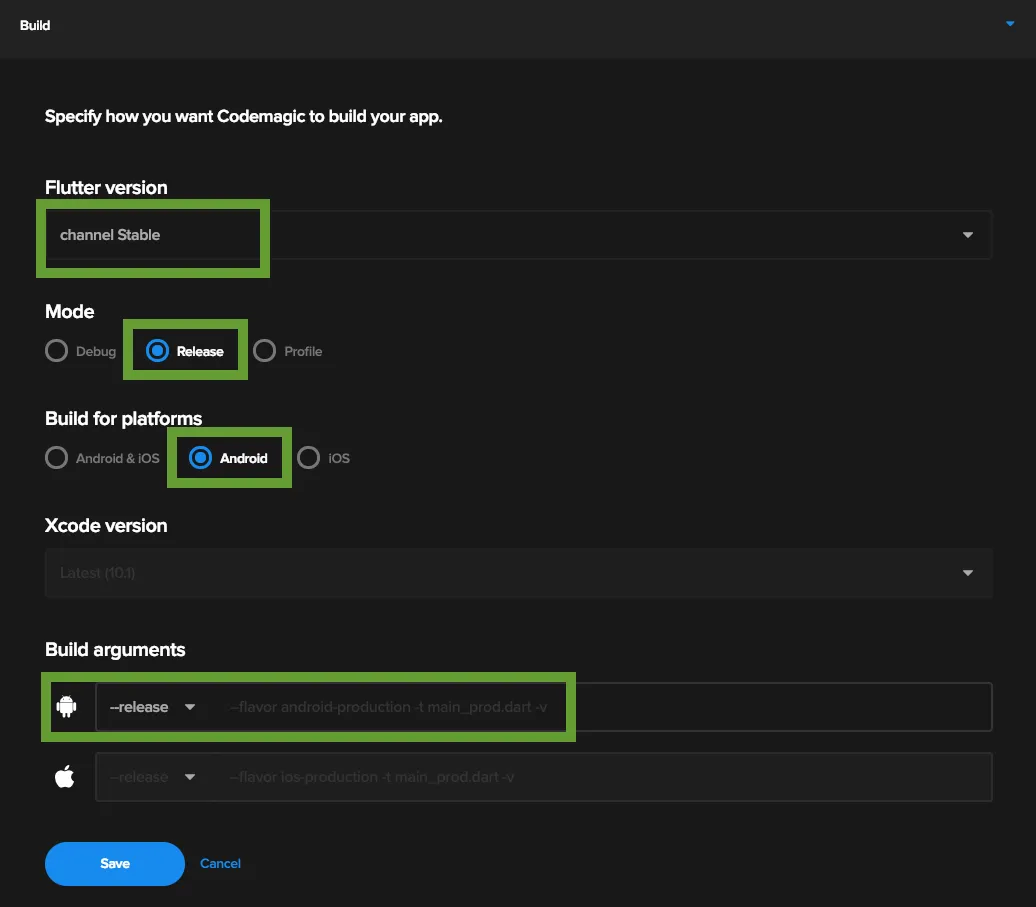
We have the option to deploy to both iOS and Android, however for the purpose of this demo, I’ll just be dealing with Android deployments. Just know that both iOS AND Android are supported.
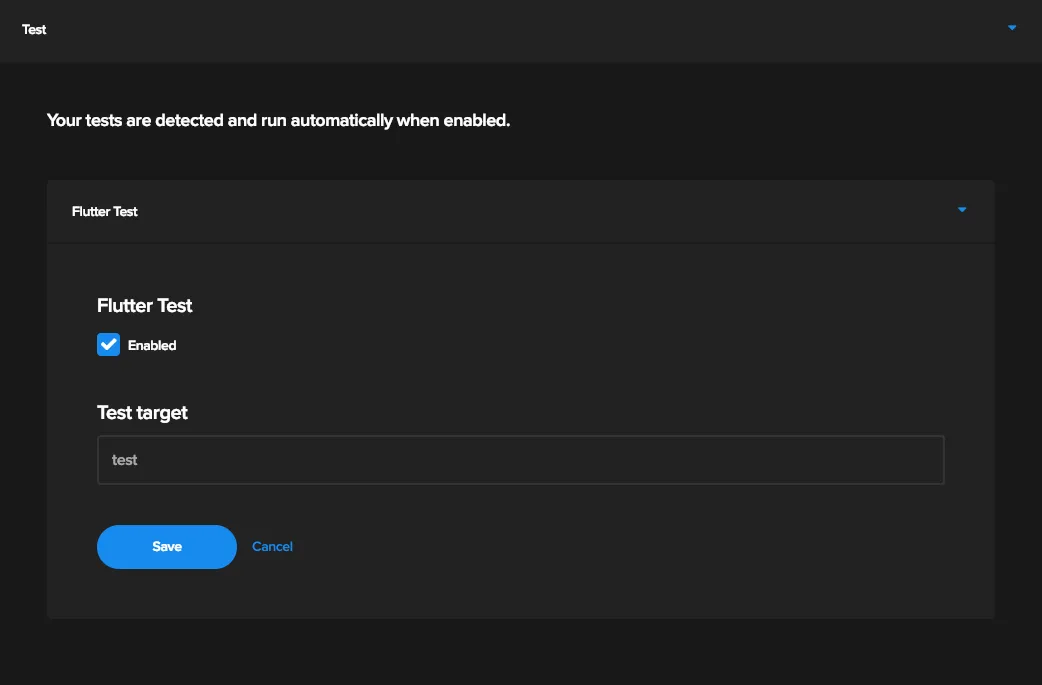
Test
Test should be pretty self explanatory. You enable it and the results of flutter test dictate if your build is successful or not.
Publish
The Publish section has quite a few different options.
- Android code signing - requires us to upload the signing key for release-apk builds.
- iOS code signing - similar deal, but with iOS
- Email - email notifications, by default they will go to your email you signed up with
- Slack - Slack notifications (not covered in this post)
- Google Play - Google play deployments, we’ll be coving this shortly
- App Store Connect - Not covered in this post, but the same concept as Google play deployments but for iOS
Android code signing requires you to have a signing keystore setup and working with the release build of your App. For more detailed information on how to do that, check out the guide on Preparing an Android App for Release. Once you have your keystore and details simply upload them to the settings page and hit Save
Google Play
The google play configuration requires you to have a service account setup. Let’s go through doing that now.
Google Play Service Account
In order to deploy your APK to your Play Store app automatically, you’ll need to setup a service account that has the proper permissions to publish on your behalf. To do this navigate / login to the IAM & Admin panel of your Google account: https://console.cloud.google.com/iam-admin/serviceaccounts
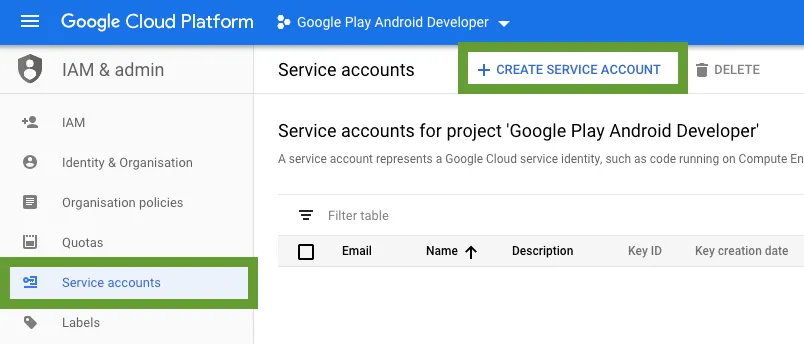
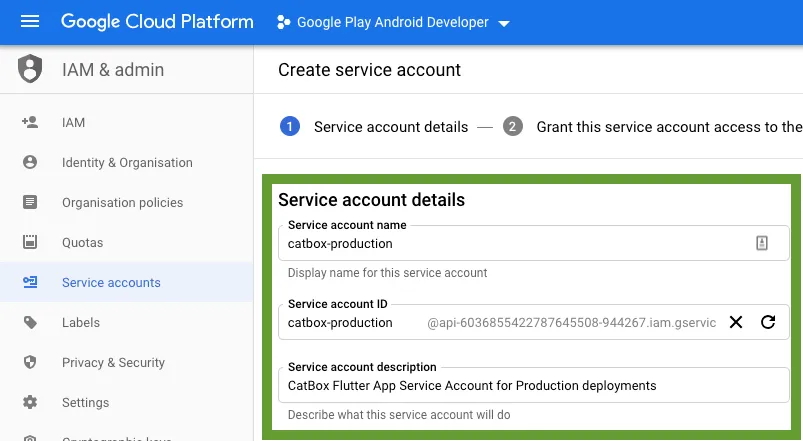
Open up the Service accounts tab and click Create Service Account. Fill the details with something that makes sense for your app, giving the service account name at the very least (description is optional).
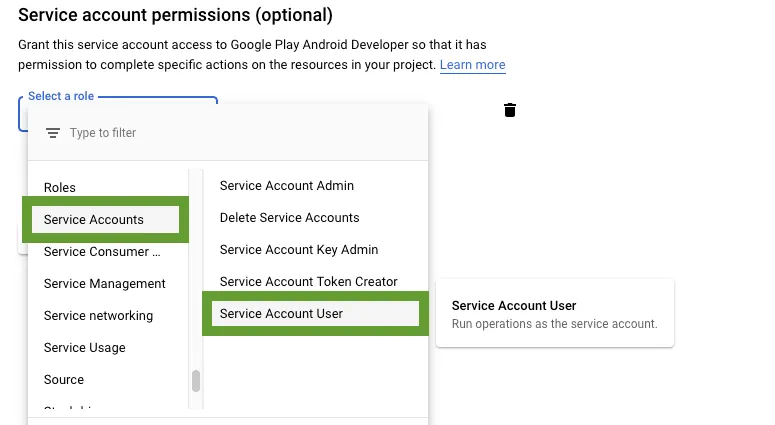
When you click next you will be prompted to select a Role to attach. You are going to want to select Service Accounts > Service Account User from the list and hit add. Then continue to the next screen.
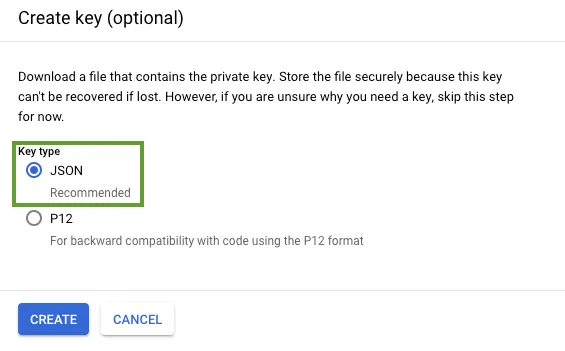
You will now need to create the credential key. Click Create Key
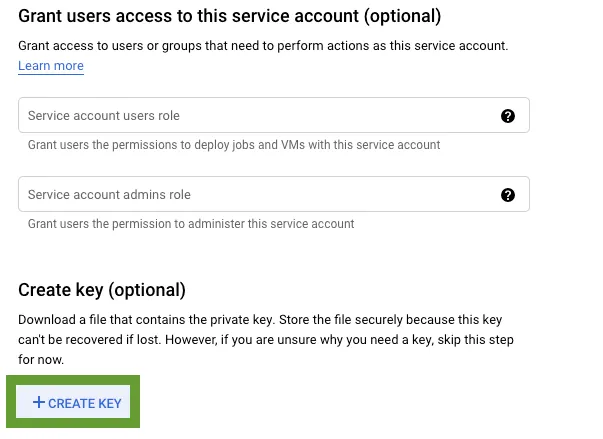
Select JSON as your key type and hit Create. This will download a key to your computer (Don’t Lose this!)
Now, navigate to the Google Play Console https://play.google.com/apps/publish. I’ll make the assumption you have already setup your app for deployment Select Developer account > API Access in the side panel. From here scroll down until you get to the Service Accounts section. Find you new email account listed and Click Grant Access
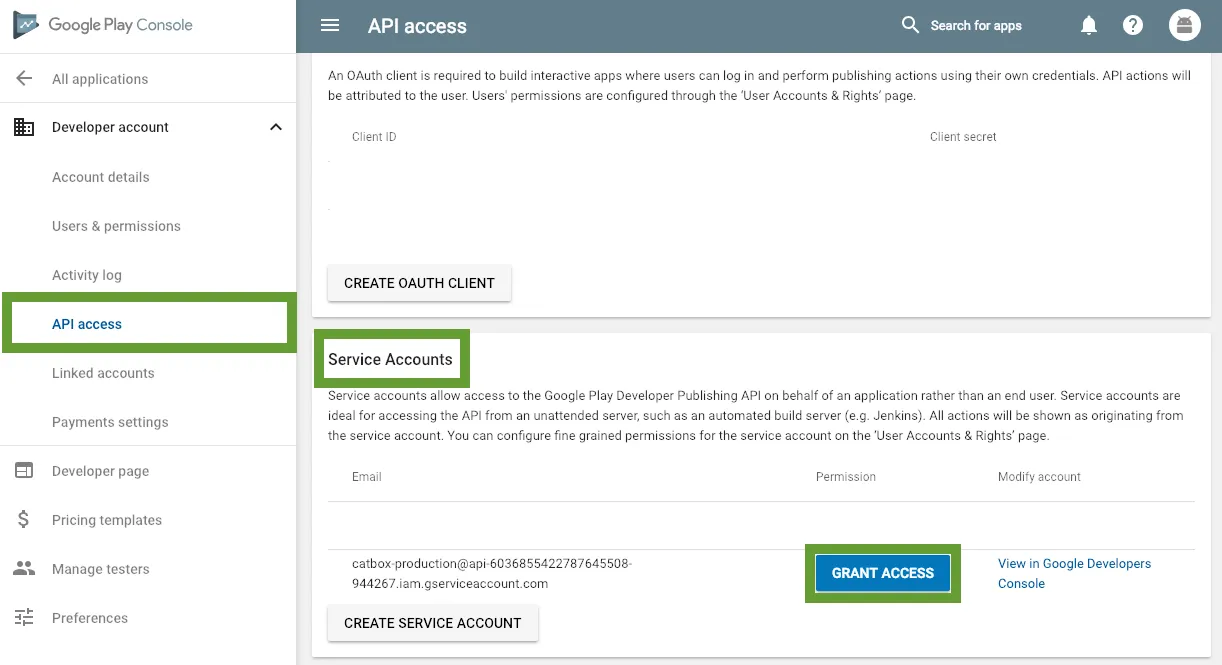
You will need to confirm a few options here:
- Ensure that Release Manager is selected as the Role
- Click Add an app and select the App the Service Account should be able to control
- Click Add User
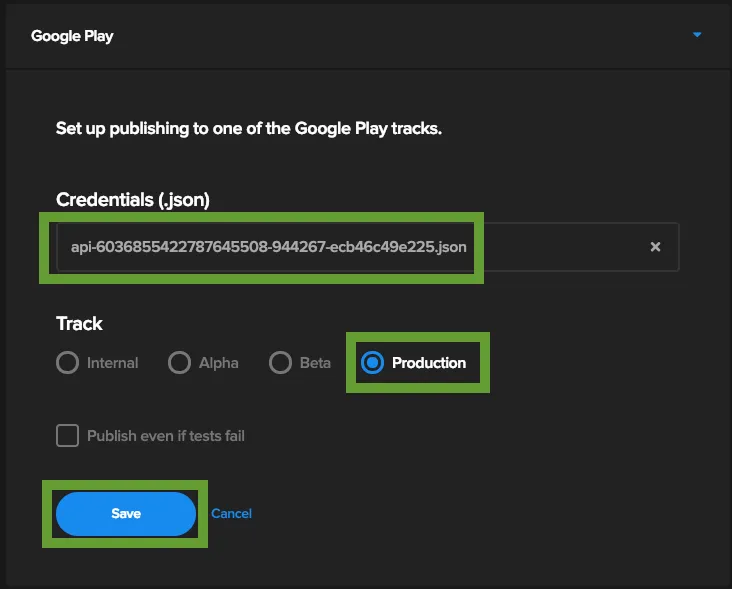
Return to the codemagic.io app page and open up your project settings once more. Under the Publish Stage, expand Google Play and Upload your api-xxxxx-sssss.json file that you downloaded in the previous steps. Finally hit Save.
Deploy / Build
Now that we have everything setup, I recommend making a change to the version number of your App and then pushing to master
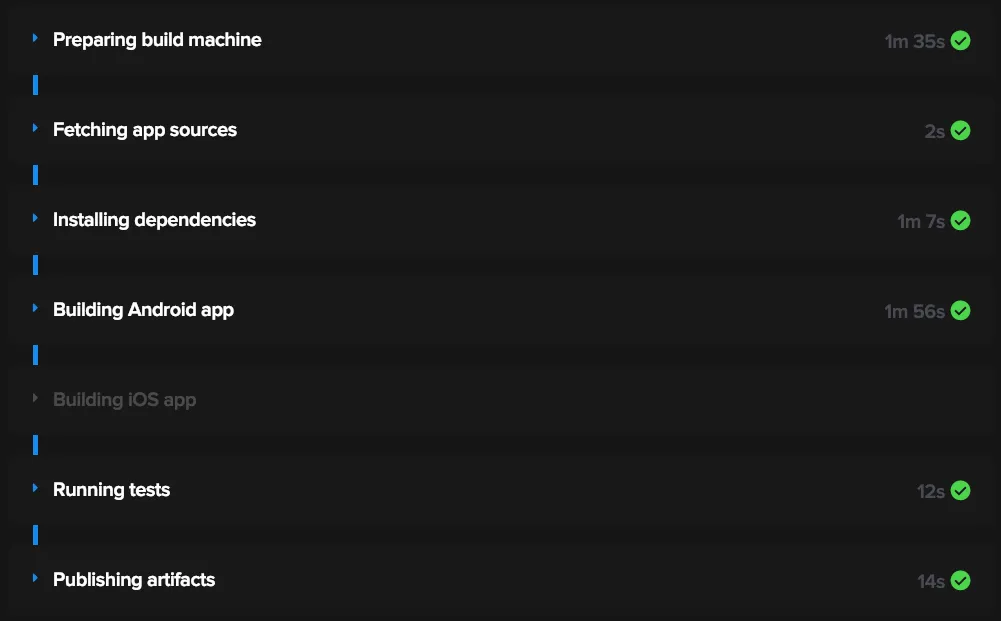
You should find that your App deploys and is published successfully automatically when you push to Master (as long as you have incremented the version number).
Learn More
If you’d like to learn how to build the App that we deployed in this post; or you’re new to Flutter, Or maybe you just want to brush up on your skills, Myself and Rico Beti teach a course on Flutter and Firebase Deployment that you should totally check out!